
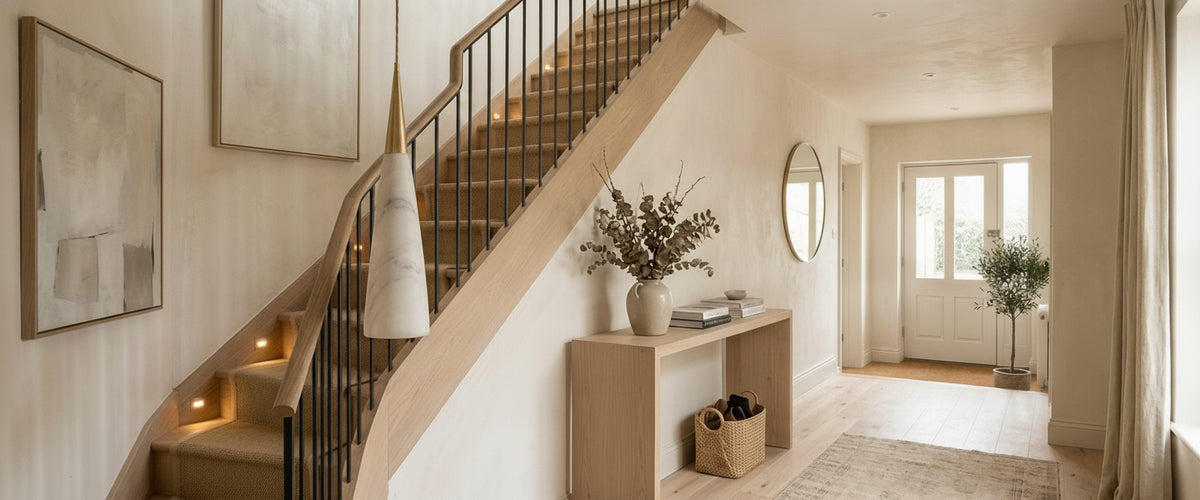

Most staircases are lit for the way up. You notice the mistake going down at two in the morning, when a small bright fitting sits at exactly eye level and the treads below it drop into shadow. step and stair lighting is a short brief with an unusually low tolerance for error, because a flight lit badly can be harder to read than a flight left dark. Spacing, mounting height, colour temperature and the surface you are lighting all change the result, and so does the material of the fitting itself. Alabaster and natural stone behave very differently from clear glass here, which is why step and stair lighting comes up more often than almost any other brief we are asked about.

At a Glance: What Good Step and Stair Lighting Gets Right
- Light the tread, not the eye. Every fitting should put light onto a horizontal surface you are about to stand on.
- Space it to the flight, not to a grid. Every third riser is usually enough; every riser tends to read like an airport runway.
- Design for descending. Walk down before you sign off a step and stair lighting layout. Glare shows itself in one direction only.
- Match colour temperature to the surface. Warm light flatters oak and stone; cooler light can turn white risers clinical.
- Give landings a deliberate pause. A wall light or pendant at the turn tells your feet the rhythm has changed.
- Outdoors is a different brief. IP rating, drainage, salt, frost and rain scatter all matter, and true alabaster stays inside.
- Plan two brightness levels. A low night setting and a normal daytime setting solve most arguments about stairs.

Spacing That Follows the Flight
The instinct is to light every riser. Resist it. Spacing is where most step and stair lighting schemes go wrong long before a single fitting is bought. A continuous run of step and stair lighting flattens the flight, doubles the number of visible light sources and makes a domestic staircase feel like a fire escape. On a straight flight, a fitting at every third riser gives your eye enough information to read the pitch, because the pools of light overlap gently across the treads between them.
Count from the bottom, not the top. The lowest step is the one people misjudge, so a light near the base of the flight earns its place before anything higher up does. Then work upward in threes and check where the last one lands; if it falls awkwardly close to the top nosing, drop it and let the landing light take over. On a long flight in a stairwell, our step and stair lighting plans often specify five fittings where the client expected fourteen.
Approved Document K sets out how UK stairs are supposed to be built, including rise and going consistency, and it is worth reading the geometry before you plan the lighting, because the regulations assume a stair with a predictable rhythm. Step and stair lighting should reinforce that rhythm rather than fight it.
Riser Lights, Tread Washers and Wall Fittings Light Different Parts of the Step
These three step and stair lighting formats are not interchangeable, and mixing them without thinking is how staircases end up over-lit.
Recessed Riser Lights
Set into the vertical face of the step, these throw light forward and down onto the tread below. They are the most discreet option and the best choice on stone or concrete flights where you can cut cleanly. Their weakness is that the aperture itself is visible from below, so choose fittings with a deep-set source or a diffusing lens rather than a bare LED behind flush glass.
Tread Washers and Under-Nosing Strips
Tucked beneath the nosing, these graze light across the tread and leave no visible source at all. They flatter timber grain and honed stone beautifully. The catch is heat and dust: an under-nosing channel collects both, and a strip that is even slightly wavy will show as a scalloped edge on the step below.
Wall Lights Beside the Flight
This is where alabaster earns its keep. A wall light with an alabaster or marble diffuser sits at roughly hip to shoulder height, spills soft light downward and outward, and never presents a hard point source to your eye. Because the stone glows across its whole surface rather than concentrating light in one spot, the luminance is low and the shadows on the treads stay soft. Hold an alabaster offcut against a lamp in our studio and the difference is immediate: the veining lights up, the edges stay warm, and there is no bright pinhole to look away from. Most of our step and stair lighting work now leads with wall fittings from the alabaster lighting collection, and uses recessed step lights only where a wall run is impossible.
Descending Is the Hard Direction
Going up, you look at the wall and the next few treads. Going down, your sightline runs along the flight and straight into anything mounted between roughly 900mm and 1.6m (3ft to 5ft 3in) above the treads. That is the glare zone, and it is why so much step and stair lighting fails in one direction while looking fine in the other.
Three fixes make stair and step lighting comfortable in both directions. Mount recessed step lights low, around 150mm to 250mm (6in to 10in) above the tread, so the aperture drops below your descending sightline. Choose fittings with asymmetric or louvred optics that push light down rather than out. Or use diffusing materials, which is the reason stone and alabaster wall lights read so comfortably on stairs: a glowing surface of low brightness is far kinder at eye level than a small very bright one. When you commission a scheme, ask to see it lit at night from the top landing before the scaffold comes down.
Warm Light on Oak, Cool Light on Limestone, and What Happens on White Risers
Surface finish decides colour temperature more than personal taste does. Oak, walnut and brass all sit in the warm half of the spectrum and want around 2700K; push them to 4000K and the timber turns grey and slightly sour. Pale limestone and honed marble hold their character at 3000K and can take a fraction cooler if the rest of the house is cool, though most UK homes look best staying warm on a stair.
Painted white risers are the trap. White paint reflects almost everything it receives, so a bright step light on a white riser produces a hot spot that reads as a stripe rather than a wash, and any slight variation in fitting output shows up as inconsistency down the flight. Use lower-output fittings there, keep the beam tight to the tread, and treat the riser as a reflector rather than a target. Consistency matters more than brightness in step and stair lighting: fittings from the same batch, same colour temperature, same driver. A single mismatched LED on a white flight is visible from the hallway.
Landings and Winders: Where the Rhythm Breaks
Winders and quarter landings are where people actually stumble, because the going changes and the foot expects it not to. Step and stair lighting should mark that change deliberately rather than continuing the same spacing round the turn. A wall light at the landing, or a pendant dropping through a stairwell void, gives the eye a fixed point to orient against and makes the change of direction legible from several steps away.
In a five-storey Georgian townhouse in Bath we ran alabaster wall lights at each landing and left the straight flights to low recessed step lights. The client had originally asked for a fitting at every riser across all four flights. Once the landings were lit properly, the flights needed a fraction of what was drawn.
Stairwell voids are also the one place in a house where a tall chandelier or a vertical cluster genuinely works, since you see it from three or four levels. Where the void is narrow and a wide fixture would crowd the handrail, a slim linear form such as the Step Gold LED Linear Pendant Light hangs along the axis of the flight rather than across it, and its 3000K output sits comfortably against pale stone and oak. In a painted stairwell where a brass note would fight the joinery, the same fitting in white reads as part of the plaster and leaves only the light visible from the landings below. If you have a void worth using, it is worth comparing proportions across the wider lighting range before committing to a drop length.
Outdoor Flights Change Everything
External step and stair lighting is a separate engineering problem. Fittings need an IP rating suited to their position, typically IP65 or better where they are washed by rain and exposed to hose-down or driving weather, plus proper drainage behind recessed housings so water does not sit against the fitting. Frost, salt near the coast and UV all attack finishes, so specify materials accordingly and expect brass to patinate outdoors.
Rain and mist also scatter light, which means a beam that looked crisp indoors will haze and travel further outside. Aim low, keep output modest and shield the source. Spill from a garden stair is one of the commonest sources of neighbourly annoyance and unnecessary sky glow, and shielded downward-facing fittings solve most of it.
One firm rule: genuine alabaster is a gypsum stone, soft and water-soluble, so it belongs indoors. For covered porches and sheltered thresholds we would look at marble, granite or basalt instead, and keep the alabaster for the inside flight. Any outdoor installation, and any work on a stair circuit at all, should be carried out and certified by a qualified electrician.
Midnight Versus Morning: Dimming a Staircase
A staircase needs two personalities. At night you want just enough light to place your feet, low enough that it does not wake anyone or reset your eyes; roughly five to ten per cent output usually does it, and warm-dim fittings that shift toward amber as they drop are worth the extra spend. In the morning, or when guests are coming down for dinner, the same flight wants to look properly lit at fifty to eighty per cent.
Set this up as two scenes rather than one dimmer that someone has to guess at. A PIR or motion sensor on the low scene, with a wall control overriding to the higher one, covers almost every household. Add fade-up and fade-down of a second or two so nothing snaps on. If you are specifying dimmable LED drivers, confirm compatibility with the control system before ordering; trailing-edge dimming behaves far better at low levels than cheap leading-edge kit, and step and stair lighting spends most of its life at the bottom of the curve.
The Buyer's Checklist for Step and Stair Lights
- Count the flights, then the fittings. Plan every third riser as a starting point and reduce from there.
- Walk down the stair at dusk with a torch at each proposed height to find the glare zone before cutting anything.
- Pick the fitting type to suit the construction. Recessed risers for masonry, under-nosing strips for timber, wall lights where you have a plastered run.
- Lock the colour temperature to the tread material: 2700K for oak and brass, 3000K for pale stone.
- Order from one batch so output and colour match down the flight.
- Confirm dimming at both ends of the range, plus sensor and scene control.
- Check IP rating and drainage for anything outdoors, and keep gypsum alabaster inside.
- Agree access for maintenance. A recessed fitting above a half landing needs a plan for the day it fails.
- Budget honestly. Cost depends on material, scale, engineering, wiring and finishing, so ask for a tailored quote against your drawings rather than working from a guess.
Caring for Stone Fittings on a Stair
Stairwells are dusty places. Air moves vertically, carrying fibres from carpet and clothing, and alabaster and marble diffusers show a film sooner than glass does. Dust with a dry soft brush or microfibre cloth; if you need more, use a barely damp cloth and dry immediately. No vinegar, no bathroom spray, no anything acidic, since these stones etch. Check fixings once a year on a stair, because vibration from footfall on a timber flight will loosen a backplate over time in a way it never would in a bedroom. Handled properly, a stone wall light will outlast several generations of LED module, which is a good argument for choosing step and stair lighting with replaceable sources. If you want a second opinion on a specific flight, our team is happy to look at drawings before you commit; start from the Niori homepage to see how the alabaster and natural-stone ranges sit together.