
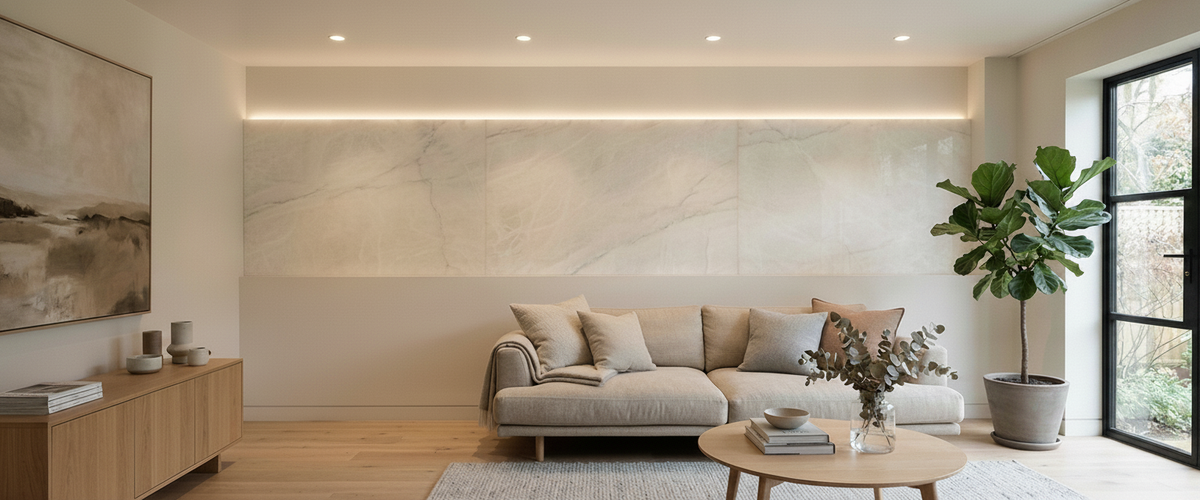

A raw strip of diodes stuck to a shelf edge is one of the fastest ways to make an expensive room look cheap. Install LED strip well and the same run disappears, leaving a soft wash that makes alabaster glow from within and shows off the grain in a stone worktop. When you install LED strip properly you gain a quiet, layered light source that supports the sculptural fixtures doing the real work overhead. Get it wrong and you spend the next year staring at a row of bright dots.
A concealed strip in a cove grazes an alabaster panel, revealing its veining.
We install LED strip alongside our alabaster pendants and wall lights often enough to know where it earns its keep and where it lets people down. The difference is almost never the strip itself. It is the channel, the diffuser, the color temperature, and the way the cable is hidden.

Key Takeaways Before You Buy
Strip is a supporting act. It handles coves, shelf edges, and under-cabinet runs, not the main light in a room.
Use an aluminum channel and diffuser. Bare strip shows hotspots; a frosted diffuser turns dots into a continuous line.
Pick warm white around 2700K. Cooler tones make stone and timber read gray and plastic.
Size the driver with headroom. Add roughly 20 percent above the strip's total wattage.
You can often install LED strip yourself at low voltage; mains wiring is another matter. A qualified electrician handles anything behind the wall.

Where LED Strip Actually Earns Its Keep
The best installs are the ones you never notice as strip. Install LED strip in a cove above a plaster ceiling and it throws light upward so the ceiling itself becomes a soft source. Along the underside of a kitchen cabinet, it lights the worktop without glare from a downlight. Tucked behind the front lip of a floating shelf, it grazes the wall and gives depth to a run of books or ceramics.
Where it works hardest for us is near natural stone. Install LED strip as a short warm run under an alabaster wall panel, or as a discreet line lighting the back of a stone alcove, and it picks up the veining in a way a single point source cannot. That is the same principle behind the fixtures in our alabaster lighting collection: light passing through or across stone reveals the material rather than flattening it. This kind of strip is the low-key version of that idea.
What it should never do is act as the main light in a living space. It has no focal point, no shape, no character on its own. Ask it to light a whole room and you get a flat, shadowless wash that feels like an office. Install LED strip as one layer only, pair it with a pendant or a pair of wall lights, and let each layer do one job.
Channels and Diffusers Turn Diodes Into a Wash
The single upgrade that separates a considered job from a botched one is the aluminum channel, and it is the first thing we specify whenever we install LED strip. It does three things at once. It hides the individual diodes behind a frosted diffuser, so you see a line of light rather than a row of dots. It draws heat away from the strip, which matters for how long the diodes last. And it gives you a clean straight edge to mount against, which no amount of careful hand-pressing on adhesive tape will match.
An aluminium channel and frosted diffuser turn individual diodes into a continuous line of light.
Diffusers come in a few finishes. A frosted or opal cover is the safe default when you install LED strip in a home; it softens the line and hides the diodes even at close range. A clear cover gives a brighter, sharper output but shows the individual points, so save it for runs the eye never sees directly. The deeper the channel and the further the diffuser sits from the strip, the smoother the result.
For the recess itself, plan the channel into the joinery or cove before anything is painted or fitted. Retrofitting a channel into a finished shelf is fiddly and rarely as tidy. If you are building coving specifically to hide the run, keep it set back from the front lip so the source stays invisible from normal standing height.
Choosing Warm-White Strip That Flatters Stone and Timber
Color temperature is where most installs go wrong for anyone who cares about materials. A cool 4000K or 5000K strip drains the warmth out of oak, walnut, and honey-toned alabaster, leaving everything looking slightly gray and clinical. If you install LED strip in a home, and especially near stone, aim for 2700K. It keeps the reds and ambers in timber and lets alabaster read as the warm, living material it is.
Color rendering matters as much as temperature. Look for a CRI of 90 or above; cheaper strip often sits at 80 or below, which quietly dulls the colors of everything it touches. The Chartered Institution of Building Services Engineers publishes guidance on lighting quality worth reading if you want to understand why rendering matters beyond raw brightness. On natural stone the difference is obvious: high-CRI warm white makes the veining sing, while low-CRI diodes make it look muddy.
Density counts too. Install LED strip with more diodes per meter and you get a smoother line, particularly behind a shallow diffuser. Sparse, budget product shows scalloping, a wavy pattern of bright and dim that no diffuser fully hides. If in doubt, go denser.
Powering It Cleanly: Driver, Dimming and Hidden Cable
Every low-voltage strip needs a driver to step mains down to 12V or 24V DC, so price one in before you install LED strip. Size it to the total wattage of your run, then add headroom of around 20 percent so it is not working flat out. A driver running permanently at its limit gets hot and dies early. For a short shelf edge or a single cabinet run, a compact unit such as the 12V 10W LED Driver Power Supply IP20 covers a modest length without oversizing the box you then have to hide. For longer runs, 24V holds its brightness better over distance than 12V, which drops off and dims toward the far end; where you are feeding several meters of denser product, a higher-capacity unit like the 24V DC 200W LED Driver Power Supply IP20 gives you both the voltage and the headroom to run steady.
Dimming needs planning at the start, not as an afterthought. Confirm the strip, the driver, and the dimmer are all designed to work together before you install LED strip; a mismatched combination gives you flicker, buzz, or a dead zone at the bottom of the dial. If you want the run to fade in step with your alabaster pendants and wall lights, choose a control system that handles both. We often see people fit dimmable fixtures overhead, then bolt on a non-dimming strip below, and the mismatch is glaring the moment the room is set low.
Hide the cable and driver before you commit. The driver is a box that needs air and access; plan a spot inside a cabinet, a ceiling void, or a service cupboard where it can breathe and be reached if it ever fails. Where the run reaches damp or exposed areas rather than a dry cabinet, an IP67-rated unit such as the 24V DC 40W LED Driver Power Supply IP67 is the safer choice for the placement. Never seal a driver permanently behind plaster. Run the low-voltage cable through joinery channels so no wire is visible along the finished edge.
The Mistakes That Leave You With Hotspots and Shadow Gaps
Three faults account for most disappointing attempts to install LED strip. The first is skipping the diffuser, which leaves the diodes visible as a row of dots. The second is a shadow gap at corners, where two runs meet at an angle and leave a dark break; use corner connectors or bend the channel where the product allows, and test the join before you fix anything down.
The third is uneven brightness caused by voltage drop on an over-long single run. Once a run gets long, feed power from both ends or split it into shorter sections, each fed cleanly, so the far end stays as bright as the near end. Plan the feed points on paper before you install LED strip, because adding them later usually means lifting the whole run.
One more, easy to miss: adhesive backing fails on textured or dusty surfaces. Clean the channel, let it dry, and for anything overhead consider mechanical clips rather than trusting tape alone.
When the Wiring Stops Being a DIY Job
Sticking a strip into a channel and plugging a driver into an existing socket is within reach of a confident DIYer, which is why plenty of people install LED strip themselves. The moment you need a new fused connection, want the light on a wall switch, or are running anything through the fabric of the building, it becomes an electrician's job. In the UK, mains work in certain areas of the home falls under Part P of the Building Regulations, and a registered electrician keeps you compliant and safe. Guidance from Electrical Safety First is a sensible starting point before you decide.
The same logic applies to the questions we get about wall sconces. Installing a wall sconce light fixture where wiring already exists is a matter of connecting to the existing point, mounting the bracket, and making good. Fitting a wall light without existing wiring, or an outdoor wall light that needs a weatherproof feed, is not a job to improvise. Outdoor fixtures need the right IP-rated driver and cabling, and both indoor and outdoor mains work should go to a qualified electrician.
Strip lighting is the quiet layer that makes everything else in a room look intentional. Install LED strip as the supporting act to sculptural pieces, with a proper channel, warm-white high-CRI diodes, and a well-hidden driver, and it does exactly what good lighting should: you notice the light, never the source. Browse the wider lighting range to see the fixtures this layer is meant to support.