
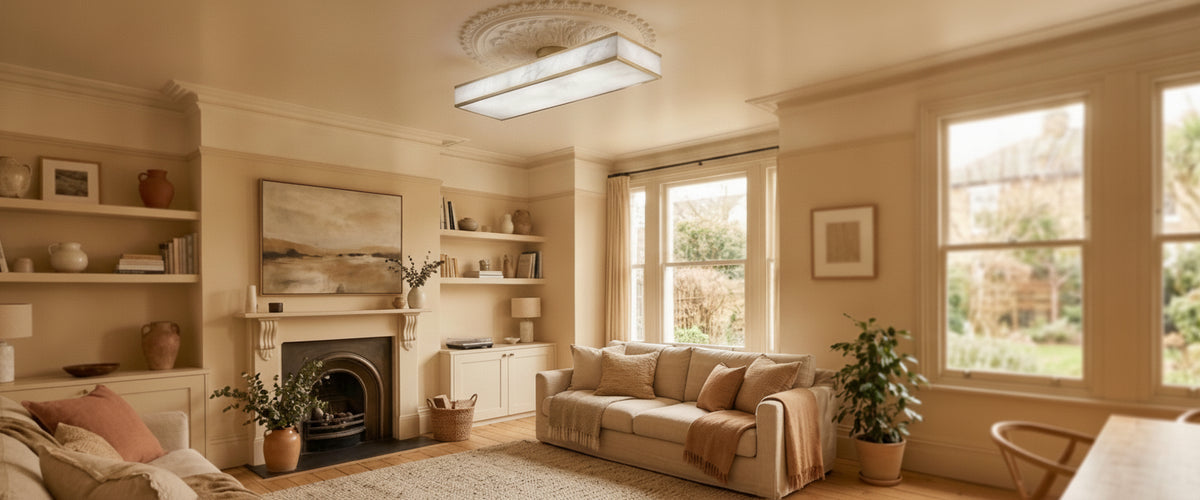

Two ceiling fittings can look near-identical in a catalog photograph and behave nothing alike the moment you switch them on. One throws a clean, even wash with no hot spot. The other shows a bright disc where the lamp sits, a gray shadow at the rim, and a faint green cast on the wall behind it. That gap is where the money goes in designer ceiling lights, and almost none of it is visible until the fitting is up, wired and dimmed. Anyone pricing designer ceiling lights for the first time is really buying the things a photograph cannot show.

Key Takeaways
Price at the upper end of the designer ceiling lights market reflects casting quality, diffusion depth and finish consistency, not badge value.
Natural stone, hand-blown glass and cast metal age slowly; molded acrylic and thin pressed shades tend to yellow, craze or dull within a few years.
Ceiling height and existing plaster detail should set the brief. Choose the fitting type second.
Specify color temperature and CRI in writing. A CRI of 90 or above at around 2700K flatters skin, timber and stone.
Some rooms genuinely do not need designer ceiling lights. Spend where the light is seen at eye level and lived under.

Casting Quality, Diffusion Depth and Finish: Where the Price Difference Lives
Start with the material that carries the light, because that is what separates designer ceiling lights from everything else on the shelf. Alabaster is cut from a solid block, so every shade has its own density, veining and translucency. A skilled workshop reads the block before cutting and keeps wall thickness consistent, because a shade that is 8mm thick on one side and 14mm on the other will glow unevenly for its entire life. Thin it too far and the lamp itself becomes visible as a bright core. Leave it too thick and you lose the honey warmth that makes the material worth specifying at all.
Cast metal components tell a similar story. A properly cast brass canopy has crisp edges, no pitting at the seams and a finish applied in enough coats to survive a decade of dusting. Cheaper fittings use spun or pressed metal with a lacquer that wears thin at the touch points first. Look at the back plate, the part nobody photographs. If the underside is tidy and the fixings line up without force, the rest of the piece was usually built to the same standard.
Diffusion depth is the quiet differentiator across designer ceiling lights. Good ceiling lights design puts distance, or a secondary diffuser, between the LED board and the surface you see. Without that gap you get a pinpoint of glare through the stone. With it, the whole shade lifts evenly. In our studio we have compared two alabaster semi-flush fittings of similar diameter where the only real difference was a 25mm (1in) internal gap and an opal baffle. Side by side, the difference read as quality; technically it was geometry.
Hand-Blown Glass, Cast Metal and Stone Versus Molded Alternatives After Five Years
The five-year test is the honest one, and it sorts genuine designer ceiling lights from the merely good-looking. Injection-molded polycarbonate and acrylic shades start life bright and sharp. Run warm LEDs behind them, in a hallway that gets four hours a night, and they slowly shift towards a yellow-gray that no cleaning will reverse. Thin pressed glass with a printed frosting can lose that coating around the fixing points. Powder-coated steel chips at the edges and shows the substrate.
Natural materials fail differently, and usually more gracefully. Alabaster and marble are stable indoors, away from steam and standing water. Hand-blown glass keeps its optical clarity. Solid brass will patinate if left unlacquered, which most designers treat as a feature rather than a fault. Alabaster is a gypsum stone and sits around 2 on the Mohs scale, which makes it soft and sensitive to moisture; conservation guidance from Historic England on gypsum-based stone is a useful reminder that dry handling and gentle cleaning matter far more than any proprietary polish.
One practical note from orders we have shipped: clients who chose stone for a stairwell almost never come back to change it, while the same clients often replace molded fittings in secondary rooms within a few years. That replacement cycle is a real cost, and it rarely appears in the original budget when designer ceiling lights are being compared on headline price alone.
Let the Ceiling Set the Brief
Ceiling height and existing architectural detail should constrain your choice of designer ceiling lights, not follow it. A 2.3m (7ft 6in) ceiling in a converted flat cannot take a deep pendant, however good the piece is. Flush or semi-flush is the answer there, ideally with a shade that glows on its side faces so the fitting reads as light rather than as an object bolted overhead. In a low hallway or a small bedroom, a compact fitting such as the Welland LED Mini Flush Ceiling Light in aged brass sits tight to the plaster and keeps the sightline clear in a way no drum pendant can at that height.
Above roughly 2.7m (9ft), you have room to work, and most designer ceiling lights come into play. Pendants, tiered chandeliers and stone drum fittings all become viable. Keep at least 2.1m (7ft) of clear headroom beneath any suspended fitting in a walkway, and hang dining pendants around 75 to 90cm (30 to 35in) above the table surface so the light lands on plates rather than in faces.
Period detail changes the calculation again. A Victorian ceiling rose, a deep cornice or an original beam sets a visual center you should either use or deliberately ignore. We supplied an alabaster semi-flush fitting to a Georgian first-floor flat in Bath where the existing rose sat 40cm (16in) off the true center of the reconfigured room. The client wanted to re-center the fitting; the cornice ran the other way and would have made the offset obvious. The fix was a wider shade on the original rose, which read as intentional. Good ceiling and lighting design frequently means solving the building, not the product, and the best designer ceiling lights are chosen with that in mind.
Color Temperature and CRI: Why the Specification Gap Is Real
Two LED modules with the same wattage and the same stated color temperature can render a room completely differently, which is one reason designer ceiling lights are judged on paperwork as much as looks. Color Rendering Index is the reason. Below CRI 80, reds go flat, timber looks brown rather than warm, and cream walls pick up a gray undertone. At CRI 90 and above, alabaster returns the amber it is supposed to return.
At home, ceiling lights LED design should sit at 2700K in living rooms and bedrooms, with 3000K acceptable in kitchens and bathrooms where a slightly crisper read helps. Anything at 4000K or above under a stone shade fights the material. Specify dim-to-warm drivers if you want the fitting to drop towards 2200K at low output, and confirm compatibility with the dimmer type before installation; trailing-edge dimmers matched to the driver are usually the safe route, and mismatched pairings are the single most common cause of flicker we hear about.
Ask for the driver specification in writing, not just the lamp specification. That is where the flicker percentage, the dimming curve and the replaceability of the module are hidden. Serious designer ceiling lights come with that information before you have to chase it. A fitting with a serviceable, standards-compliant driver will still be working when a sealed integrated unit has become landfill.
Where a Designer Fitting Earns Its Keep
Not every socket deserves a considered piece, and pretending otherwise wastes budget. Designer ceiling lights earn their keep on the ceilings people actually look at: entrance halls, stairwell voids, dining rooms, principal bedrooms, and the sightline from a sofa. Those fittings work as daytime objects as well as night-time light sources, which is exactly what alabaster does well, holding color and texture even when switched off.
Utility rooms, deep cupboards, garage ceilings and plant rooms need output and nothing else, so keep designer ceiling lights out of them. A well-chosen flush LED fitting does that job honestly, and where the space also sees moisture or dust, a sealed option like the Welland LED Flush Ceiling Light in polished chrome carries the IP54 rating those rooms need without pretending to be a feature piece. The same goes for corridors, where a wall light or a run of discreet downlights will outperform a decorative fitting. Browsing the wider lighting range alongside the feature pieces tends to produce a more balanced scheme than specifying showpieces everywhere.
Crystal Ceiling Light Design Versus Stone
Crystal ceiling light design works by refraction: it splits light into bright points and sparkle, which suits high ceilings, formal dining rooms and hospitality spaces with hard reflective surfaces. Alabaster works by transmission, giving a soft, contained glow with no glare. In a room with a lot of glass, gloss lacquer or polished stone floors, crystal can tip into visual noise. In a calm, textural interior, stone usually wins. Plenty of schemes use both, with crystal in the formal room and alabaster everywhere people actually relax. Both sit inside the same designer ceiling lights brief; the room decides which one wins. Where a formal room wants refraction but lacks the height for a full drop, a multi-light semi-flush such as the Ariadna 9 Light Crystal Semi-Flush Ceiling Light keeps the sparkle while staying close to the plaster.
How to Design Kitchen Ceiling Lights That Work
Kitchens punish lazy ceiling light design, and designer ceiling lights over an island only work as part of a layered scheme. Layer it. Task light over worktops, usually recessed or under-cabinet so you are not working in your own shadow. Feature pendants over the island, spaced evenly and sized so their combined width is about a third of the island length. Then a soft ambient layer for the evening, ideally on its own circuit so the room can drop to a low, warm setting once the cooking is finished.
Wet and greasy zones set hard limits on which designer ceiling lights are appropriate. Keep stone away from the hob canopy and any zone that takes regular steam. Alabaster tolerates a normal kitchen; it does not enjoy sitting directly above a rolling pan of pasta water. For bathroom ceilings, check the IP rating against the relevant zone, and have the work signed off by a qualified electrician registered with a competent person scheme such as NICEIC.
Three Questions Worth Asking Any Supplier
What is the CRI, color temperature and flicker performance of the supplied module, and is the driver replaceable? A vague answer here usually means an integrated unit with a finite life.
Is the shade cut from solid stone or a composite, and how is wall thickness controlled across a batch? If you are ordering a pair or a run, ask how closely they can match veining and translucency.
What is the fixing weight and does the ceiling need reinforcement? Stone fittings carry real mass. Ask for the weight in kilograms and pass it to your electrician before installation day.
Budget for designer ceiling lights depends on material, scale, engineering, finishing and installation complexity, so ask for a tailored quote rather than working from a headline figure. If you are comparing options across a whole project, the alabaster lighting collection is a sensible place to see how stone reads at different diameters and mounting types.
Installation and Care Checklist
Confirm ceiling construction and load capacity before ordering any of the heavier designer ceiling lights cut from stone.
Check dimmer and driver compatibility in writing; test before final plastering or decorating.
Handle alabaster with clean dry hands or gloves. Skin oils mark unsealed stone.
Dust with a dry microfiber cloth or a soft brush. Avoid water, vinegar, alcohol and any acidic cleaner.
Never wet-clean a shade in situ. Isolate power and, where the design allows, remove the shade first.
Re-check fixings after the first heating season, when timber and plaster have moved.
Keep one spare lamp or module from the original batch so color temperature stays consistent.
Judged this way, designer ceiling lights stop being a matter of taste and become a specification exercise with a clear right answer for each room. Get the material, the diffusion and the color quality right, and the fitting will still look considered in a decade. Skip those checks and you are buying a photograph.