
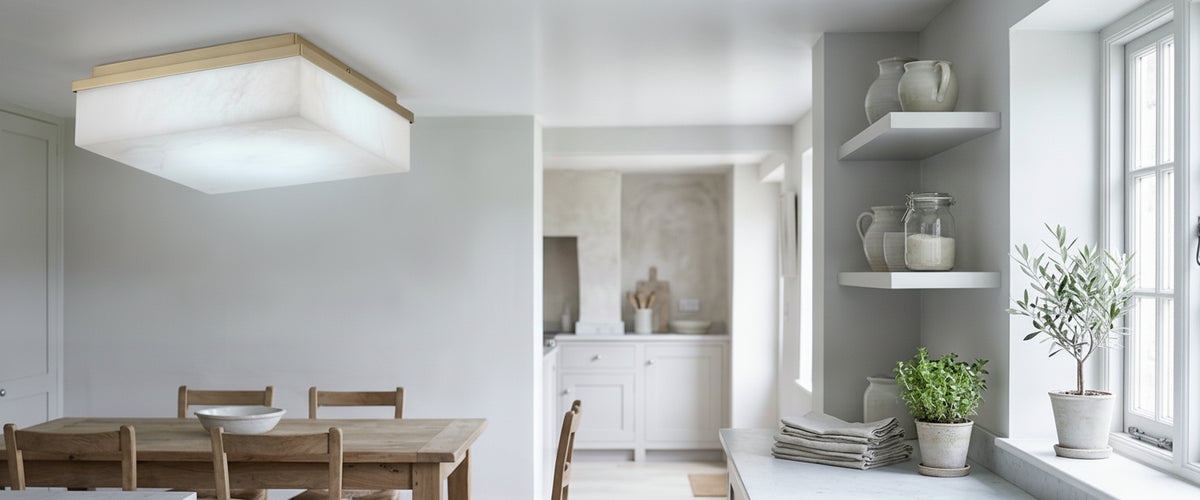

Stand under a beautiful pendant in a kitchen with an 8-foot (2.4 m) ceiling and you will understand the problem within about four seconds. It hangs in your eyeline, it blocks the sightline to the garden, and someone will eventually catch it with a cabinet door. That is why flush mount kitchen lighting exists, and why choosing it well takes more thought than picking the widest disc that fits the budget. Get the depth, output, and placement right and the ceiling reads calm and uncluttered. Get it wrong and you end up with a bright spot in the middle of the room and shadows everywhere you actually chop, wash, and cook.

Key Takeaways
Under 8 feet (2.4 m): go fully flush. Between 8 and 9 feet (2.4 to 2.7 m), semi-flush is usually still safe.
The 3-inch rule: roughly 3 inches (80 mm) of drop is the difference between a fitting you forget about and one you duck under.
Output: a flush mount kitchen fitting sits further from the worktop than a pendant, so plan for more lumens to match the same working brightness.
Layer it: flush kitchen ceiling lights handle ambient light; under-cabinet and wall lighting handle tasks.
Material matters: alabaster and marble diffuse light softly and wipe clean, which suits a room full of steam and grease.
Check the spec last: dimming range, driver quality, and colour temperature decide whether you like the light at night.

Why Ceiling Height Decides Everything Before You Pick a Fixture
Ceiling height is not a detail you accommodate at the end. It is the first constraint, and it quietly rules out half the fittings people fall in love with online. Every flush mount kitchen scheme starts with that number. In a kitchen, head height is only part of it: you also have upper cabinets, a range hood, sometimes a beam, and the swing of a tall fridge door. All of that eats into the volume a fixture can occupy without feeling like an obstacle.
The practical test is simple. Measure from finished floor to ceiling at the point where the fitting will go, then subtract the tallest regular user's height plus a hand's width of clearance. Whatever depth remains is your fixture allowance. On a 7-foot-10-inch (2.4 m) ceiling in a Napa cottage kitchen we shipped to last year, that allowance came out at barely four inches. The client had three pendants specified. They ended up with a pair of shallow alabaster flush discs over the run and a single semi-flush over the breakfast nook, where the ceiling stepped up. Same budget, completely different result.
A shallow alabaster disc keeps the ceiling plane clean where a pendant would sit in your eyeline.
Low ceilings also change how light behaves. Bounce is stronger, the ceiling itself becomes part of the light source, and any glare from a bare lamp is closer to your eyes. That is where translucent stone earns its place. Alabaster spreads light through the material rather than firing it straight down, so the fitting glows instead of glaring. Browse the alabaster lighting collection with that in mind and look at the shallow, domed and disc-shaped pieces first: they are the flush mount kitchen options that behave well in tight ceiling voids.
Flush Versus Semi-Flush: The 3 Inches That Decide It
A true flush mount kitchen fitting sits tight to the plaster with no visible gap. A semi-flush sits on a short stem, typically dropping a few inches, which lets light wash upward onto the ceiling as well as down into the room. That upward wash is genuinely useful; it makes a low ceiling feel taller and stops the room reading flat. But it costs you head height.
Choose Fully Flush When
The ceiling is under 8 feet (2.4 m), or under a beam or bulkhead.
The fitting sits directly over a walkway, island seating, or a door swing.
You want the ceiling plane to disappear and the cabinetry to lead.
Choose Semi-Flush When
You have 8 to 9 feet (2.4 to 2.7 m) and the fitting is not above a traffic route.
The room feels cave-like and needs ceiling bounce.
You want a piece with more presence: a carved alabaster bowl on a brass stem reads closer to a chandelier than a disc does.
Where the height is there and the room needs warmth bouncing off the ceiling rather than a flat disc, something like the Winslow 1 Light Semi-Flush Ceiling Light in natural brass and seeded glass is closer to the right design language, because the short stem and textured glass give the fitting presence without pendant depth.
One caution from the studio: people under-estimate semi-flush fittings on photographs. A 3-inch (80 mm) stem looks like nothing on a product shot and feels significant when you are unloading groceries beneath it. If you are within an inch or two of your allowance, choose a fully flush mount kitchen fitting and get the drama from the material instead of the silhouette. In that situation a tight-to-plaster piece such as the Albers 1 Light Opal Glass Globe Flush Ceiling Light in matt black keeps the ceiling line clean while the opal glass softens the source at close range. Stone veining lit from within does the same job at zero depth.
Why Flush Mount Kitchen Fittings Need More Lumens Than a Pendant
This is the calculation most buyers skip, and it explains a lot of disappointed reviews. Light falls off sharply with distance. A pendant hanging 30 to 34 inches above an island puts its source close to the surface you are working on. A flush mount kitchen fitting sits at ceiling level, often five feet or more above the same counter, so a meaningful share of its output never arrives with any punch.
Two consequences. First, plan for higher total lumens across your flush kitchen ceiling lights than you would for pendants covering the same footprint. Second, treat flush mount kitchen fittings as ambient light rather than task light. The knife work gets covered by under-cabinet strips, a run of alabaster wall lights beside the range, or a discreet directional fitting over the sink. A kitchen lit by one central fixture always looks like a kitchen lit by one central fixture, no matter how good the fixture is.
With translucent stone there is a second layer to the maths. Alabaster and onyx absorb and scatter some of what passes through them, which is exactly why the light looks warm and forgiving; it also means the lamp behind the stone needs to be specified with that loss in mind. A well-made piece accounts for this in its lamping. If you are comparing fittings across our wider lighting range, look at the lamp specification and the number of light sources, not the diameter alone.
Placing Flush Kitchen Ceiling Lights Around an Island, Cooktop, and Sink
Shadow zones are designed in, usually by accident, when flush mount kitchen lights get centred on the room rather than on the work. The fix is to plan around activity.
Islands: for a run longer than about 6 feet (1.8 m), two smaller flush mount kitchen fittings spaced along the axis beat one large one in the middle. Even spacing keeps the light flat across the surface and stops the ends going dim.
Cooktop or hob: if you have an extractor with integrated lighting, do not double up directly above. Place the flush fitting slightly forward of the cooking line so you are not working in your own shadow.
Sink: stand at the sink and note where your head blocks the light. A fitting positioned a touch toward the room, rather than dead above, solves it.
Walkways: keep flush fittings over the runs you actually walk, not over cabinet tops where the light is wasted.
Open-plan rooms: repeat one family of fittings across the kitchen and dining zone. A flush alabaster disc in the cooking area and a deeper alabaster bowl over the table read as one scheme without being matchy.
Two smaller fittings spaced along the island axis give flatter light than one large disc in the middle.
Grease, Steam, and Stone: Finishes That Last in a Working Kitchen
Kitchens are hostile, and a flush mount kitchen fitting sits right in the firing line. Airborne grease settles on every horizontal surface, steam cycles humidity up and down, and cleaning products get sprayed with more enthusiasm than accuracy. Materials that shrug this off tend to be dense, smooth, and unlacquered or properly sealed.
Alabaster is a fine-grained gypsum stone, historically favoured by carvers precisely because it is soft enough to shape into thin, light-transmitting panels, a tradition documented in museum collections such as the Victoria and Albert Museum. That softness is also its care requirement. Alabaster is water-sensitive, so never soak it. Dust with a dry microfiber cloth, then lift greasy film with a barely damp cloth and dry immediately. Skip vinegar, citrus sprays, and anything labelled descaler; acids etch the surface. Marble behaves similarly. Onyx is a little harder but still deserves gentle handling.
On metalwork, unlacquered brass will develop patina faster in a kitchen than anywhere else in the house, which some buyers love and some do not. If you want the finish to stay consistent, ask for a lacquered or antiqued option. Matt black and graphite hold up well and hide fingerprints, though they show dust sooner; over a busy hob run, a muted metal frame like the Louvre 4 Light Semi-Flush Ceiling Light in graphite takes cooking film far more gracefully than a polished or plated finish. Whatever you choose, position the flush mount kitchen fitting away from the direct plume of an extractor-free cooktop. Stone directly in a steam path will need wiping far more often.
Dimming and Driver Quality: The Check Most Buyers Skip
A kitchen is a task room by day and a social room by night, so dimming is not optional. The mistake is buying the flush mount kitchen fitting, then buying whatever dimmer is on the shelf. Mismatched dimmers and LED drivers cause flicker, buzzing, and a dead zone at the bottom of the dial where the light drops out entirely. Research summarised by the IEEE Standards Association on temporal light modulation is the reason good manufacturers now publish flicker data; ask for it.
Practical spec checks before you order:
Confirm the dimming protocol: trailing-edge (leading-edge dimmers are a common cause of buzz), or a low-voltage protocol if you are on a control system.
Ask for the dimming floor: a fitting that only reaches 20 percent is not a dinner-party light.
Check colour temperature: 2700K flatters warm alabaster and wood; 3000K suits cooler stone and gray cabinetry. Mixing the two in one open-plan room looks like a mistake.
Check CRI: 90 or above so food, produce, and stone veining look right.
Check replaceability: if the LED is integrated, ask how the module is serviced years from now.
Confirm the driver location: some flush fittings house the driver in the canopy, which affects the backbox and ceiling void you need.
The Flush Mount Kitchen Buying Checklist
Measure floor to ceiling at the exact fitting position, not at the tallest point of the room.
Subtract head height plus clearance to get your maximum fixture depth.
Decide flush or semi-flush from that number, not from a mood board.
Map the island, cooktop, sink, and walkways before choosing quantity.
Plan a second layer: under-cabinet, wall lights, or directional task fittings.
Confirm total lumens are higher than a pendant scheme would need.
Choose finishes with grease and steam in mind, and agree the brass finish you want.
Lock in dimmer compatibility, colour temperature, and CRI in writing.
Book a qualified electrician for installation and check the ceiling void depth first.
Budget for flush mount kitchen lighting varies widely because it tracks material, scale, hand-finishing, engineering, and installation complexity rather than a simple size chart. Hand-selected stone with matched veining sits at a different level from machine-cut glass, and a bespoke diameter changes the picture again. The honest answer is to describe your ceiling height, worktop layout, and finish preference and request a tailored quote.
Alabaster does something that no flat panel can copy: it makes light look like it has passed through something solid. In a low-ceilinged room, where every fitting is on show, that is worth paying attention to. Take your measurements first, then let the stone do the talking.