

Plenty of the brass sold as "retro" was cast, plated and antiqued a few months before it reached the showroom floor. That is not a scandal, but it does mean the word tells you almost nothing about quality. A good retro brass chandelier earns its warmth through solid metal, honest finishing and a shape that belongs to a specific period rather than a vague mood board. A poor one is thin tube, lacquer-heavy color, and a patina sprayed on in a booth. Knowing the difference saves you from buying a retro brass chandelier that looks tired within two years instead of better.

At a Glance
Solid brass beats plated steel for weight, sound and the way a retro brass chandelier ages. Tap it; plated tube rings hollow and bright.
Real patina is uneven. It pools in crevices and wears off handling points. Factory antiquing is suspiciously consistent.
Scale is decided by drop, not arm count. Get clearance right first, then choose how many arms the room can carry.
Warm, low-output filament bulbs flatter brass. Cool LED replacements push it green.
Brass wants attention roughly twice a year, not a monthly polish. Over-cleaning strips the character you paid for.
Budget depends on alloy, casting quality, scale, wiring and finishing. Ask for a tailored quote on the retro brass chandelier you actually want rather than assuming a category price.

Genuine Aged Patina Versus Factory Antique Effect
Brass is a copper and zinc alloy, and its color shifts because the copper content reacts with oxygen, moisture and sulfur compounds in the air (the CAMEO materials database at the Museum of Fine Arts, Boston is a useful reference on alloy behavior). That reaction is never even. On a retro brass chandelier that has hung in a real room for decades, the deepest browns sit inside moldings, under bobeches and along the top faces of arms where dust settles. The undersides stay lighter. Anywhere a hand has reached to change a bulb, the metal is brighter and slightly smoother.
Factory antiquing reads differently. It is usually a chemical dip or spray followed by a clear lacquer, which produces a uniform mid-brown with a faint plastic sheen. Look at the inside of a socket cup and the back of a scroll arm. If those hidden surfaces are exactly the same tone as the front, the finish was applied, not earned. A second tell: genuine age shows tiny green-blue verdigris specks in crevices near old solder joints. Sprayed finishes rarely reproduce that.
Neither is wrong for a buyer. A well-made new retro brass chandelier with a controlled antique finish is a sensible choice if you want consistency across a pair of fittings in one hallway. Just do not pay salvage prices for it, and check whether the lacquer will be a problem later. Lacquered brass holds its color for years, then fails in patches, and stripping it is a job for a specialist.
Retro Brass or Victorian Revival? The Distinction That Changes the Room
Buyers use "retro" and "vintage" as if they were one category. They are not, and the visual gap is wide. A vintage brass chandelier in the Victorian revival mode has downward-curving scroll arms, heavy cast rosettes, glass shades and often a gasolier-derived silhouette with a central stem you could grip in both hands. It suits high-ceilinged period rooms, deep skirting and a certain density of pattern.
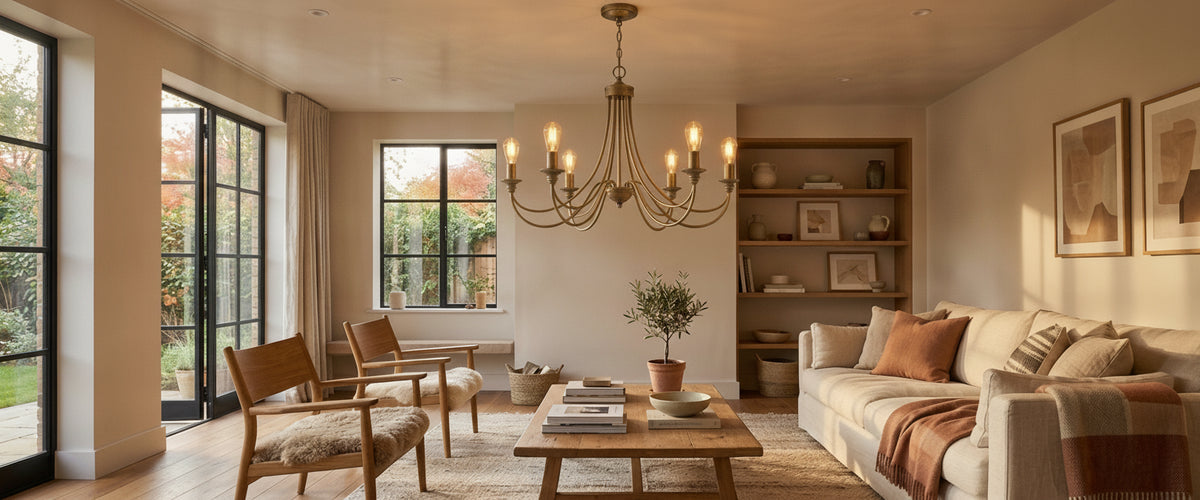
A retro brass chandelier, in the sense most people mean, is mid-century onward: Sputnik bursts, slim spokes, tiered rings, enamel cups, geometry rather than ornament. It carries far less visual weight for the same diameter, which makes it workable in a flat with a 2.4 m (8 ft) ceiling where a Victorian piece would simply swallow the room. Where the ceiling height is ordinary and the brass needs to read as warm rather than ornate, a restrained arm-and-shade form such as the Balance 5 Light Chandelier in Brown and Polished Brass is closer to the right design language than a cast scroll piece. Get this wrong and the fitting fights the architecture. Plenty of heavy revival pieces get ordered for 1930s semis and quietly swapped for something linear once they are hanging.
Ask yourself which century your skirting boards belong to. Then choose the retro brass chandelier that agrees with them, or commit fully to contrast and let the fitting be the only period voice in a plain room.
Arm Count, Diameter and Drop for Real Rooms
Start with clearance, because it is the constraint you cannot argue with. Over a dining table, the common convention is to hang the lowest point of a retro brass chandelier roughly 75 to 90 cm (30 to 36 in) above the tabletop, so diners see each other under it. In a hallway or anywhere people walk beneath, keep at least 2.1 m (7 ft) of head height. Over a stairwell or double-height landing, sight the fitting from the upper floor as well as the hall, because that is where guests will meet it at eye level.
Diameter comes next. A rough starting point for a retro brass chandelier over a dining table is around half to two-thirds the width of the table, keeping the outer arms inside the table edge. For a room-center fitting, add the room's length and width in feet and treat that number in inches as a sensible diameter, then adjust down if the ceiling is low. Arm count follows from diameter, not the other way round. Five arms on a generous span looks confident; nine arms crammed into the same circle looks nervous. The clearest way to test that is to compare two versions of one design at different arm counts, such as the Kula 5 Light Chandelier against the Kula 9 Light Chandelier, where the finish stays constant and only the density of the arms changes.
Weight matters more with solid brass than with plated alternatives. Anything substantial needs fixing into a joist or a properly specified ceiling plate, and the wiring should be done by a qualified electrician. If you are comparing forms before committing to a retro brass chandelier, it helps to see chandeliers, pendants and wall lights side by side across the wider lighting range so you can judge visual mass rather than only measurements on a page.
Bulbs: Why Filament Beats a Standard LED Replacement
Brass is a reflective warm metal, and it takes its color from whatever you put inside it. A carbon-filament or Edison-style lamp at around 2200K throws an amber light that makes the alloy glow rather than gleam. Swap in a cool 4000K LED and the same fitting turns faintly green and hospital-flat. Color temperature does more for the look of a retro brass chandelier than any amount of polishing.
Practical guidance: choose 2200K to 2700K, a high color rendering index (CRI 90 or above), and clear glass so the filament shape stays visible through the open arms of a retro brass chandelier. LED filament lamps now do this convincingly, and they avoid the heat and short life of true carbon filaments. Check dimming compatibility before you buy the dimmer, not after. Low-wattage LED loads trip up older leading-edge dimmers, and a fitting that flickers at 20 percent is worse than one that does not dim at all.
One more point on quantity. Eight sockets at 40 W equivalent is plenty for a dining room with other layers in play. Over-lamping a retro brass chandelier is the fastest way to make it look like a showroom display.
Pairing Brass With Plaster, Dark Woodwork and Texture
Aged brass sits beautifully against lime-washed or polished plaster because both finishes are slightly irregular and absorb light rather than bouncing it. Dark woodwork works too, though it needs a lighter counterweight somewhere in the room or the scheme tips theatrical. Textured fabric helps: wool, boucle, a heavy linen curtain. Surround a retro brass chandelier with gloss on every surface and the metal reads as cheap shine.
This is where alabaster earns its place. Brass detailing against translucent stone is a long-standing pairing, and it solves a real problem: brass reflects, alabaster diffuses. A retro brass chandelier over the table plus alabaster wall lights along the flank wall gives you sparkle at the center and a soft wash at the perimeter, without a second metal finish competing. At Niori we work almost entirely in alabaster, marble and onyx with brass detailing, and the pieces in the alabaster lighting collection are designed to sit alongside metal fittings rather than shout over them. The split works because the eye accepts one bright focal point and reads everything at the edges as ambient, which is what stops a warm scheme from flattening out after dark.
Buying Checklist for a Vintage Brass Chandelier
Confirm whether the retro brass chandelier is solid brass or brass-plated, in writing. Ask about the base metal if plated.
Check whether the finish is lacquered, waxed or raw. Raw brass will keep moving in color; lacquered will not, until it fails.
Inspect hidden surfaces for consistent tone (the antiquing tell).
Look at solder joints and arm seatings. Wobble in an arm now becomes a crack later.
For salvage pieces, budget for full rewiring to current standards and earthing of metal parts.
Measure drop from the ceiling rose to the lowest point, then check against table or head height.
Confirm dimming type and lamp cap fitting before ordering bulbs.
Ask about ceiling fixing requirements and total weight for the installer.
Request a tailored quote; cost varies with alloy, scale, casting complexity, wiring and finishing rather than following a fixed band.
Keeping Retro Brass Legible Rather Than Neglected
There is a line between patina and grime, and dust is what crosses it. Twice a year, take the bulbs out, dry-dust with a soft brush, then wipe with a barely damp microfiber cloth and dry immediately. That alone keeps the aged finish on a retro brass chandelier readable. Skip it for five years and the surface goes flat gray-brown, which people misread as patina when it is really just soil.
Polishing is a decision, not a routine. Commercial brass polish is mildly abrasive and will strip aged color permanently, so use it only if you want the bright look back across the whole fitting. Never polish lacquered brass; you will scratch through the coating in patches. For antique or inherited pieces of any value, conservation advice is to clean sparingly and reversibly, and to consult an accredited specialist before anything abrasive. The Institute of Conservation maintains a register if you need one.
A thin coat of microcrystalline wax after cleaning slows tarnish on raw brass and is the approach most historic-house teams favor. Keep it away from sockets and wiring, keep fittings out of steam-heavy zones where you can, and accept that a retro brass chandelier will keep changing. That is the point of buying metal that lives.