
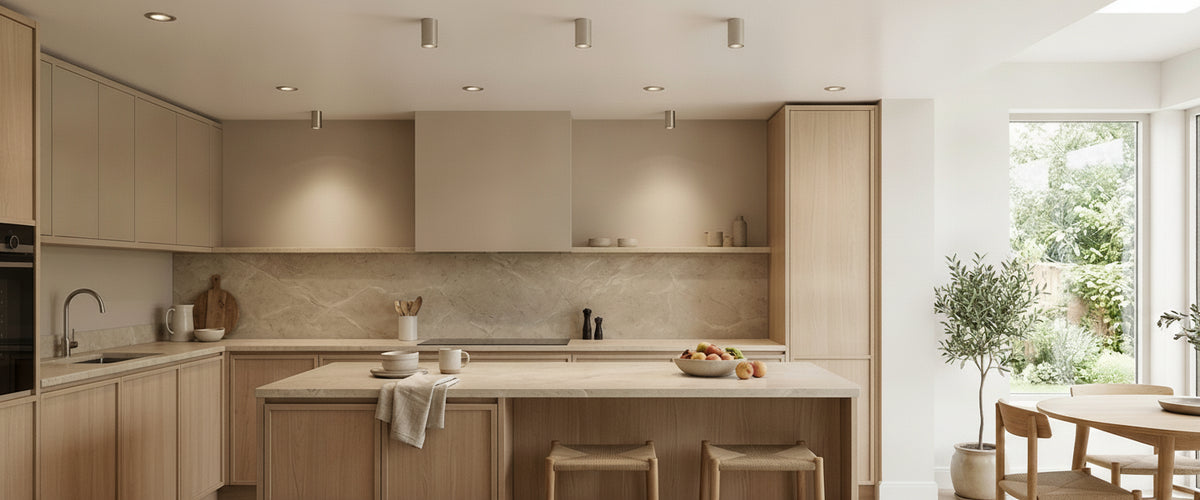

Nine downlights in a tidy grid, all firing straight down from a 2.4m (8ft) ceiling, is still the most common kitchen lighting plan in Britain. It is also why so many smart kitchens feel like the underside of a multi-storey car park: bright everywhere, interesting nowhere. kitchen recessed downlights are a brilliant tool when they are aimed at something. Spread evenly across a ceiling like polka dots, they produce flat, shadow-free light that drains depth out of the joinery, bleaches the stone you paid for, and puts a hard pool of glare on top of everyone's head.
The fix is not fewer lights or dimmer lights. It is a different order of decisions.

Key Takeaways
- Zone before grid. Place kitchen recessed downlights over worktops, hob, sink and island first, then add ambient fill only where the room still feels heavy.
- Beam angle does the shaping. Narrow beams (around 24 to 36 degrees) for task and accent, wider beams for general wash. Mixing the two is what makes a kitchen read as designed.
- 3000K is the safe centre for most kitchens; 2700K for warm, timber-heavy schemes; 4000K only for utility spaces you do not sit in.
- Keep fittings off the walls. Downlights placed too close to a wall throw scalloped arcs across it, which is the single biggest giveaway of a rushed layout.
- Check the dimmer before you order. The same LED fitting can be smooth on a trailing-edge dimmer and flickery on a leading-edge one.
- Downlights are the utility layer. Character comes from what hangs above the island, which is where alabaster and natural stone earn their place.

Why Evenly Spaced Recessed Downlights Kitchen Layouts Fall Flat
Light needs contrast to be legible. When every square metre of ceiling delivers the same downward beam, you remove the shadow that tells your eye where surfaces begin and end. Handleless cabinetry loses its shadow gaps. A honed marble splashback loses its sheen because nothing is grazing across it. Faces get lit from directly above, which drops shadow into eye sockets and under the nose, the least flattering angle in interior lighting.
There is a practical problem too. A symmetrical grid almost never lines up with how a kitchen is actually used. The centre of the ceiling is rarely the centre of the work. Push the fittings out to the perimeter to catch the worktops and the grid stops being symmetrical anyway, so you may as well plan for function from the start. CIBSE's lighting guidance treats kitchens as task spaces with higher illuminance needs at the work surface than in circulation areas, and that difference is exactly what a flat arrangement of kitchen recessed downlights refuses to acknowledge (CIBSE).
Zone First: Where Recessed Downlights for Kitchen Tasks Actually Belong
Work out the zones on a plan before you count fittings, because kitchen recessed downlights only earn their keep when each one has a job. In a typical run of base units with 600mm (24in) deep worktops, a downlight centred on the ceiling directly above the front edge of the units will light the chopping board and the person using it. Sit it tight against the wall instead and you light the wall units, then your own body blocks the beam. That shadow-across-the-worktop complaint is nearly always a layout fault, not a lumen fault.
- Worktop runs: space task fittings along the length of the run, roughly aligned with the front of the cabinets, and keep the spacing tight enough that you do not get dark gaps between pools.
- Hob: many extractors carry their own lighting, so check it before adding fittings that will be blocked by the canopy.
- Sink: one well-placed fitting above the bowl, slightly forward of centre so you are not working in your own shadow.
- Island: treat the island as a feature, not a worktop. Pendants or a chandelier handle the visual job; if you add recessed led kitchen downlights here, use narrow beams as accents at the ends, not a line of four down the middle.
- Tall cupboards and pantries: recessed kitchen cabinet downlights inside deep units or a walk-in pantry solve the black-hole shelf problem far better than cranking up the ceiling lights.
- Circulation: the walkway needs the least light of anything in the room. It usually gets the most.
We shipped an alabaster pendant trio to a client in Surrey whose electrician had already installed a perfect ten-light grid before the joinery went in. Two fittings ended up behind the new tall units and one landed 200mm off the pendant centreline, visible from the dining table for the rest of the kitchen's life. Mark your lighting plan after the cabinetry drawings are signed off, never before.
Beam Angle and Trim Colour: The Two Specs Buyers Skip
Beam angle is the closest thing to a free upgrade when you specify kitchen recessed downlights. A narrow beam around 24 to 36 degrees concentrates light where you want it and leaves the surrounding surfaces to fall away, which is what creates modelling and depth. A wide beam of 60 degrees or more spreads a gentle wash and is better for low ceilings or for lifting a dark corner. Most disappointing kitchens use one wide beam everywhere. The good ones mix two or three optics on the same ceiling.
Trim colour changes how the fitting reads once the plaster is painted. Matt white trims disappear into a white ceiling and are the default for a reason: over a long worktop run on a plain plastered ceiling, something like the Virunga LED Recessed Downlight in Matt White is the fitting you stop noticing within a week, which is the point. Matt black trims read as deliberate punctuation and cut perceived glare because the bezel does not catch light, so a fitting such as the Himal LED Recessed Downlight in Black suits a darker or double-height ceiling where the dots are meant to be visible. Satin nickel sits between the two and tends to work in schemes with brushed metal ironmongery or brass detailing. Single-lamp fittings suit even ceilings; where you want to graze a run of open shelving or a stone splashback from a single cutout position, a three-light bar like the Himal 3 Light LED Recessed Downlight lets you aim three narrow beams along the surface instead of drilling three separate holes.
Two more specs worth insisting on: a colour rendering index of 90 or above, so raw meat, herbs and veined stone look like themselves, and fire-rated, sealed fittings where the ceiling sits below a floor above. Your electrician will also need to think about insulation contact and airtightness in the ceiling void, and any new circuit work should be carried out by a qualified, registered electrician.
2700K, 3000K or 4000K in a Kitchen
The colour temperature you choose for kitchen recessed downlights is where most people over-correct. 4000K reads clean and clinical: excellent in a utility room, laundry or garage, unkind in a kitchen where you eat. It pushes warm timber grey, makes brass look green and takes the blush out of food and faces.
2700K is properly warm and flatters oak, walnut, honed limestone and unlacquered brass. In a large, pale kitchen it can tip slightly yellow against cool white marble. 3000K is the reliable middle: crisp enough for prep, warm enough to sit under at 9pm, and kind to both cool and warm stone. If you are mixing led recessed kitchen downlights with decorative fittings, match the temperatures across the room or the mismatch will bother you every evening. Dim-to-warm options that drift from 3000K toward 2200K as you dim are worth the premium in open-plan kitchens that double as dining rooms.
How Many Recessed Downlights Does a Kitchen Really Need?
Count zones, not square metres. How many kitchen recessed downlights a room needs depends on the work it has to cover: a 4m by 4m (roughly 13ft by 13ft) kitchen with two worktop runs, a sink and an island might need six to eight task and accent fittings, plus pendant lighting over the island. The same room lit as a grid often ends up with twelve, which is why the owner then fits a dimmer and runs it at 40 per cent forever.
For spacing, two rules of thumb keep you out of trouble. First, spacing between general fittings of roughly half the ceiling height works well: about 1.2m (4ft) apart on a 2.4m (8ft) ceiling. Second, keep fittings at least 700mm to 900mm (28in to 36in) away from any wall you do not intend to light, or you will get scalloping: a row of bright arcs on the plaster with dark gaps between them. If you want a wall lit, do it properly with a tight run of narrow-beam fittings at a consistent offset, or light it with wall lights instead.
Dimmer Compatibility: Leading Edge Versus Trailing Edge
Identical kitchen recessed downlights can behave completely differently depending on the dimmer behind them. Leading-edge dimmers were designed for old filament loads; they chop the mains waveform abruptly, which many LED drivers dislike. The symptoms are flicker at low levels, buzzing, a dead zone at the bottom of the dial and sometimes a refusal to strike at all. Trailing-edge dimmers switch more gently, run quieter and generally give a smoother low end with modern LED drivers.
Check the minimum and maximum load of the dimmer as well. Six low-wattage LED fittings can add up to less than the dimmer's minimum load, which produces the same flicker as an incompatible waveform. Where possible, ask for the manufacturer's tested dimmer list rather than guessing, and if you are running smart controls, confirm whether the fitting expects phase dimming, 0-10V or DALI before the walls close. The Lighting Industry Association publishes useful background on LED compatibility testing if you want to understand what those lists are based on.
Where Alabaster Fits Above the Downlights
Recessed lighting is infrastructure. It does the work and then it should vanish. The part of a kitchen people actually remember is the fitting at eye level: a pendant over the island, a pair of wall lights flanking a range, a stone table lamp on the end of a run of cabinetry for late-evening light. Alabaster does something that glass and metal cannot, because light travels a short way into the stone before it leaves, so the whole shade glows with visible veining rather than showing you a bright bulb. That soft, warm diffusion is a natural counterweight to the precision of kitchen recessed downlights.
Practically, this means you can be more restrained with your ceiling. Hang two or three alabaster pendants over the island, put them on their own dimmer circuit, and you can drop the ceiling layer to 20 per cent once the cooking is done. The room switches from workshop to dining space without touching a single fitting position. The alabaster lighting collection covers island pendants and chandeliers, and the wider lighting range is the place to look if you are specifying wall lights and table lamps alongside the recessed layer. Niori works exclusively in alabaster and natural stone, so the decorative layer is where we can genuinely help you; the recessed layer is where we would rather you got the spec right first.
The Kitchen Downlight Spec Checklist
- Lock the cabinetry layout, then mark lighting zones on the same drawing.
- Position task fittings above the front edge of worktops, plus sink and pantry positions.
- Decide the decorative fittings over the island before you place ceiling fittings around them.
- Choose beam angles per zone: narrow for task and accent, wide for fill.
- Pick one colour temperature for the whole room, 3000K unless you have a reason.
- Specify CRI 90 or above, and fire-rated sealed fittings where required.
- Choose trim colour to match ironmongery and ceiling finish.
- Keep fittings 700mm to 900mm (28in to 36in) off walls unless you are deliberately lighting them.
- Confirm dimmer type, load range and tested compatibility before ordering.
- Split circuits so task, ambient and decorative layers dim independently.
- Have all wiring and circuit work done by a qualified registered electrician.
- Ask for a tailored quote on the decorative fittings; budget depends on material, scale, engineering and finishing rather than a headline figure.
Get the zones right and you can use fewer recessed downlights for kitchen work than you expect, with better food, better stone and better faces under them. Then hang something worth looking at.