
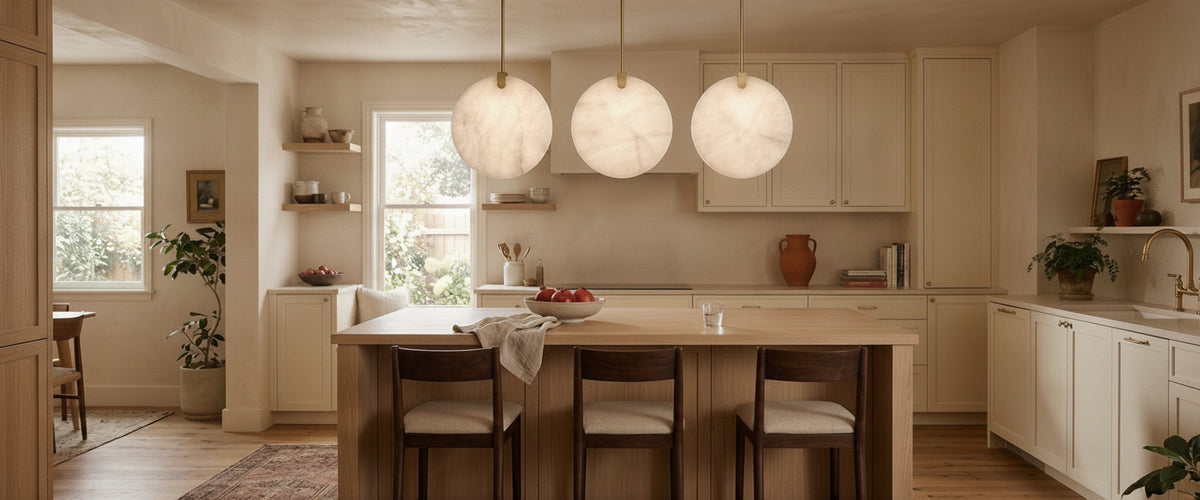

To design kitchen ceiling lighting properly, settle it at first fix: draw a reflected ceiling plan marking the island, hob, sink and extractor, split task and ambient light onto separate circuits, choose fixture types from your measured ceiling height, and add timber noggins wherever a heavy stone or metal fitting will hang. Cabinetry gets six months of drawings. The ceiling above it gets a five-minute conversation with the electrician on the morning the plasterboard arrives. That imbalance is why so many kitchens end with beautiful joinery lit by four badly placed downlights. Once the ceiling is boarded, skimmed and painted, every change becomes a compromise dressed up as a decision.

Key Takeaways
- Design kitchen ceiling lighting at first fix. Cable drops, joist positions and pattress points are near-impossible to move once the board is up.
- Separate task light from ambient light. The worktop needs to be lit for chopping; the room needs to be lit for living.
- Let real ceiling height choose the fixture type, not the photograph you saved. Below roughly 2.4m (8ft), semi-flush or flush wins.
- Finishes age differently over a hob. Unlacquered brass patinates, polished nickel shows every splash, matt black shows dust and grease film.
- Run 2700K and 4000K in the same room on separate circuits. They do different jobs and should never share a switch.
- Alabaster belongs in the ambient layer, set away from the steam plume, where its diffusion does the most work.

Why Kitchen Ceiling Design Fails After First Fix
Second fix is a fitting exercise, not a design exercise. By then the joists are covered, the ceiling void is sealed, and the only honest options left are the ones your cable positions allow. We had a client in a converted barn in Suffolk who wanted three pendants over a 2.8m (9ft 2in) island. The electrician had already run two drops, centred on the room rather than the island, because nobody had given him a furniture plan. The result was a choice between two pendants sitting slightly off-axis or a fresh chase through a freshly skimmed vaulted ceiling. They took the chase. It cost more than the pendants.
The fix is unglamorous: design kitchen ceiling layouts on paper before anyone lifts a drill. Produce a reflected ceiling plan, even a rough one drawn over the kitchen elevation, marking the island centre line, the hob, the sink, the door swings and the extractor position. Give a copy to the electrician and one to the kitchen fitter. Ask where the joists run before you promise yourself a pendant at a specific point, because a joist 100mm off your centre line will quietly move your light and nobody will mention it until it is fitted.
Task Zones and Ambient Zones Are Not the Same Job
A kitchen is two rooms wearing one ceiling. The worktop is a workshop: knives, heat, raw meat, reading small print on packaging. The rest of the space is social, and increasingly it is also the dining room and the place someone does homework at seven in the evening. Design kitchen ceiling lighting as two systems, not one.
Task zones want light that falls from slightly in front of you, so your own body does not cast a shadow over the board. That usually means directional downlights or track set 250mm to 350mm forward of the wall units, plus under-cabinet strips doing the close work. Ambient zones want the opposite: soft, wide, low-glare light with no hot spots. This is where translucent stone earns its place. Alabaster diffuses a lamp from the inside out, so you read a glowing surface rather than a bright source, and the honey and cream veining shifts as the dimmer moves. A stone pendant over a dining end or an island used mainly for sitting gives you atmosphere that no downlight can imitate.
Keep the two layers on separate circuits. A kitchen where one switch does everything is a kitchen that is either interrogation-bright or unusable. Three circuits is better: task, ambient, and a low-level layer such as plinth or shelf lighting for late evening.
Pendant, Flush, Semi-Flush or Track: Start With the Height You Actually Have
Fixture type is the one decision you cannot bluff. Design kitchen ceiling fittings around the height you measured this morning, not the height you remember or the one in the photograph.
Under 2.4m (8ft)
Flush and semi-flush fixtures only, unless the pendant sits over an island or table where nobody walks. A shallow alabaster disc or a semi-flush with a carved stone shade spreads light across the ceiling plane and makes a low room feel calmer than a grid of downlights ever will. Where the fitting sits directly over a walkway and nothing can drop into head height, a shallow disc such as the Zon White LED Flush Ceiling Light 45W 3000K, 40cm keeps the ceiling plane unbroken while still covering a good width of floor. Avoid anything with a long stem or a deep shade that clips sightlines across the room.
2.4m to 2.7m (8ft to 9ft)
The workable middle. Pendants over an island should leave roughly 75cm to 90cm (30in to 35in) between the worktop and the bottom of the shade, enough to see across the island while standing. Semi-flush fittings still read well over circulation space, and a slim track can carry the task layer without visual weight. Over a landing zone between the kitchen and a dining end, a multi-head form such as the Aetheron 3 Light Semi-Flush Ceiling Light spreads light wider than a single central fitting without dropping far enough to interrupt the room.
2.7m and above, including vaulted ceilings
Now you can use scale. A larger stone pendant, a linear trio, or a chandelier over a dining end all hold their own. Vaulted ceilings need a sloped-ceiling adaptor and an honest conversation about rod length before you order anything. Measure from the lowest point of the slope, not the ridge.
Whatever the height, look at the fixture from the doorway as well as from the sink. Most kitchens are seen from a threshold far more often than they are seen from the hob. If you are still weighing options, it helps to browse a full range of ceiling and pendant lights against your actual measured height before falling for a photograph shot in a room twice the size of yours.
How Brass, Nickel and Black Finishes Age Over a Hob
Grease is airborne. Even with a good extractor, a fine film settles on everything within about two metres of the hob, and it bonds harder each time the room heats up. Finishes respond differently, so when you design kitchen ceiling fittings above a cooking zone, finish choice is a maintenance decision as much as a visual one.
Unlacquered brass patinates, which is a feature rather than a fault, but it patinates unevenly near steam and fingerprints. If you want it even, expect to polish. Lacquered brass and antique brass hold their colour and hide the film longest, which is why we specify them most often for kitchen work. Polished nickel is beautiful and merciless: every splash shows within a day. Matt black looks sharp in photographs and collects a dull grey film in real life, most visible on the upper surfaces nobody wipes.
Natural stone sits differently again. Alabaster is a soft, porous gypsum stone, closer in character to the carved panels in medieval church work than to a glass shade, and it should never be cleaned with anything wet or chemical. The Victoria and Albert Museum holds alabaster carvings that have survived centuries precisely because they were kept dry and handled rarely. Applied to a kitchen, that means one rule: keep stone shades out of the direct steam plume above the hob, and dust them with a dry soft brush rather than a damp cloth. Marble and onyx are harder and more forgiving, but the same principle holds.
Why 2700K and 4000K Serve Different Purposes in the Same Kitchen
Colour temperature is the quickest way to make a well-planned ceiling feel wrong. A single 4000K setting makes an evening kitchen feel like a dispensary. A single 2700K setting makes prep work feel murky, and it flatters raw chicken in ways you do not want.
Split it. Run under-cabinet and worktop task light at 3000K to 4000K, where colour rendering on food and surfaces is honest and crisp. Run the ambient layer, including pendants and any stone fixtures, at 2700K on a good dimmer. Alabaster is particularly sensitive here; at 2700K the stone glows amber and the veining warms, while at 4000K the same shade can read slightly grey and lifeless. Specify a CRI of 90 or above throughout, which matters more in a kitchen than in any other room.
Check dimmer compatibility before you buy. Trailing-edge dimmers matched to the driver keep low-level light smooth; the wrong pairing gives you flicker, buzz, or a dead zone at the bottom of the dial. And all of this is work for a qualified electrician, not a weekend project. In the UK, kitchen circuits fall under notifiable work, so use a registered electrician and keep the certificate.
Four Kitchen Ceiling Mistakes a Second-Fix Electrician Cannot Undo
- Centring pendants on the room instead of the island. The eye reads the island edge, not the wall. Off-centre by 80mm is visible forever.
- One circuit for everything. Splitting later means lifting floorboards upstairs or chasing the ceiling again.
- Downlights in a grid. A symmetrical grid ignores where you actually stand and leaves the worktop shadowed by your own shoulders.
- No structural support above a heavy fixture. Stone and marble fittings need a noggin or a proper fixing point installed before boarding. Plasterboard fixings are not an answer.
How to Design Kitchen Ceiling Lighting: A Working Checklist
- Draw the island, hob, sink and table on a ceiling plan before any cable is run.
- Measure floor to ceiling at the lowest point, and note any slope or downstand.
- Confirm joist direction and extractor ducting routes with the builder.
- Decide your three layers: task, ambient, low-level. Assign a circuit to each.
- Set pendant drop heights against the finished worktop level, not the subfloor.
- Choose colour temperature per layer and confirm CRI 90+ across the room.
- Confirm dimmer type against driver specification.
- Add noggins or backing plates for any heavier stone or metal fixture.
- Keep porous stone shades clear of the steam plume and away from the hob.
- Book the electrician for a pre-board walkthrough, not just a fitting day.
An Industrial-Leaning Kitchen Ceiling Without the Warehouse Cliché
Industrial kitchen ceilings usually go wrong in the same way: too many black shades, too much exposed conduit, and a room that ends up feeling cold under artificial light. If you want to design kitchen ceiling lighting with an industrial edge, keep the structural honesty and soften the light source. Exposed track in dark bronze or graphite for the task layer, a run of deep shades over the island, and then one warm, diffused element to break the hardness. Where the ceiling is too low for track and the room still wants that darker metal language, a graphite semi-flush such as the Louvre 4 Light Semi-Flush Ceiling Light carries the same weight over circulation space without dropping into head height. That warm counterpoint is where a carved stone fixture does something metal cannot. Pair a graphite track with a pair of alabaster pendants over the dining end and the room reads industrial in structure and warm in atmosphere.
Niori works almost entirely in alabaster and natural stone for exactly that reason. The material behaves like a lampshade and a sculptural object at once, and it holds up next to steel, concrete and dark timber without competing with them. If you want to see how stone reads at different scales before fixing your plan, the alabaster lighting collection is a useful reference for shade depth and veining density.
Design kitchen ceiling lighting early, give the electrician a drawing rather than a description, and accept that the ceiling plan is a structural decision as much as a decorative one. Kitchens that feel right in the evening were planned before the plasterboard went up.