
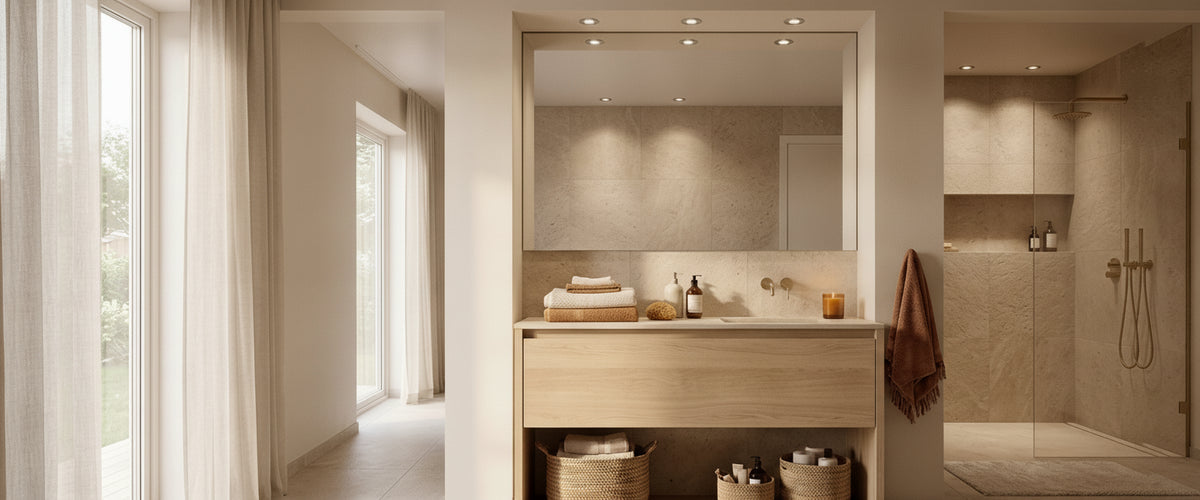

Walk into most newly refitted bathrooms and you can count the holes before you find the light switch. Nine of them, evenly spaced, all firing straight down onto gloss porcelain. The room is bright, and it is also flat, glary and slightly clinical. That ceiling was set out with a tape measure rather than a lighting plan, which is the single most common failure we see when clients ask us about bathroom recessed spotlights. Getting this right is less about the fitting you buy and more about where the water goes, how wide the beam spreads, and what happens when you dim it to twenty per cent at eleven at night.

Key Takeaways
Zone classification comes first. IP44 is the practical minimum for most bathroom positions, with higher protection required closer to the bath or shower.
A symmetrical grid is rarely the right answer. Light the tasks and the walls, not the middle of the floor.
3000K suits the majority of UK bathroom schemes. 4000K reads cold against warm stone, brass and timber.
Specify dimmable bathroom recessed spotlights and a compatible trailing-edge dimmer at the same time, never as an afterthought.
Bathroom lighting must be installed by a Part P qualified electrician. This is not a weekend job.
Alabaster and natural stone belong in a bathroom, but in wall lights and pendants away from direct spray, not in the ceiling.
Positions are decided by zone and by task, not by dividing the ceiling into equal squares.

Zone Classification Overrides Every Other Decision
Before beam angle, before colour temperature, before anything aesthetic, a bathroom is divided into zones based on how likely a fitting is to meet water. Zone 0 is inside the bath or shower tray itself. Zone 1 sits directly above it to a defined height. Zone 2 extends outward from the edges of the bath, shower and basin. Everything beyond that is outside the zones, though steam still travels and ceilings still get damp.
In practice, IP44 is the sensible default for bathroom recessed spotlights across the whole room, with a higher rating where the fitting sits above a shower or bath. Using an unrated downlight because it looked neater in the brochure is how people end up replacing a full set of recessed bathroom spotlights three winters later, corroded from the inside. Electrical Safety First publishes clear guidance on bathroom electrical safety worth reading before you sign off a plan, and your electrician will confirm the zone boundaries for your layout.
One extra consideration catches people out: fire rating and insulation contact. In a two-storey house, ceiling downlights usually need to be fire rated, and if there is loft insulation above them they must be rated for insulation coverage or fitted with a proper hood. Get this specified on the drawing, not discovered on site.
The Grid Above the Shower Mistake
Here is the scenario we see most often. Six identical bathroom spotlight fittings are set out in two neat rows, one of which lands squarely over the shower head. The user stands under it, their own shoulders block the beam, and the enclosure turns into a cave with a bright halo around it. Meanwhile the mirror gets lit from directly above, which drops shadow into the eye sockets and under the chin, the worst possible light for shaving or applying makeup.
The mirror wall is the one place where a ceiling fitting almost never wins. Light needs to arrive from the sides at roughly face height, so a slim surface-mounted unit such as the Ambience LED Wall Spotlight sits closer to the right design language than another hole in the plasterboard, particularly where the ceiling void is already congested with joists and extractor ducting.
Beam angle is where bathroom recessed spotlights earn their keep elsewhere. A narrow beam of roughly 24 to 38 degrees puts a defined pool of light exactly where you want it, which suits a shower enclosure or a niche. A wider beam of 60 degrees or more washes across a larger area and is far more forgiving in a small room with a low ceiling. Mixing the two deliberately produces a room that feels lit rather than floodlit.
Trim size matters more than buyers expect. A small aperture with a deep recessed baffle cuts glare when you are lying in the bath looking up, which is precisely when a cheap flush-lensed fitting becomes unbearable. Where the aim is a discreet accent over a niche rather than full output, something on the scale of the Velvet LED Square Spotlight 3W 3000K keeps the ceiling quiet and the light source well back from the eye. We once inherited a Surrey project where the joiner had cut the ceiling before the lighting plan arrived; the only workable fix was a wider beam with a recessed bezel to soften what was, geometrically, a bad set-out.
Colour Temperature: Why 3000K Earns Its Place
4000K is sold hard as the "clean" bathroom option and it is usually a mistake in a domestic setting. It pushes marble grey, drains warmth out of brushed brass, and makes skin tones look tired in the mirror. Specify 3000K for bathroom recessed spotlights in most UK schemes: warm enough to feel like a home, crisp enough to read as a bathroom rather than a bedroom.
Pay equal attention to colour rendering. Look for a CRI of 90 or above on any LED bathroom spotlights you are considering. Below that, the veining in stone flattens out and paint colours shift noticeably, which is a costly discovery after the decorator has finished. If you are specifying LED bathroom spotlights in the UK across several rooms, keep colour temperature and CRI consistent through the whole floor; mismatched whites between a landing and a bathroom door are instantly obvious.
Dimming on a Bathroom Circuit
A bathroom is used at 7am and at 11pm, and those two moments need very different light levels. Full output at midnight is genuinely unpleasant. Dimming solves it, but LED loads are fussy in a way that halogen never was.
Most LED bathroom ceiling spotlights are capacitive loads, which makes a trailing-edge dimmer the appropriate choice; leading-edge is generally wrong here. Trailing-edge dimming runs quieter, avoids the buzz and flicker that makes people assume a fitting is faulty, and usually dims lower before cutting out. Total load matters too: a handful of low-wattage bathroom recessed spotlights can fall below a dimmer's minimum load, causing flicker at the bottom of the range. Check the dimmer's compatibility list against the exact driver in your fitting, and confirm the switch sits outside the zones or is a pull-cord type.
How Many Bathroom Recessed Spotlights Do You Actually Need?
The honest answer is fewer than you think, and the question should be reframed. Count the jobs the light has to do, then place fittings to do those jobs.
Start with tasks. The mirror, the shower, the bath, the WC. Mirror lighting should come from the sides at roughly face height, not from a downlight overhead.
Add general fill. A useful rule of thumb is to space downlights at roughly half the ceiling height apart, and to keep them around 60 to 90cm off the walls so the beam grazes rather than scallops.
Subtract for hard surfaces. Tiles, mirrors, chrome and glass bounce light hard. A bathroom finished in polished stone needs meaningfully less output than the same room in matt plaster and timber.
Add a low-level or decorative layer. One warm accent at night removes the need to run the main circuit at all.
A compact cloakroom often needs two well-placed fittings plus a wall light. A family bathroom might want four to six bathroom recessed spotlights, zoned onto two circuits so the shower and the general light are controlled separately. Anything beyond that in a domestic room usually signals a plan compensating for poor placement with sheer quantity.
A restrained ceiling layout on a dimmer, with a stone wall light doing the evening work.
Where Alabaster and Natural Stone Belong in the Scheme
Recessed fittings do the functional work. They do not give a bathroom character, which is why the rooms we admire most pair a restrained layout of bathroom recessed spotlights with one or two pieces that actually glow. A pair of alabaster wall lights flanking the mirror throws soft, low-contrast light across the face and gives the room a centre of gravity after dark. Over a freestanding bath with generous ceiling height, a small stone pendant reads beautifully, provided it sits well outside the zones.
Material choice needs care. Alabaster is a form of gypsum, a soft mineral that is slightly soluble in water, as the Encyclopaedia Britannica entry on gypsum sets out. That does not rule it out of a bathroom; it rules it out of the splash zone and of being cleaned with anything wet. Keep stone pieces in well-ventilated positions, run an extractor that actually works, and dust with a dry soft cloth. Marble and onyx behave similarly and dislike acidic cleaners. To see how these materials handle light, the alabaster lighting collection is the clearest illustration of what translucent stone does that frosted glass cannot.
We shipped a pair of alabaster wall lights to a client converting a Georgian first-floor bathroom last year. The ceiling had four discreet bathroom recessed spotlights on a dimmer for practical mornings, and the stone pair on a separate switch for evenings. She described it afterwards as having two entirely different rooms depending on which switch she touched, which is exactly what a layered plan should produce.
A Buyer's Checklist for Bathroom Recessed Spotlights
Confirm the zone for every single fitting position before ordering anything.
Specify IP44 as the minimum, higher where required above bath or shower.
Check fire rating and insulation-contact rating for upstairs ceilings.
Choose 3000K and CRI 90+ for warm, accurate colour on stone and metal.
Mix beam angles rather than repeating one fitting across the whole ceiling.
Pick a deep-recessed trim or baffle to control glare from the bath.
Confirm the fitting is dimmable and pair it with a compatible trailing-edge dimmer.
Split circuits so task and ambient light can be used separately.
Plan a decorative layer, ideally alabaster or natural stone, sited away from spray.
Decide early between integrated LED modules and replaceable GU10 lamps.
That last point deserves a moment. Integrated units are slimmer and better sealed, and a fitting such as the Solix LED Recessed Downlight 7W shows the trade-off clearly: a neat bezel and a factory-sealed lens, but a fixed colour temperature for the life of the fitting, which is why the 4000K version belongs in a utility-leaning shower room rather than a warm stone bathroom. Replaceable lamps are easier to service and let you change colour temperature later. Neither is universally right; where access above the ceiling is difficult, serviceability beats a millimetre of bezel depth.
Installation: Use a Part P Qualified Electrician
Bathroom lighting in the UK falls under Part P of the Building Regulations, and notifiable work in a special location must be carried out or certified by a qualified electrician. Beyond the legal point there is a practical one: the IP rating of bathroom recessed spotlights depends on the gasket seating properly against the plasterboard, and a badly cut hole compromises that seal no matter what the box says. Ask for the certificate and keep it with your paperwork; it will matter when you sell the house.
Plan the decorative layer at the same time as the recessed layer so the wiring for both is in before plastering. Browsing the wider lighting range alongside your spotlight schedule tends to sharpen the plan, because the moment you know a stone wall light is going beside the mirror, you stop trying to make a downlight do a job it was never designed for.