
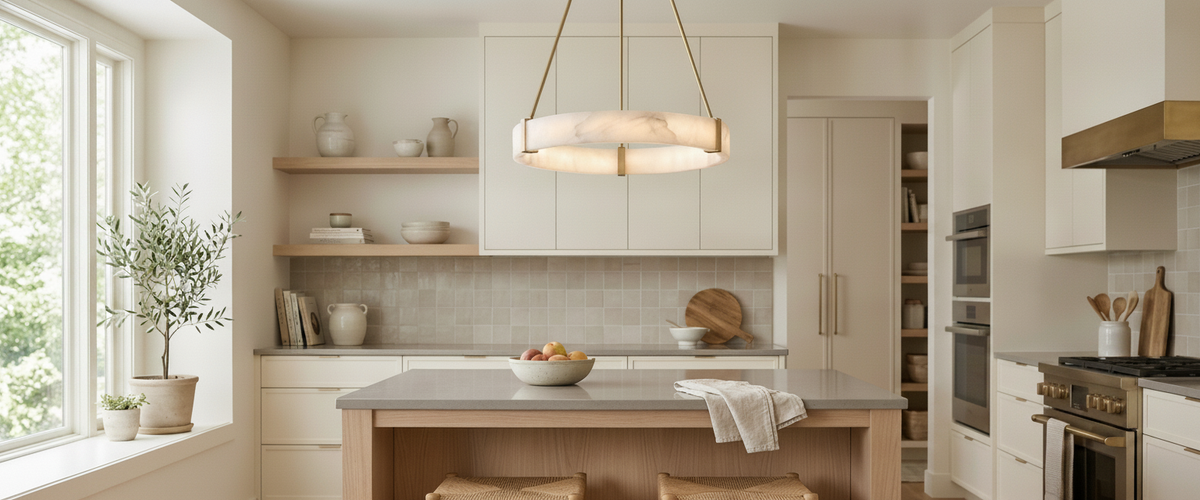

Getting led lighting kitchen schemes right comes down to colour, layers and driver quality, not raw brightness. Walk into a kitchen lit at 6000K and the tomatoes look grey, the oak worktop reads blue, and everyone's skin turns faintly clinical. That single mistake, choosing the wrong colour temperature, undoes more LED lighting kitchen schemes than any other. The rest is about layering the light and choosing a driver good enough to hold the whole thing steady, so the space works for cooking, eating and everything in between.
Layered LED lighting keeps a kitchen worktop bright and shadow-free.
At Niori we work in alabaster and natural stone, so we spend a lot of time thinking about how light behaves once it leaves the source. A kitchen is the hardest room to get right because it asks light to do two jobs at once: sharp, honest task light over the worktop, and a softer glow for the times you are pouring wine rather than chopping onions. Good LED lighting in a kitchen has to cover both without you thinking about it.

Key Takeaways Before You Buy
Colour temperature: aim for 2700K to 3000K in a home kitchen. Cooler than that and food looks unappetising.
Layer it: task, ambient and accent light each do a separate job. Skip one and the room feels flat or harsh.
Under-cabinet LED is the layer most people miss, and the one that transforms the worktop.
Driver quality decides flicker: cheap drivers strobe under dimmers. This is where corners get cut.
CRI 90+ for anywhere you prepare or plate food.

Colour Temperature First: Why the Wrong Kelvin Ruins Food and Worktops
Colour temperature, measured in Kelvin, is the single decision that shapes how your whole kitchen feels. It is the first thing to settle when you plan LED lighting for a kitchen. Warm white (2700K) reads golden and relaxed. Neutral white (3000K to 3500K) is crisp without turning cold. Cool white (4000K and above) belongs in a garage or a surgery, not over a dinner plate.
The trap is that showrooms and flat-pack suppliers often default to cool white because it looks bright and clean under fluorescent shop lighting. Take it home and your walnut cabinets look ashy, your marble worktop loses its warmth, and roast chicken looks like it came out of a hospital canteen. For most homes, 2700K to 3000K is the sweet spot for LED lighting in the kitchen. If you have a lot of grey stone and want the veining to stay honest, 3000K holds detail without going clinical. Where you specify your own light engines, a warm-white unit such as the 19W LED Module Light Engine Warm White keeps timber and stone reading true, whereas the equivalent cool-white module is better kept out of the food-facing areas. If you are refitting several rooms and want flexibility, a colour-selectable option like the 24W LED Module CCT Colour Selectable Light Engine lets you tune the same fixture room by room rather than committing to one Kelvin figure at the specifying stage. That flexibility is a smart hedge for any LED lighting kitchen project.
One caveat worth knowing: colour temperature and brightness are separate settings. Clients often ask us to make the kitchen "warmer", when what they actually want is to dim it. Warmth in perception comes partly from lower output, which is why a good dimming setup matters as much as the Kelvin number on the box.

The Three-Layer Plan Makers Assume You Already Understand
Professional lighting designers rarely rely on a single source. They build in three layers, and any LED lighting kitchen plan needs all of them.
Task, ambient and accent layers let a kitchen shift from morning prep to evening calm.
Task light is the honest, functional layer: under-cabinet LED over the worktop, focused downlights over the hob, and pendants over an island where you actually prep. This is the light that keeps knives away from fingers.
Ambient light fills the room and softens shadows. This is where a sculptural piece earns its place: an alabaster pendant or a stone ceiling light over the island casts a warm, diffused wash that no downlight can match. If you want to see how carved stone diffuses light rather than glaring, browse the alabaster lighting range and note how the glow spreads through the material instead of bouncing off it.
Accent light is the finishing layer: a strip inside glass-front cabinets, a low glow under a plinth, a wall light beside an open shelf. It adds depth and stops the room reading like a showroom display.
Get all three and the kitchen flexes from a working space at 7am to a warm, low-lit room at 9pm. Layered LED lighting in the kitchen is what makes it do that. The Chartered Institution of Building Services Engineers publishes guidance on layering and light levels for domestic and commercial spaces that is worth a look if you want the technical grounding behind this approach (cibse.org).
Under-Cabinet LED: the Quiet Workhorse Most Kitchens Skip
If you install one thing beyond your ceiling lights, make it under-cabinet LED. It is the part of LED lighting in a kitchen that pays off first. Overhead fixtures throw your own shadow straight onto the worktop when you lean in to chop or read a recipe. Under-cabinet light fills that shadow from the front, so the surface where you actually work is the best-lit part of the room.
You have two main options. LED strip is flexible, easy to run along a continuous line, and cheap to specify, which is exactly why people ask whether it is any good. It is, provided you house it correctly. A bare strip stuck to the underside of a cabinet gives you visible dots of light and glare reflected in a glossy worktop. Set the same strip inside an aluminium profile channel with a frosted diffuser and it becomes a clean, even line with no hotspots. Along a long worktop, a surface channel such as the 1m Surface LED Profile Channel Type C, Anodised gives you both the diffuser housing and a heatsink that extends the life of the LEDs. It is a small detail that lifts the whole LED lighting kitchen scheme.
The alternative is LED modules or pucks, small individual light engines spaced along the cabinet run. These suit shorter runs and give a more focused pool of light. Strip wins for a continuous line along a long worktop; modules win where you want light concentrated over specific zones. Either one is a solid choice for LED lighting kitchen worktops.
How to Install Under-Cabinet Kitchen Lighting
Plan the run before ordering, measuring the usable underside length of each cabinet minus any lip or trim.
Choose your housing: an aluminium surface profile channel with a diffuser for strip, or spaced modules for zoned light.
Mount the profile toward the front edge of the cabinet underside, not the back, so light falls on the worktop rather than the splashback.
Run the low-voltage cable back to a concealed LED driver sized to the total wattage, with headroom to spare.
Leave the mains connection and driver siting to a qualified electrician. Kitchens combine water and power, so this is not the place for guesswork.
To add LED lighting under existing kitchen cabinets without a full refit, self-adhesive profiles and a plug-in driver make the job far less invasive, though the final spur or fused connection should still be signed off by an electrician. It is the easiest LED lighting kitchen upgrade to retrofit.
Dimming and Driver Quality: Where Cheap LED Reveals Itself as Flicker
This is where the difference between good LED lighting in a kitchen and a cheap scheme becomes visible, sometimes literally. LED needs a driver to convert mains power, and a poor driver paired with the wrong dimmer produces flicker, buzz, or a stubborn refusal to dim below about 40 percent before it drops out entirely.
Two rules save most of the pain. First, match a trailing-edge dimmer to a dimmable LED driver; a lot of older dimmers are leading-edge and were built for filament bulbs, which is the usual cause of that mid-range strobe. Second, do not run a driver at its maximum rating. A 60W load on a 60W driver runs hot and ages fast, so size up. For a compact low-voltage run, a sealed unit like the 12V DC 15W LED Driver, IP67 tucks into a cabinet void and copes with the damp knocks a kitchen throws at it, provided you keep the load comfortably under its rating. Good drivers are the backbone of any LED lighting kitchen worth the money.
Flicker is not only annoying. Some people report headaches and eye strain from lighting that pulses faster than the eye consciously registers, which is worth taking seriously in a room where you spend real time with knives. Spend on the driver and the dimmer; it is the least glamorous part of any LED lighting kitchen budget and the one you will notice every single evening.
CRI, Glare and the Reflections a Glossy Kitchen Throws Back at You
Colour Rendering Index (CRI) measures how faithfully a light shows colour against natural daylight, on a scale to 100. Cheap LED often sits around CRI 80, which is fine for a hallway and poor for a worktop where you are judging whether meat is cooked or a sauce has caught. Specify CRI 90 or above for any task area, and treat it as a baseline for LED lighting in a kitchen. The jump is obvious the moment fresh produce is on the counter.
Glare is the second enemy, and gloss cabinetry makes it worse. A polished worktop, lacquered doors and a glass splashback all behave like mirrors, so a bright, unshielded source reflects straight back into your eyes. This is another argument for diffused sources and recessed profiles rather than bare LED. It is also where natural stone earns its keep: an alabaster or onyx shade softens the source into a glow, so the reflection in a glossy surface is a gentle wash rather than a hard bright dot. If you are weighing up pendants and ceiling fixtures for the island, the wider lighting collection shows how stone and glass diffusers handle this alongside your LED lighting kitchen layers.
Red Flags to Raise With Your Installer Before Anything Is Wired
"We'll just use cool white, it's brighter." Push back. Ask for 2700K to 3000K in the living and dining zones at the very least.
No dimming on the task or island circuit. A kitchen that only has one brightness is a kitchen you will find harsh by evening.
Bare LED strip with no profile or diffuser. You will see dots and glare within a week of moving in.
Undersized or non-dimmable drivers. Confirm the driver is dimmable and rated above the actual load, which is the backbone of any LED lighting kitchen scheme.
CRI not specified. If nobody can tell you the CRI of the worktop lighting, assume it is 80 and ask for better.
Every circuit ganged together. You want task, ambient and accent on separate switches so you can use one without the others.
Get those settled on paper and the wiring stage becomes straightforward. A kitchen is a room you use in every mood and at every hour, and thoughtful LED lighting in a kitchen, backed by a good driver and one or two pieces that treat light as something to shape rather than simply switch on, is what makes it feel calm rather than clinical. Done well, LED lighting for the kitchen carries the room from prep to dinner without a single harsh moment. That is the whole point of a considered LED lighting kitchen. If you want a starting point for the decorative layer, our homepage is the easiest way into the full range of alabaster and natural-stone fixtures.