
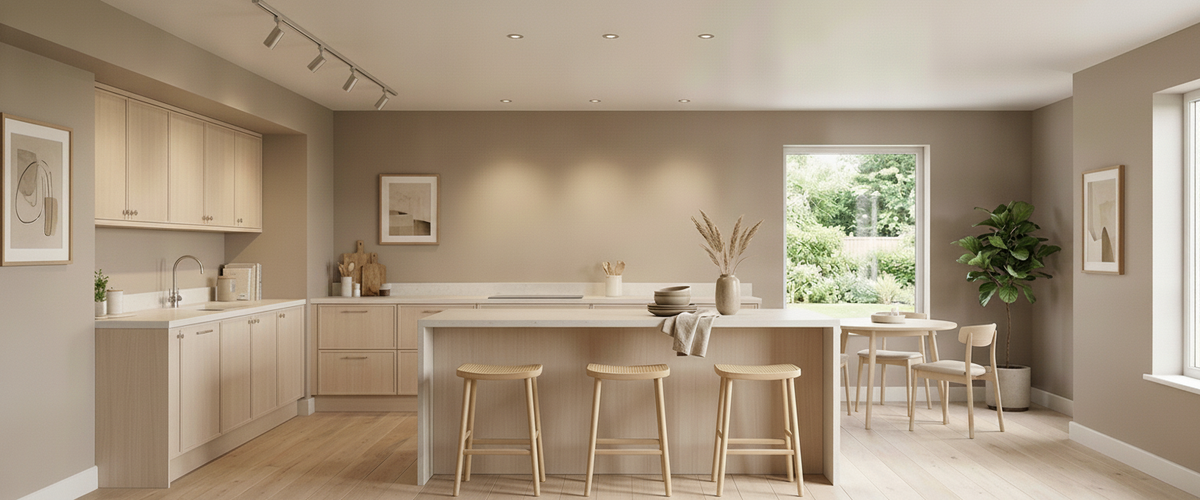

Kitchen lighting track lighting solves the one problem downlights never can: the shadow you cast on your own worktop. Stand at a counter lit by a neat grid of recessed downlights and you will notice something annoying. Your own head throws a shadow onto the exact spot where the knife meets the board, because ceiling downlights sit behind you and your body blocks the light. This is the quiet failure behind most schemes, and it is why kitchen lighting track lighting keeps earning its place in serious kitchen design. Track lets you put light where the work happens, then move it when the layout changes.
Alabaster and natural stone are the heart of what we make at Niori, but a good kitchen almost always runs on layers. Soft diffused stone light for ambience, then something directional and adjustable for the tasks. A kitchen lighting track lighting system is the workhorse in that second layer, and getting it right is mostly about geometry rather than gadgets.
Track run parallel to the worktop, offset toward the counter edge.

Key Takeaways
Run the track parallel to the worktop, roughly over the counter edge, not stranded down the centre of the ceiling.
Aim each head at the front edge of the counter so light lands in front of you, not behind your shoulders.
Use tighter beam angles for focused pools and wider ones for an even wash across the run.
Choose warm, dimmable heads (around 2700K to 3000K) so the room shifts from prep to dinner.
Islands are the classic over-lit mistake; fewer heads on a dimmer usually reads better.

What Track Lighting Solves That Downlights Can't
Fixed downlights commit you to a plan on the day the ceiling is plastered. Move the hob, add an island, change where you actually stand, and those holes are still exactly where they were. Kitchen lighting track lighting keeps the decision open. You add, remove, and re-aim heads along the run whenever the kitchen changes, which matters more than people expect over a ten-year kitchen.
The bigger win is control over direction. A downlight fires straight down; a track head tilts and rotates, so you can push light onto a vertical surface, a splashback, open shelving, or the front lip of a worktop where prep really happens. That adjustability is why track lighting for kitchens shows up so often in retail and gallery schemes, where the whole point is aiming light at a chosen surface. Bring that logic home and the kitchen stops fighting you. You can browse the directional and adjustable options across our lighting collection to see how spotlights and linear heads differ in reach.

Running the Track: Parallel to the Worktop, Not Down the Middle
The single most common error with kitchen lighting track lighting is a run straight down the centreline of the ceiling because it looks tidy on a plan. Centred track lights the floor beautifully and leaves your worktop in shadow, because you are standing between the light and the counter. Instead, run the rail parallel to the worktop and offset toward it, so the heads sit roughly above the front edge of the counter or slightly in front of it.
As a working rule, position the rail around 10 to 16 inches (25 to 40 cm) out from the wall cabinets, over the leading edge of the worktop. That puts the light source in front of your body when you face the counter, so your shoulders no longer block it. Where you want a single continuous line above a long run rather than a scatter of separate heads, a fixed linear fitting such as the Display UGR Linear Track Light 106.5cm gives you a clean, low-glare wash along the counter edge. For a galley kitchen you may want two parallel runs, one over each worktop. For an L-shaped layout, an L or two separate rails following each leg keeps every working surface covered. These simple kitchen track lighting ideas cover most real-world layouts.
Warm, dimmable heads keep an island from feeling over-lit.
Aiming Heads to Kill the Shadow You Cook In
Once the rail is in the right place, aiming does the rest. Good kitchen lighting track lighting means tilting each head so the beam lands on the front edge of the counter and the face of the cabinets below eye level, not straight down onto the back of the worktop. You are trying to light the space between your hands and the counter edge, which is precisely where a downlight leaves you in the dark.
A practical test: stand where you actually chop, reach forward as if using a board, and check that your hand is lit from the front rather than casting a shadow toward you. If it does, nudge the head a few degrees outward. This five-minute adjustment is the difference between a kitchen that photographs well and one that works at 7pm on a Tuesday. We have re-aimed track lighting heads in finished kitchens where the client swore the electrician had installed the wrong fittings; the fittings were fine, the angle was wrong.
Beam Angle and Spacing: Tight Pools or an Even Wash
Beam angle decides the character of the light. A narrow beam (around 15 to 24 degrees) throws a defined pool, good for accenting a specific spot or a feature surface. A wider beam (36 degrees and up) spreads a softer, more even wash, which suits general worktop lighting where you do not want scalloped bright and dark patches.
Spacing follows from that. For an even wash along a run of kitchen lighting track lighting, space heads so their beams overlap slightly at counter height, typically every 24 to 36 inches (60 to 90 cm) depending on ceiling height and beam width. Higher ceilings need either wider beams or closer spacing to avoid gaps. Where the layout calls for pinpoint accents on shelving or a splashback rather than a broad wash, a compact tiltable spot such as the Display Accent Track Light 26W 3000K is closer to the right design language for those focused pools. Mixing a couple of narrower accent heads with wider heads for the wash gives you flexibility, and the system lets you tune this by eye once everything is live rather than guessing on paper. For colour rendering, aim for a CRI of 90 or above so food, produce, and finishes look true; guidance from the Chartered Institution of Building Services Engineers is a sensible reference point when you are specifying lux levels and quality for domestic task areas.
Warm, Dimmable Heads for the Shift From Prep to Dinner
A kitchen has two jobs and they need two moods. Chopping needs crisp, bright, slightly cooler light; sitting down to eat wants something warmer and lower. The fix is warm-toned, dimmable kitchen lighting track lighting. We generally steer clients toward 2700K to 3000K for a home kitchen, which stays inviting rather than clinical, and pair the circuit with a dimmer so you can drop the level for the evening.
Make sure the driver or bulb is genuinely dimmable and matched to the dimmer type, or you will get flicker and buzz at low levels. A dimmable warm run over the worktops, paired with the softer glow of an alabaster pendant or two over the island, gives you both registers. The stone diffuses light with a gentle amber warmth that no bare spotlight can copy, which is why we so often specify our alabaster lighting as the atmosphere layer and keep track for the task layer. Because this is mains work, hand the wiring, dimmer compatibility, and circuit loading to a qualified electrician rather than treating it as a weekend job.
The Over-Lit Island Mistake and How to Pull It Back
Islands tempt people into overkill. A full run of bright heads plus pendants plus downlights turns the island into an operating table. The trick is to let one element lead. If you want sculptural pendants over the island, let those own the space and keep track lighting off the island itself, using it only for the perimeter worktops. If the island is your main prep zone, use a short, restrained run of kitchen lighting track lighting with warm dimmable heads and skip the decorative pendants, or hang low-output ones purely for looks.
Whatever you choose, put the island on its own dimmer. Being able to knock the island back to a low glow while the perimeter stays bright is what makes an open-plan kitchen feel like a room in the evening rather than a workshop that never clocks off.
A Quick Buyer's Checklist
Map where you actually stand and work before deciding where the rail goes.
Run it parallel to worktops, offset toward the counter edge.
Choose CRI 90+ heads at 2700K to 3000K for a home kitchen.
Match narrow beams for accents with wider beams for wash lighting.
Put the task rail and any island lighting on separate dimmers.
Confirm dimmer and driver compatibility to avoid flicker.
Book a qualified electrician for the install and circuit design.
Where Niori Fits
Niori is an alabaster and natural-stone lighting brand, and we ship worldwide. In a kitchen we treat the track lighting as the practical spine of the task layer and reserve stone pieces (pendants, wall lights, and the odd table lamp on a dresser or shelf) for the warmth and character. Handled this way, kitchen lighting track lighting gives you a kitchen that is genuinely usable at the counter and quietly beautiful once the knives are away.