
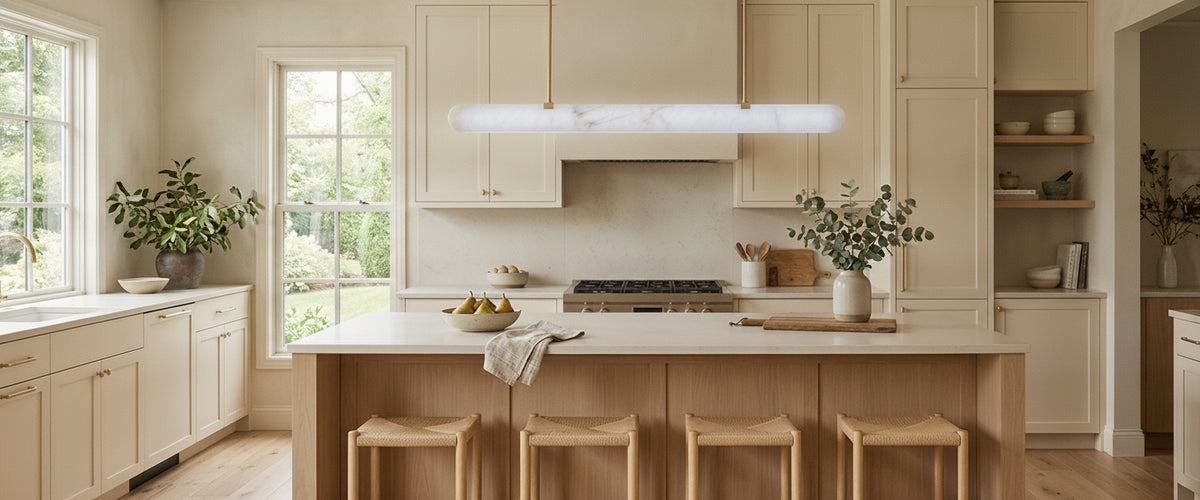

Brass photographs beautifully in a showroom. Then it moves into a kitchen, where a pan of pasta throws steam at the ceiling every other evening, the extractor runs hard twice a day, and a fine, invisible film of cooking oil settles on everything above the hob. Brass kitchen ceiling lights have to survive all of that and still look deliberate. Type brass ceiling light kitchen into a search bar and you get hundreds of near-identical discs, which is half the problem. Most of the disappointment we hear about brass kitchen ceiling lights comes down to three decisions made too fast: the wrong finish, a fitting one size too small, and a single central light asked to do four jobs at once.

Key Takeaways
Finish matters more than form in a kitchen. Unlacquered brass kitchen ceiling lights will patinate faster here than anywhere else in the house; satin and antique finishes hide fingerprints and grease film better.
Size up, not down. A flush disc that looks generous on the studio floor usually reads small once it is 2.4m in the air above a 3m island.
Zone before you shop. Prep, island, sink and circulation want different light. One central fitting rarely covers all four.
Pair brass kitchen ceiling lights with a diffuser you can live with. Alabaster and natural stone soften the glare that polished metal alone tends to throw back at you.
Confirm the specification early. Dimming protocol, driver location, mounting plate, IP rating and ceiling build-up all need answering before a qualified electrician books the day.

Why Brass Behaves Differently in a Kitchen
Brass is a copper alloy, and copper alloys react. In a hallway or a sitting room that reaction is slow and mostly driven by handling. In a kitchen you add heat, humidity, airborne fats and cleaning products, which speeds everything up and makes it uneven, so brass kitchen ceiling lights age at different rates across a single ceiling. The area directly above a hob or a kettle will change color before the corner above the fridge does. The Copper Development Association's guidance on cleaning copper, brass and bronze is a useful reality check on how quickly surface films build up and what removes them without damaging the metal.
That is not a reason to avoid the material. It is a reason to decide, up front, whether you want brass kitchen ceiling lights that stay consistent or ones that develop character. Both are legitimate. Problems start when a client expects a mirror finish forever and specifies an unlacquered fitting directly over an induction hob.
The second difference is optical. Kitchens are full of hard, reflective surfaces: quartz, granite, gloss cabinet fronts, glazed tile, stainless appliances. Polished brass in that context bounces light in every direction and can create hot spots you notice while chopping. Softer metal finishes, or brass kitchen ceiling lights paired with a stone diffuser, calm the whole room down.
Unlacquered, Antique and Satin Brass: How Each Finish Copes
Unlacquered (Living) Brass
Raw metal with no protective coating. It darkens, warms and eventually develops a mottled patina, faster near steam. If you like the look of a well-used copper pan, this is the finish for you. Expect unlacquered brass kitchen ceiling lights to age unevenly above the cooking zone, and accept that a polish returns them to bright for a while and then the clock restarts.
Antique or Aged Brass
Chemically darkened and usually sealed, so it starts where unlacquered brass ends up. Antique brass kitchen ceiling lights are the most forgiving option in a busy family kitchen because grease film and fingerprints barely register on a mid-tone, textured surface. The finish also sits comfortably with older properties, timber and darker cabinetry.
Satin and Brushed Brass
The workhorse. A directional grain scatters reflections, so a brushed brass ceiling light keeps a kitchen scheme crisp without the glare of polished metal. Lacquered satin brass holds its color with routine wiping, which is why it dominates specifications for open-plan kitchens where the fitting is on show from the sofa as well as the sink. For that grained, low-reflectance surface rather than a mirror, a fitting such as the Gemini Brushed Brass Flush Ceiling Light, 61cm speaks the right design language for a working kitchen.
Polished and Lacquered Brass
The most decorative and the least forgiving. Polished brass kitchen ceiling lights show every splash. They work best away from the hob, above a dining end or in a scullery, where they can be a deliberate jewelry moment rather than a maintenance chore.
Sizing Brass Kitchen Ceiling Lights for Your Ceiling Height
The single most common mistake we see with brass kitchen ceiling lights is a fitting that looks squat. Kitchen ceiling lights, brass ones included, need reading against ceiling height and the surface below, so diameter and drop are relative measures rather than fixed ones. A product photo will not tell you which way to go.
For flush and semi-flush discs, work from the room proportions. A compact galley with a 2.4m (roughly 8ft) ceiling wants a modest diameter kept tight to the plaster, in the region of the Oracle Brass Slim Flush Ceiling Light 3000K, 50cm; a large open-plan kitchen with a 3m ceiling can carry a disc close to a meter across without looking heavy, which is where the 90cm version of the same fitting starts to make sense. If a fitting is under-scaled it reads as a builder's afterthought no matter how good the metal is.
For pendants over an island, the working rule is to keep the base of the fitting roughly 75cm to 90cm (about 30 to 35 inches) above the worktop, then adjust for eye lines. If people will be sitting on stools facing each other across the island, raise it until you can see across without a lamp in your face. Where ceilings are higher, lengthen the drop rather than raising the fitting; a pendant floating a meter below a lofty ceiling looks stranded.
For multiple pendants, three small ones over a 3m island usually beat two medium ones, but the spacing matters more than the count. Keep the outer fittings inboard of the island ends so the arrangement reads as a group. Our own lighting collection spans flush ceiling fittings, pendants and wall lights, which makes it easier to compare drop lengths and diameters on brass kitchen ceiling lights against a plan before committing.
One Fitting or Zoned Layers? Read the Plan First
Print the kitchen plan and mark four things: where you chop, where you wash, where you eat, and where you walk. Then ask what a single central fitting can honestly cover.
In a compact kitchen, one well-chosen flush brass ceiling light plus under-cabinet task strips is often the correct answer. It keeps the ceiling calm, and the fitting becomes the one piece of jewelry in the room.
Open-plan spaces need layers. A typical scheme runs: brass kitchen ceiling lights over the island for the social centre, discreet downlights or a flush fitting on the circulation route, under-cabinet lighting for prep, and something warmer and lower over the dining end. A kitchen is a task space and wants more light on the worktop than a living room does; CIBSE's lighting guidance is a sensible reference point if you are working with a designer on a larger project. Put each layer on its own circuit. A kitchen that can drop to island pendants alone at 10pm is a far nicer room than one with a single bright switch.
One recent project makes the point: a Victorian terrace conversion where the client wanted a single large brass kitchen ceiling light centered on the room. The plan showed the extractor hood sitting almost dead centre. We moved the feature fitting over the dining end, ran two smaller flush discs along the working run, and the kitchen suddenly made sense. Read the plan, not the ceiling rose you inherited.
Pairing Brass with Cabinetry, Stone and Tile
Brass is warm. Its job is to relieve cool surfaces, not to compete with them.
Against deep green, navy or olive cabinetry, brass kitchen ceiling lights read classic and need no help. Against pale gray or white, they can look isolated unless the metal is echoed somewhere else in the room: handles, tap, a shelf bracket. Two or three touchpoints are enough. Any more and the kitchen starts to feel like a hardware showroom.
Stone worktops set the temperature. Warm-veined marble and travertine sit naturally with antique brass. Cool gray quartz and honed granite are better with satin brass, which has less orange in it. If your splashback is a strongly patterned tile, keep the fitting simple; a plain brass ring with an alabaster or opal diffuser gives the eye somewhere to rest.
This is where alabaster earns its keep. As an alabaster and natural-stone lighting brand, we spend most of our time on how a material transmits light rather than how it looks switched off, and alabaster does something metal and glass cannot: it glows from within, softly and unevenly, with the veining faintly visible. The brass kitchen ceiling lights people keep longest tend to combine a metal frame with a stone diffuser, giving the accent without the glare, which matters in a room full of hard reflective surfaces. If you are weighing that option, the alabaster lighting range shows how the stone changes character between flush fittings and pendants.
Bulbs, Colour Temperature and Dimming
Color temperature: 2700K for a kitchen that doubles as a living space, 3000K where prep and cooking dominate. Keep every fitting in the room on the same figure. Mixed temperatures across a ceiling are obvious and hard to unsee.
Color rendering: specify CRI 90 or above. Food, timber and stone all look flat under poor rendering, and brass kitchen ceiling lights can read slightly green under cheap LEDs.
Dimming: confirm the dimming protocol before you buy the dimmer. Mains-dimmable integrated LED fittings generally want a trailing-edge dimmer; separate driver systems may need 1-10V or DALI. Get this wrong and you will hear buzzing over your extractor.
Warm dim: worth considering over a dining end, where light that drops towards candle warmth as it dims flatters both the food and the stone.
Replaceable lamps: ask whether the light source is user-replaceable. Integrated LED is neat, but it changes the long-term ownership picture.
Specification Checklist Before Installation
Fixing and weight. Confirm the mounting plate type and the weight of your brass kitchen ceiling lights against the ceiling build-up. Plasterboard between joists needs noggins or a proper fixing kit.
Ceiling void. Check there is enough depth for the driver and cabling, especially in a converted flat with a shallow void.
Drop adjustability. Ask whether pendant rods or cables can be shortened on site and by whom.
Zone and IP rating. Fittings near a sink or in a utility area may need a higher ingress rating. Your electrician will confirm against current wiring regulations.
Heat above a hob. Nothing decorative should sit directly in an extractor's plume unless it is rated for it.
Switching plan. Decide circuits and dimmer positions before first fix, not after the plaster is on.
Qualified installation. All mains work should be carried out by a qualified electrician who can certify it.
Spares and finish batch. Note the finish reference so a later addition matches.
Caring for Brass and Stone Fittings
Little and often beats an annual deep clean. Wipe lacquered brass kitchen ceiling lights with a barely damp microfibre cloth and dry immediately; skip ammonia-based glass sprays and anything abrasive, both of which cut through lacquer. For unlacquered brass, decide whether you are polishing or patinating and stay consistent. Alabaster and marble need less than people expect: dry dusting, no soaking, no solvent cleaners, and never a spray applied directly to the stone, which can wick into the surface and stain. Switch the fitting off and let it cool before touching any diffuser.
What It Costs and What to Ask For
Budget for brass kitchen ceiling lights depends on scale, the quality and thickness of the metal, whether the finish is plated or solid, the complexity of the engineering, any hand-worked stone components, and the installation and finishing on site. A hand-selected alabaster disc and a machine-pressed metal shade sit in very different places for good reason. Rather than working from a guessed figure, send the plan, ceiling heights and finishes across and ask for a tailored quote; you can start from the Niori homepage to see the range and formats before you narrow the specification.
Get the finish, the scale and the layering right, and brass kitchen ceiling lights stop being a trend purchase and start being the thing that makes the room feel finished. Get them wrong and you will notice every time you walk in.