
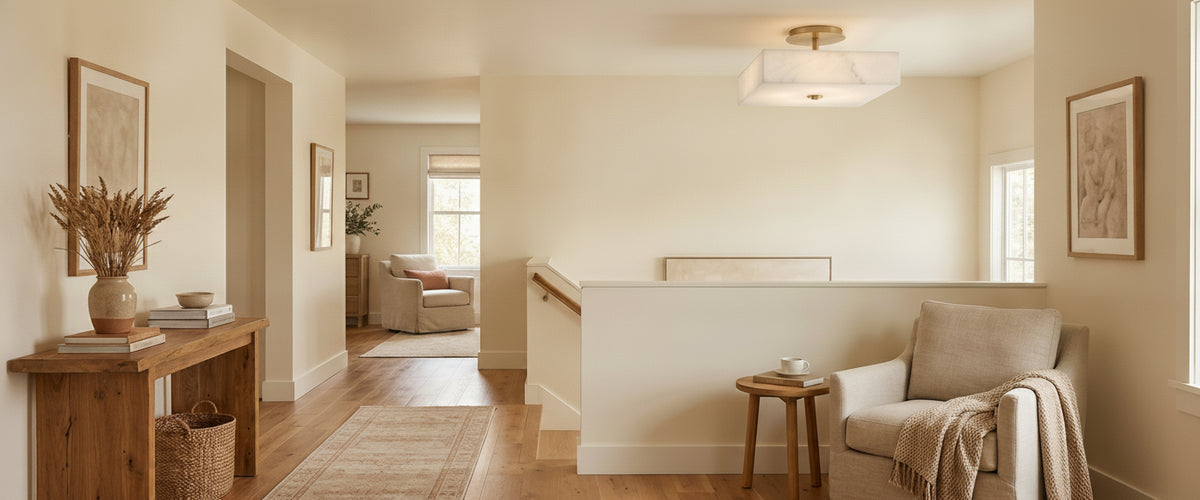

Most LED flush mount regrets start the same way: someone picks a fixture from a photograph, checks that the diameter fits, and hits buy. Six weeks later the ceiling has a cold gray disc on it that buzzes at 40% on the dimmer and makes the walnut floor look like laminate.
An LED flush mount sits closer to the ceiling than any other fixture type, which means it has nowhere to hide. There is no drop, no cord, no sculptural silhouette to distract from a flat plastic lens. What you see is a lit surface, so the material of that surface and the electronics behind it decide almost everything. At Niori we work mostly in alabaster and natural stone, and the difference between a stone diffuser and an acrylic one is the difference between a ceiling that glows and a ceiling that shines a flashlight at you.

Quick Answer: What to Check Before You Buy an LED Flush Mount
- Diffuser material. Alabaster, onyx and thick opal glass scatter light through the body of the material. Thin acrylic scatters it at the surface and looks flat.
- Driver quality and location. Ask whether the driver is integral or remote, and whether it is replaceable.
- Color temperature. 2700K for bedrooms and living rooms, 3000K for kitchens, entries and bathrooms.
- CRI 90 or higher, with a good R9 value if you have red or warm timber tones in the room.
- Dimming compatibility. Confirm the protocol (TRIAC, ELV, 0-10V) and the minimum load before you order the dimmer.
- Ceiling height. Under about 8 ft (2.4 m), stay flush. Between 8 and 10 ft (2.4 to 3 m), a semi-flush usually reads better.
- Weight and fixing. Stone is heavy. The junction box and the installer both need to know that in advance.

Why the LED Driver and Diffuser Matter More Than the Diameter on the Box
The number on the listing that buyers fixate on is width. The numbers that determine whether you like the light are wattage per square inch of diffuser, and the quality of the driver pushing current into the boards.
Pack too many diodes behind too small a surface and you get hotspots: bright coins of light visible through the diffuser, with dimmer valleys between them. This is the single most common flaw in a cheap LED flush mount. A dense array behind a translucent stone shade, spaced properly and set back far enough, gives you a single even field of light instead. Alabaster helps enormously here because light travels a short distance inside the stone before it exits, which softens edges that acrylic leaves sharp.
Drivers deserve equal attention. A poor driver is where flicker, hum and premature failure come from, and in an integrated LED flush mount it is often the first component to die while the diodes are still perfectly healthy. Ask three things: is the driver accessible without dismantling the whole fitting, is it a standard replaceable part, and what dimming protocol does it use. A studio-built fixture with a serviceable driver is a twenty-year purchase. A sealed unit with a potted driver is a disposable one.
Color Temperature and CRI: The Numbers Between a Warm Glow and a Clinical Wash
Color temperature is the setting people notice immediately and describe badly. 2700K is the warm, slightly amber light most Americans associate with a good living room. 3000K is cleaner and crisper, which suits kitchens, entry halls and bathrooms where you want surfaces to look bright rather than cozy. 4000K belongs in a garage.
Alabaster shifts this slightly. The stone carries its own warmth, so a 3000K source read through a honey-toned shade lands closer to what a 2700K bare lamp looks like. We had a client in Marin County order two semi-flush pieces for a hallway, worried that 3000K would feel too clinical next to their plaster walls. Once installed, the stone pulled the temperature down visually and they kept both. If you are specifying an LED flush mount with a stone diffuser, err a step cooler than you would with glass.
Color rendering matters more than most buyers expect. CRI describes how faithfully a light source shows color compared with a reference, and the Illuminating Engineering Society has spent years pushing the industry toward better metrics because a single CRI figure hides weaknesses, particularly in deep reds. Look for CRI 90+, and if the product sheet lists R9, look for a value above 50. In practice this is the difference between terracotta reading as terracotta and reading as dusty brown.
Slim Flush versus Semi-Flush: The Ceiling Height Bracket Where Each Earns Its Place
A true flush mount sits tight against the plaster with no visible gap. A semi-flush hangs on a short stem, usually a few inches, which lets light spill upward and wash the ceiling. That upward spill is why semi-flush fixtures make rooms feel taller, and why they are worth the extra drop whenever you can afford it.
The bracket works roughly like this. Below 8 ft (2.4 m), especially in hallways, closets and basement rooms, choose a fully flush profile and keep it shallow. From 8 to 9 ft (2.4 to 2.7 m), a semi-flush with a modest stem is usually the better-looking choice in bedrooms, dining rooms and living spaces. Where the room needs a soft diffused glow rather than a hard downlight, a stone piece such as the Orbis Medium LED Alabaster Semi-Flush Ceiling Light in Brushed Brass is closer to the right design language than a slim acrylic disc. Above 9 ft, you are into pendant and chandelier territory, though a large semi-flush still works well in a stairwell landing where a hanging fixture would be a hazard.
One clearance rule saves grief: keep at least 7 ft (2.1 m) between the floor and the bottom of any fixture people walk under. In an entry where the door swings, measure the door arc too. We have shipped replacement pieces to more than one Brooklyn brownstone where a beautiful semi-flush met the top of a bedroom door on its first swing.
Dimming an LED Flush Mount: Traps to Confirm Before You Commit
This is where good fixtures get blamed for bad wiring. Integrated LED fixtures dim through their driver, not through the bulb, so the dimmer on your wall has to speak the same language as the driver in the ceiling.
- Confirm the protocol. Leading-edge (TRIAC) dimmers and trailing-edge (ELV) dimmers are not interchangeable. 0-10V and DALI are separate systems again and need an extra control wire pulled during first fix.
- Check minimum load. Many older dimmers need 40W or more to function. A 12W LED flush mount on its own will flicker or refuse to start. On a US 120V circuit this trips people up constantly.
- Ask about dim-to-warm. Standard LEDs stay the same color as they dim, which can feel sterile at low levels. Dim-to-warm drivers drop toward 2200K as they fade, mimicking an incandescent lamp. On alabaster this is genuinely lovely.
- Test before the ceiling closes. If you are mid-renovation, bench-test the fixture with the specified dimmer before drywall goes up.
- Use a licensed electrician. Anything involving mains wiring, junction boxes or fixture weight ratings should be signed off by a qualified professional, not improvised on a stepladder.
The Scale Mistakes Most Buyers Make and the Dimensions That Actually Work
Undersizing is epidemic. A 12 in fixture that looked generous on screen disappears on a real ceiling.
The useful starting rule: add the room's length and width in feet, then treat that number as the fixture diameter in inches. A 12 by 14 ft bedroom suggests roughly a 26 in fixture. Adjust down if you have several other light sources, and up if the LED flush mount is doing all the work. In a hallway, size to the width rather than the length, and space multiple smaller fixtures at intervals of about one and a half times the ceiling height instead of hanging one big one in the middle. Where the ceiling carries the whole scheme in a wide open-plan room, a 60 cm plate like the Zon White LED Flush Ceiling Light 90W covers ground that two undersized discs never will.
Weight is the other overlooked dimension. A carved alabaster shade is substantially heavier than a glass one of the same size, and a large stone semi-flush can reach a weight that a standard pancake box will not carry. Tell your electrician the fixture weight before installation day, and expect a fan-rated box or a brace between joists on the larger pieces. If you want to compare shade depths and profiles across sizes, the alabaster lighting range is the easiest place to see how stone thickness changes the glow at each scale.
Installing, Changing and Removing an LED Flush Mount
The mechanics are simple once you know what you are looking at, but the order matters.
- Kill power at the breaker, not just the wall switch, and verify with a non-contact tester.
- Remove the diffuser or shade first. On stone, support the full weight with both hands; alabaster chips at the rim if it swings on one fixing.
- Unscrew the canopy from the mounting bracket to expose the junction box and wiring.
- Match line, neutral and ground, cap securely, and tuck the connections back without crushing them.
- Fit the new bracket to the box, hang the canopy, then refit the shade last.
- Restore power and run the dimmer through its full range, checking for flicker at low output.
Changing an LED flush mount with an integrated diode array is not a bulb swap. If the light has failed, the driver is usually the culprit, and on a serviceable design the driver alone can be replaced. That is worth confirming at purchase rather than discovering years later.
Removing an LED flush mount with no visible screws sounds like a trick question, and it is not. Most no-screw diffusers use one of three systems: a bayonet twist (rotate counterclockwise a quarter turn and lower), spring clips or torsion springs hidden behind the rim (push the diffuser up gently and squeeze the clips inward), or a central decorative finial that unthreads from below. Feel around the edge for a slight rotational play before applying any force. If it will not budge with light pressure, stop and check the product documentation rather than levering at a stone rim.
Where an LED Flush Mount Earns Its Keep, Room by Room
Entry halls. A semi-flush in alabaster gives a warm welcome without the swing risk of a pendant near a door. Aim for 3000K here.
Bedrooms. Flush or semi-flush centered on the bed, dimmed low, with table lamps carrying the evening light. 2700K, dim-to-warm if the budget allows.
Kitchens. An LED flush mount works as ambient fill above the traffic zone, with task lighting under cabinets doing the real work. Do not ask one ceiling fixture to light a whole kitchen.
Bathrooms. Check the fixture's damp or wet rating and the distance from the shower before specifying. Stone is fine in a well-ventilated bathroom; steam-drenched wet zones need a rated fitting.
Hallways and stairwells. Multiple modest fixtures beat one large one. Even spacing removes the dark-patch effect that makes corridors feel narrow.
Laundry and closets. Function over drama. A slim white diffuser with high CRI so you can actually match a navy sock to a navy sock, which is where a shallow fitting such as the Zon LED Small Flush Ceiling Light 3000K makes more sense than anything sculptural.
Caring for a Stone LED Flush Mount
Alabaster is a form of gypsum or calcite depending on the type, which is why conservation departments at institutions like the Metropolitan Museum of Art handle historic alabaster with dry methods rather than wet cleaning. Apply the same logic at home. Dust with a soft dry cloth or a clean makeup brush. Skip vinegar, ammonia, citrus sprays and any all-purpose cleaner, all of which can etch the surface permanently. Never soak the shade or run it under a tap; water can leave a dull bloom in the stone.
Twice a year, when you dust, take thirty seconds to check the mounting screws are still snug and the diffuser sits square. Stone fixtures are stable, but a ceiling that carries weight is worth an occasional glance.
Get the four fundamentals right (diffuser material, driver quality, color temperature and dimming) and an LED flush mount stops being the compromise you accept for a low ceiling. It becomes the piece that makes the room feel finished. Browse the full lighting collection to see how flush and semi-flush pieces sit alongside pendants and wall lights when you are planning a whole scheme.