Introduction
Picture Lights are the easiest way to give artwork proper presence without changing the whole room. Done well, they add focus, reveal colour and texture, and create that calm, gallery-style feel without glare, harsh hotspots, or distracting reflections. They also help your favourite pieces hold their own in the evening, when daylight fades and general room lighting can leave art looking flat. With the right fitting and a few careful adjustments, even a simple print can look deliberately displayed rather than casually hung.
You’ll learn where to mount fittings so the beam washes evenly across the piece, not just the top edge. I’ll also share practical checks to avoid common problems like uneven corners, shadows from deep frames, and glare on glass. By the end, you’ll know how to create artwork lighting that looks polished from day to night.

What Are Picture Lights And What Do They Do For Artwork?
These are dedicated fittings designed to illuminate framed art evenly and comfortably. They usually sit just above the piece and cast a controlled wash of light across the surface. In some layouts, they can also be positioned to the side to suit tight spaces or a particular styling choice. The aim is always the same: to reveal detail and colour clearly without glare, hotspots, or distracting shadows.
They matter because they:
Make the artwork the focal point, not the ceiling light
Improve clarity in the evening when daylight drops
Help textures and brushwork read properly
Keep the room feeling warm while the art still “pops”
Reduce the chance of harsh reflections compared with relying on general room lighting alone.

How Do Picture Lights Make Artwork Stand Out Without Looking Flashy?
Picture Lights make artwork stand out by increasing contrast and definition exactly where you want the eye to land. You’re not blasting the whole wall brighter you’re placing a soft highlight on the piece so it feels curated.
You’ll notice the biggest difference with:
Dark-toned paintings that disappear at night
Textured canvases where detail is lost in flat lighting
Large pieces that look dull under a single downlight
Hallways and stairs where artwork is seen in passing

How Bright Should Picture Lights Be?
Picture Lights should be bright enough to reveal the artwork clearly, but not so strong that colour looks washed out or reflective. As a practical range, most homes sit comfortably between 150-300 lumens per artwork, then adjust based on size, surface and wall colour.
Use this as a simple guide:
Small frames (A4-A3): 120-180 lumens
Medium artworks: 180–250 lumens
Large paintings: 250-400 lumens (sometimes more on dark walls)
For colour quality, aim for warm white (2700-3000K) in most living spaces. Neutral white can work for crisp, modern interiors, but very cool light often makes art feel harsh.

What Are The Best Picture Lights For Large Paintings?
The best Picture Lights for large paintings are wider fittings that spread light evenly from edge to edge. A light that’s too short tends to create a bright centre with dull corners, which makes a big piece look uneven.
Look for:
A fitting that’s half to two-thirds the artwork width
A wide, even beam (not a tight spotlight effect)
Adjustable tilt so you can fine-tune the angle
A clean diffuser or well-designed LED so you don’t see “dots” on the wall
If the artwork is especially wide, two discreet fittings can sometimes look better than one oversized bar especially if you want a softer wash and fewer shadows.

How Do You Choose The Right Picture Lights For Your Home?
The right Picture Lights are chosen by matching brightness, beam spread and style to the artwork and room. If you start with the art (not the fitting), the result looks far more natural.
What should you check before you buy?
Start with these basics:
Artwork medium: oils, prints, photos and textiles reflect differently
Glazing: glass increases reflection risk
Wall colour: darker paint absorbs light; you may need more output
Frame depth: deep frames can cast their own shadows if the light is too close
Power option: hardwired, plug-in or rechargeable
If you already have a reading nook nearby, you may also want the artwork lighting to sit comfortably alongside your reading lights so the scene feels balanced rather than “striped” with competing brightness.
Which finishes look best?
A fitting should complement the frame and surrounding hardware. Brass and bronze feel classic; black and nickel read modern. If your room includes textured, architectural lighting such as plaster lights a simpler picture fitting often looks more considered, letting the artwork stay centre stage.

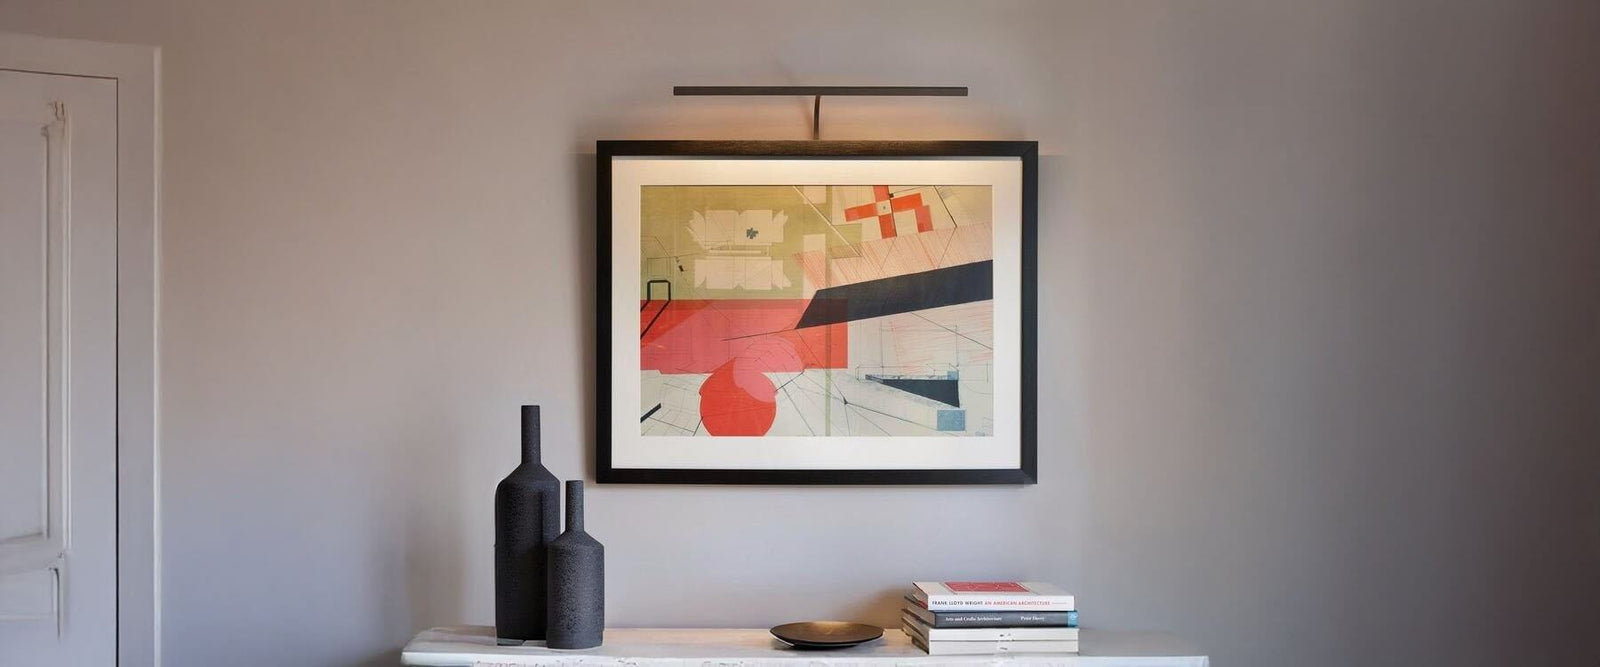
Where Should You Place Picture Lights For The Best Result?
Picture Lights should be centred above the artwork and positioned so the beam washes down the face evenly. In most homes, that means mounting the fitting 5-15 cm above the frame and aiming the light down at around 30 degrees.
That positioning helps you avoid:
Bright hotspots at the top edge
Heavy shadows along the bottom
Reflections from glass
If you’re lighting a series of pieces along cabinetry or shelving, keep the picture lighting separate from cabinet lighting so the artwork doesn’t compete with task illumination.

How Do You Position Picture Lights Correctly Step By Step?
The best way to position Picture Lights is to measure, mount, adjust, then test at night. It’s simple, but doing it in the right order saves a lot of frustration.
Measure the artwork width and choose a fitting about ½–⅔ of that width
Mark the centre line of the artwork on the wall (use low-tack tape if needed)
Choose mounting height: typically 5-15 cm above the frame
Mount the fitting so it sits square and centred
Angle the head so light falls across the full artwork, not just the top third
Turn off other lights and test in the evening to spot glare, shadows or uneven edges
Fine-tune the tilt in small increments tiny changes make a big difference
If the piece is behind glass, reduce reflections by lowering brightness slightly and keeping the angle gentle. For glossy photos, the “perfect” setting often looks a touch dimmer than you expect until you see it from different viewpoints.

What Mistakes Should You Avoid With Picture Lights?
The most common mistake is choosing the wrong size or mounting height, which causes uneven coverage and glare. A close second is using a colour temperature that makes art look unnatural.
Avoid these issues:
Too short a fitting on wide artwork (bright middle, dull edges)
Mounting too high, which creates a harsh strip of light at the top
Overly bright output, which flattens colour and texture
Very cool white light, which can make warm artwork look grey
Ignoring ambient lighting, so the piece is either lost or overpowering
If you’re considering a specific brand such as elstead lighting, focus first on beam quality, adjustability and colour temperature options those will affect results more than the name on the box.

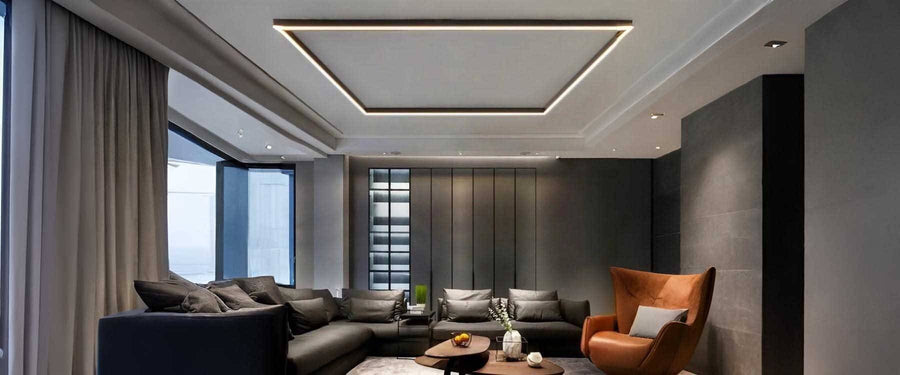
How do Picture Lights Work With The Rest Of Your Room Lighting?
These fittings work best when they’re part of a layered lighting plan, not the only statement in the room. The aim is balance: the artwork is clearly highlighted, while the rest of the space still feels calm and liveable. When the layers are working together, the lighting looks intentional rather than spotlit or harsh.
A good approach is:
Use picture fittings as accent lighting
Keep general lighting soft or dimmable in the evening
Match colour temperature across the room where possible
Use artwork lighting to guide the eye through the space (hallways, landings, living rooms)
Use them as accent lighting and keep surrounding lighting softer so the artwork remains the focal point without overpowering the room.

Quick Summary
Picture Lights give artwork proper focus, richer colour and a more finished look, especially in the evening. Choose a fitting that suits the artwork width, aim for a comfortable lumen range, and mount it close enough to wash light evenly without glare. When you measure carefully and fine-tune the angle at night, your art becomes a natural focal point that feels calm and considered.

Conclusion
Picture Lights are a simple upgrade that makes artwork clearer, richer and more intentional especially after dark. Choose a fitting wide enough to cover the piece evenly, aim for sensible brightness that enhances colour without glare, and mount it close enough to wash light smoothly down the artwork. With careful measuring, a gentle angle, and a quick night-time test, your artwork becomes a natural focal point that suits the room rather than fighting it.