Introduction
Ceiling lights are often the first fixtures people notice in a room. They don’t just provide brightness; they shape how evenly a space feels illuminated, how welcoming it appears, and how functional it becomes for daily life. When positioned well, they enhance comfort and style while reducing the risk of dark spots or unnecessary glare. Poorly placed fixtures, on the other hand, can make even a beautifully designed room feel awkward and uncomfortable.
The art of lighting design lies not only in selecting attractive fittings but also in arranging them thoughtfully. This article explores how positioning influences both mood and practicality. We’ll break down spacing guidelines, height considerations, and placement strategies tailored to living rooms, bedrooms, kitchens, and dining rooms. By the end, you’ll know how to approach installation with confidence, ensuring every corner of your home benefits from the right balance of illumination.
Why Positioning Matters in Ceiling Lights
Positioning is often overlooked, but it’s as important as fixture style. A great ceiling light loses impact if shadows dominate the room or glare makes the space uncomfortable.
Even coverage
Well-placed ceiling lights distribute illumination consistently, preventing bright “hot spots” and gloomy corners. This balance improves the look of finishes, furniture, and wall colour.
Less glare, more comfort
Placing fixtures without considering sightlines can result in harsh beams directly above seating, beds, or dining tables. Good placement supports comfort especially in rooms where people relax.
Better mood and atmosphere
Lighting placement influences whether a dining room feels intimate, whether a bedroom feels restful, and whether a kitchen feels energising and practical.

General Rules for Ceiling Light Placement
1. Spacing guidelines (a practical baseline)
A simple starting point is one ceiling light point per 1.2-1.8m (4-6ft) of ceiling space, then adjust based on:
room layout
ceiling height
how much natural light the room gets
how reflective your surfaces are (white kitchens bounce light more than dark rooms)
Tip: Instead of clustering lights in the centre, aim for coverage that reaches the perimeter.
2. Height considerations (choose fixtures that suit the ceiling)
Ceiling height affects both look and comfort:
Low ceilings: flush or semi-flush fittings reduce head-height clutter and glare.
Higher ceilings: pendants and chandeliers add presence and can bring light closer to the “activity zone” below.
Comfort rule: Avoid exposed bulbs that sit within direct line of sight when seated.
3. Furniture awareness (place lights around real life)
Ceiling lights should work with your layout, not fight it.
avoid placing harsh downlights directly over sofas or beds
avoid casting your own shadow onto work zones (kitchen counters, bathroom mirrors)
position around key areas: seating zones, circulation routes, tables, islands
4. Layered lighting (modern homes rely on layers)
Relying only on overhead lighting can make a room feel flat. The best setups combine:
ambient (ceiling lights)
task (reading lamps, under-cabinet strips, mirror lighting)
accent (wall lights, art lights, shelf lighting)

LED & Bulb Guidance for Ceiling Lights (Expert Upgrade)
Best colour temperature by room
2700-3000K warm white: bedrooms, living rooms, dining rooms (cozy)
3500-4000K neutral white: kitchens, bathrooms, hallways (clearer)
Tunable white: best if one room needs different moods through the day
LED quality checklist (comfort matters)
Choose LEDs/fixtures that are:
flicker-free / low flicker
high CRI (90+) for natural-looking colours
dimmer-compatible (if using dimmer switches)
diffused (shades, frosted glass) to reduce glare

Positioning Ceiling Lights by Room
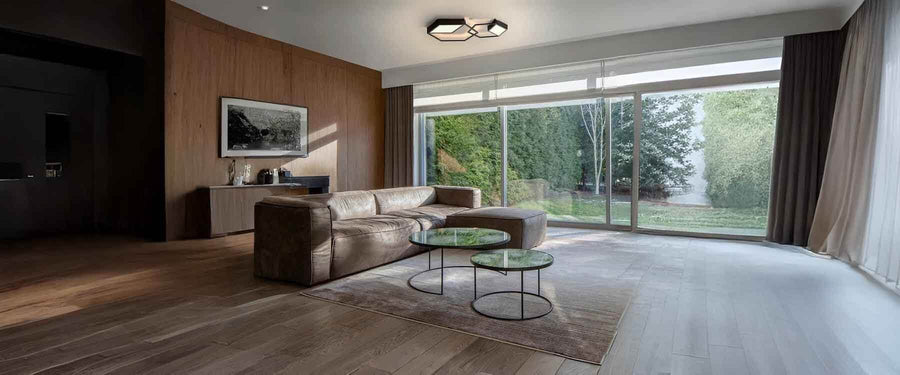
Living Room Placement
Living rooms are versatile spaces, shifting from casual relaxation to entertaining guests. Lighting should reflect this flexibility.
Layered Approach
Use ceiling lights for broad coverage, complemented by floor lamps or sconces. Position fixtures toward the room’s perimeter rather than clustering them in the center. This distributes brightness evenly without overwhelming one area.Accenting Features
If the room includes a fireplace, artwork, or shelving, aim fixtures toward these elements. Ceiling placement that highlights focal points creates visual interest and enhances mood.
 Bedroom Placement
Bedrooms should encourage calm while supporting practical activities like reading or dressing.
Soft Central Glow
A central fixture offers general illumination, but the effect should be softened with shades or diffusers. Consider dimmable options for greater control.Avoiding Over-Bed Harshness
Placing fixtures directly above the bed can cause uncomfortable glare. Instead, offset them slightly or balance them with bedside lamps that provide intimacy and layered depth.Complementary Lighting
Position wall lights or sconces near the headboard for reading, ensuring the ceiling fixture’s role remains supportive rather than overpowering.

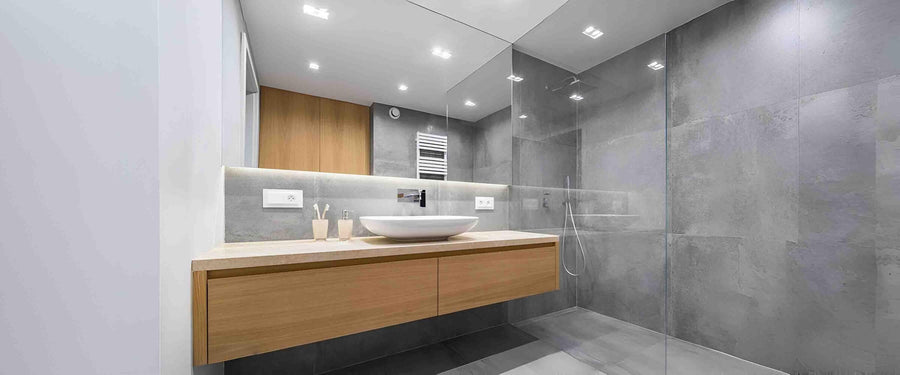
Kitchen Placement
Kitchens demand functionality, but they also benefit from thoughtful design.
Task Lighting Priority
Position ceiling fixtures so they fall between counters rather than directly overhead. This prevents shadows from being cast where food is prepared.Island & Sink Illumination
For islands, align pendants evenly to provide balance and highlight the workspace. Near sinks, place fixtures at angles that keep water zones clear and bright.Balance with General Lighting
While focused illumination is essential, ensure the entire kitchen feels consistently lit by spacing ceiling lights evenly across the layout.

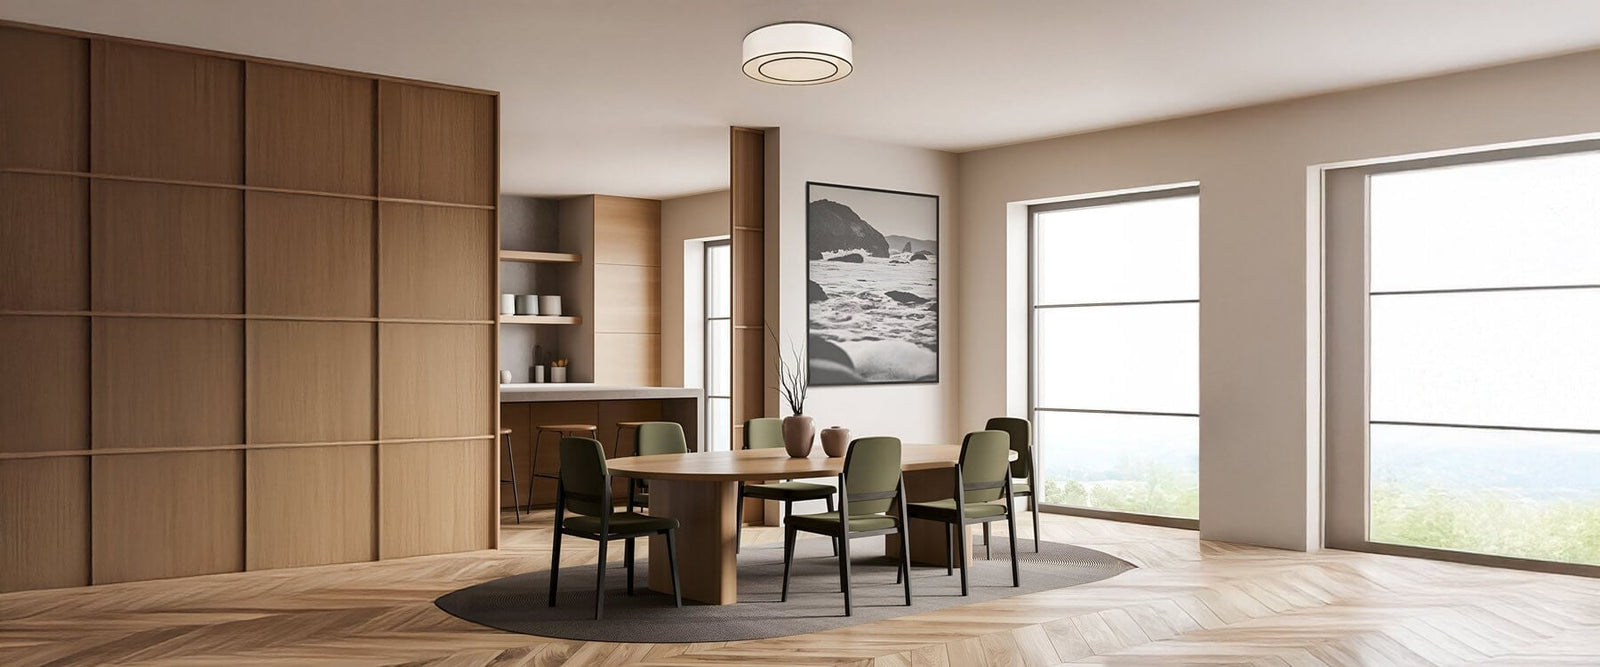
Dining Room Placement
The dining room thrives on ambiance, where lighting sets the tone for gatherings.
Centerpiece Placement
Always anchor a chandelier or pendant directly above the dining table. This acts as both a design statement and a functional necessity.Supportive Spacing
Avoid making the table the only lit area. Place supplementary ceiling fixtures around the room’s edges to prevent contrast between a bright table and dark surroundings.Adjustable Ambiance
Dimmer switches allow the central fixture and supporting lights to transition from lively family meals to intimate dinners.

Sizing & Scaling Ceiling Lights
The right size makes a room feel polished.
Match scale to room size
larger rooms: oversized fixtures, clusters, or multiple points of light
smaller rooms: compact fixtures that don’t dominate the ceiling
Match scale to furniture
A fixture should feel intentional relative to key furniture:
dining tables suit statement pendants/chandeliers
living rooms may need multiple smaller points rather than one oversized piece

Common Mistakes to Avoid
Even with attractive designs, poor planning can sabotage results.
Overcrowding fixtures: can look clinical and overly bright
Ignoring layout: causes glare over seating or shadows on counters
Overrelying on one fixture: leads to flat, uninspiring lighting
Choosing cool bulbs everywhere: can make bedrooms/dining feel harsh
Skipping dimmers: reduces flexibility and comfort

Advanced Positioning Tips
Use dimmers for versatility
One fixture can serve multiple moods with the right control.
Blend temperatures intentionally
Warm in relax zones, neutral in task zones or use tunable white for full flexibility.
Highlight architecture
Place light to enhance:
alcoves
beams
textured walls
shelving and niches
Keep consistency across rooms
A cohesive mix of finishes and shapes helps your home feel connected.

Quick Checklist Ideal Ceiling Light Setup
✅ Do
plan for even coverage (not just a bright center)
choose fixtures that suit ceiling height
use warm vs neutral colour temps by room
layer with lamps/wall lights for depth
add dimmers for flexibility
reduce glare with shades, frosted glass, or indirect light
❌ Don’t
rely on one central light in every room
place bright downlights directly over seating
overcrowd small ceilings with too many fixtures
use cool white lighting in bedrooms
ignore furniture layout and task zones

Conclusion
Positioning ceiling lights is both an art and a science. It requires attention to scale, placement, and layering to achieve professional-quality results. In living rooms, strategic spacing fosters flexibility. In bedrooms, thoughtful placement encourages rest while avoiding glare. Kitchens demand precision for tasks, and dining rooms thrive on centered fixtures supported by balanced illumination.
By applying spacing rules, considering ceiling height, and avoiding common mistakes, you can transform how your home feels. Ceiling lights, when placed correctly, enhance mood, functionality, and style. The best results come not from guesswork but from planning with both practicality and atmosphere in mind.