
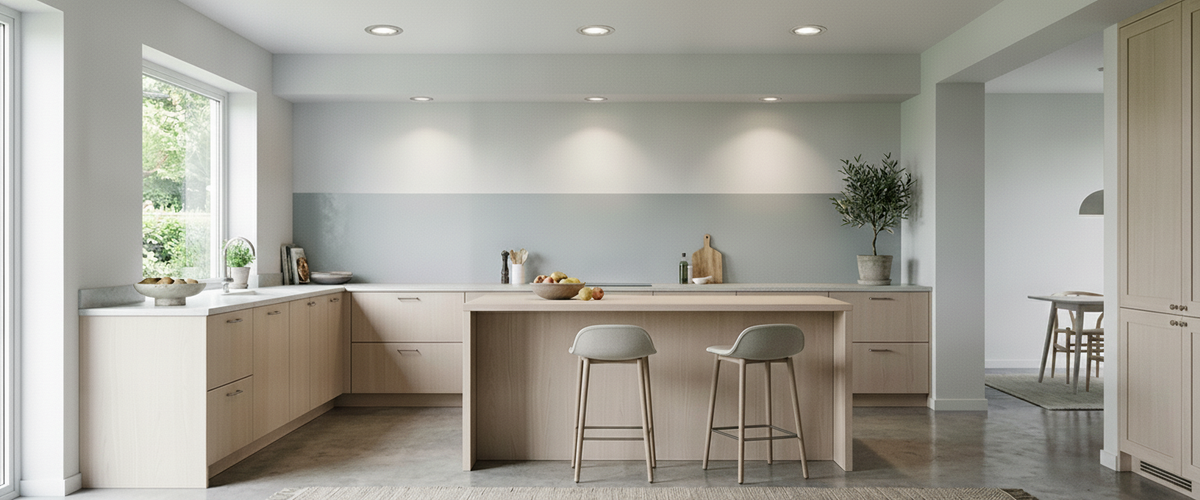

Walk into most new kitchens and you will see the same thing: a tidy grid of recessed spotlights punched across the ceiling at even spacing, as if the plan came from a maths exercise rather than the way anyone actually cooks. It looks neat on paper. In practice it lights the floor beautifully and leaves you chopping onions in your own shadow. Kitchen recessed spotlights work brilliantly when they follow the worktops and the way you move; they fall flat when they follow the grid lines.
At Niori we are known for alabaster and natural-stone lighting, the warm, diffused glow of pendants and wall lights carved from real stone. But a serious kitchen scheme almost always pairs those centrepieces with well-placed kitchen recessed spotlights. Get the functional layer right and the beautiful layer has something to sit against.
Spots placed over the worktop edge light the surface you actually work on.

Key Takeaways
Position your kitchen recessed spotlights over the front edge of worktops, not centred on the ceiling, so light lands where you work.
Use tighter beam angles for task areas and wider ones for general fill.
Choose a warm colour temperature (around 2700K to 3000K) to keep the room inviting.
Split the lighting into dimmable zones and have an electrician wire them.
Layer recessed spots with a pendant or stone fitting so the room has depth, not just brightness.

Why the Evenly Spaced Grid Is the Mistake Most Kitchens Make
The grid feels safe because it is symmetrical. The problem is that symmetry ignores where the work happens. Your worktops, hob and sink run around the edges of the room, often under wall cabinets, while the grid drops most of its light into the middle of the floor. You end up over-lit where nobody stands and under-lit where you actually cook.
A better starting point is to forget ceiling symmetry and plan the light around the room's jobs. Mark your run of base cabinets, the island, the hob and the sink. Those are the surfaces that need light. The recessed spotlights kitchen layouts call for follow those lines first; only then do you add a few for general fill so the room does not feel patchy. This is where recessed kitchen spotlights earn their place, as a precise task layer rather than a blanket wash.

Positioning Spots So You Never Prep in Your Own Shadow
The single most common complaint we hear from clients is shadowing on the worktop. It happens when a spot sits behind you, over the middle of the walkway, so your body blocks the beam as you lean in. The fix is simple geometry: place the light between you and the surface.
For a run of worktops under wall units, set your kitchen recessed spotlights roughly over the front edge of the counter, not tight against the wall. That pushes light onto the working surface and under the cabinet lip rather than down the back of the units. For an island, line the spots up with the length of the island and keep them slightly toward the side people stand on. An adjustable fitting matters here, because you can angle the beam a few degrees off vertical to catch the surface cleanly. A tiltable head such as the TRIBIS II 10W GU10 Recessed Spotlight Adjustable in black lets you aim light onto the counter rather than accepting whatever a fixed downlight gives you.
As a rough spacing guide, aim for spots around 3 to 4 feet (roughly 0.9 to 1.2 metres) apart along a worktop run, adjusted for ceiling height and beam angle. Higher ceilings and tighter beams want them closer together. Do not treat this as a hard rule; test it against your actual cabinet layout.
Beam Angle and Lumens: Sharp Light for Worktops, Soft Fill for the Rest
Beam angle decides how the light spreads. A narrow beam (around 20 to 24 degrees) throws a tighter, brighter pool, which suits task areas like the hob and prep zones. A wider beam (around 36 to 60 degrees) spreads light for general coverage and softer fill across the room. Most kitchen recessed spotlights want a mix: tighter spots over the work, wider ones for the walkways and dining edge.
Narrow beams for task zones, wider beams for general fill across the room.
Lumens matter more than watts on modern led recessed spotlights. A single GU10 LED spot pulling around 5 to 10 watts can deliver anywhere from roughly 350 to 700 lumens depending on the lamp, so read the lumen figure, not just the wattage. Where you want a wider, softer fill over walkways rather than a hard task pool, a wide-angle lamp such as the GU10 LED Spotlight Bulb at 120 degrees in warm white spreads light more gently than a tight beam. Good led spotlights recessed into the ceiling give you genuinely usable brightness over worktops; for the rest of the room you can dial it back. The Chartered Institution of Building Services Engineers offers useful guidance on domestic lighting levels if you want a technical baseline (cibse.org).
Look for a good colour rendering index too. A CRI of 90 or above makes food, worktops and stone finishes look true rather than washed out. It is the difference between a tomato that looks ripe and one that looks grey.
Colour Temperature That Keeps the Room Warm Instead of Clinical
Cool white light belongs in an operating theatre, not a kitchen you eat and sit in. Colour temperature is measured in kelvin, and for a home kitchen the sweet spot sits between 2700K and 3000K. That gives you a warm, comfortable light that flatters wood, brass and stone without going yellow.
Finish matters as much as light here. Where a scheme leans warm and metallic rather than crisp white, a fitting like the TRIBIS II GU10 Recessed Spotlight in patinated brass ties the ceiling trim to brass tapware and handles instead of interrupting them with a stark white bezel. Alabaster and onyx glow with a honeyed warmth of their own, and a cold LED overhead will fight that quality rather than complement it. Match the kelvin of your kitchen recessed spotlights to your feature fittings so the whole room reads as one temperature rather than a patchwork of cool and warm pools. If you are choosing feature pieces alongside the spots, our alabaster lighting collection shows the kind of warm glow you want the recessed layer to support.
Layering Recessed Spots With a Pendant or Stone Fitting
Recessed spots alone give you a flat, functional kitchen. Add a pendant or a pair over the island, or a stone fitting over the dining end, and the room gains depth. Your kitchen recessed spotlights do the work; the feature piece does the mood and gives the eye somewhere to land.
Over an island, a run of alabaster pendants sits at a comfortable height while the recessed spots handle the surface below. In an open-plan kitchen that flows into a living area, a stone pendant marks the dining zone and quietly separates it from the working part of the room. We recently shipped a set of carved alabaster pendants to an open-plan kitchen where the owners had already fitted a full recessed grid; adding the pendants turned a bright but characterless room into somewhere people actually wanted to linger. The lesson from that project: recessed spots and feature lighting are partners, not rivals. Browse the full lighting range if you want to see how pendants and wall lights pair with a spot layer.
Dimming Zones and Why the Wiring Belongs to an Electrician
One switch for the entire kitchen is a wasted opportunity. Split the room into zones: worktops and hob on one circuit, general fill on another, and the feature pendant on its own. That way you can push task areas bright while cooking and drop everything to a low glow for dinner. It is the fastest way to make one room feel like several throughout the day.
Make sure your kitchen recessed spotlights and lamps are genuinely dimmable, and pair them with a compatible dimmer. Cheap LED and dimmer combinations flicker or buzz; matched components do not. If you are fitting a philips hue recessed spotlight or similar smart lamp, you can create zones and scenes in software instead of extra wiring, which suits a retrofit where you do not want to open up the ceiling.
All mains wiring, new circuits and dimmer installation should be done by a qualified electrician. In the UK this is notifiable work under Part P of the Building Regulations, and getting it certified protects both your home and your insurance (electricalsafetyfirst.org.uk). Treat lamp swaps as DIY; treat circuits and cabling as a job for a professional.
A Quick Buyer's Checklist
Plan around worktops first, then add fill lights. Never start from ceiling symmetry.
Mix beam angles: tighter for task, wider for general coverage.
Read lumens, not just watts, and choose CRI 90 or above.
Stick to 2700K to 3000K and match it to your feature fittings.
Choose adjustable kitchen recessed spotlights where you need to aim light at a surface.
Wire dimmable zones and use a qualified electrician for the circuits.
Add a pendant or stone fitting so the room has a focal point, not just brightness.
What Recessed Spots Cost
Budget depends on the fixture quality, whether the spots are fixed or adjustable, the lamp specification, the number of fittings, and the electrical work involved. A retrofit into an existing ceiling is a different job to a new-build first fix. Rather than quote a figure that will not match your kitchen, we would suggest speccing the fittings and lamps you want, then getting a tailored quote for supply and installation. The same applies if you are combining kitchen recessed spotlights with alabaster pendants; the feature piece and the spot layer are priced very differently.
The same thinking works beyond the kitchen. Bathroom recessed spotlights follow similar logic to modern recessed spotlights over a worktop, though there you also need the right IP rating for the zone near water. Get the functional layer of recessed spotlights planned properly and the beautiful layer, the alabaster and stone that Niori is built around, has room to do what it does best.