
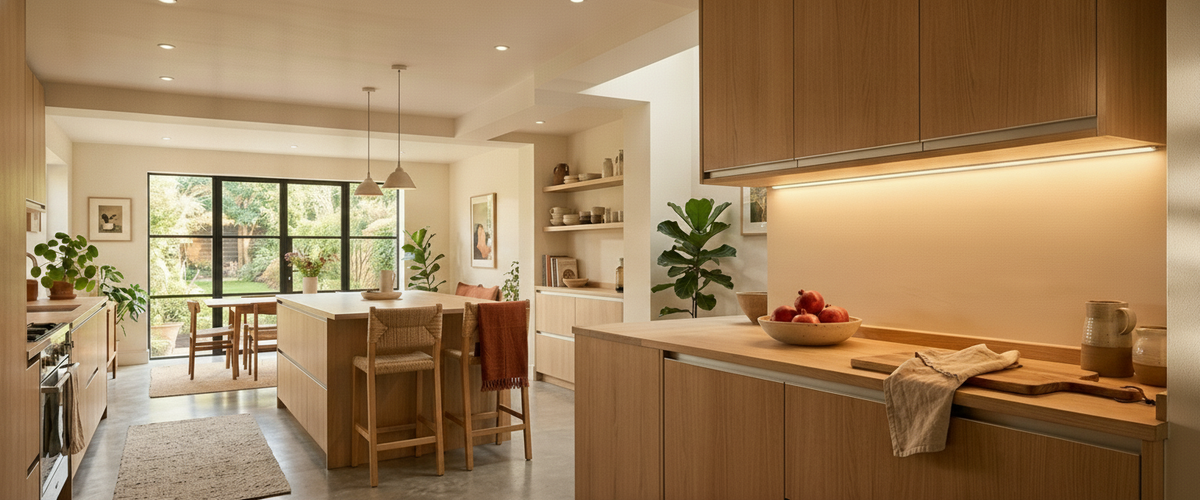

Bad kitchen lighting nearly always shows itself in the same three ways: a row of visible dots reflected in a gloss cabinet, a green cast that makes tomatoes look tired, and dark patches on the worktop right where you actually chop. Kitchen led strip lights fix all three when they are specified properly, and make the whole thing worse when they are not. The strip itself is rarely the problem. The planning around it is.
At Niori we are known for alabaster and natural-stone lighting, the warm diffused pieces that hang over an island or sit on a dresser. But those fixtures work hardest when the task lighting underneath is quiet and correct. So this guide treats kitchen LED strip lights as the working layer that lets the sculptural pieces do their job.

Key Takeaways
Three jobs, three positions: under-cabinet strips light the worktop, plinth strips wash the floor, shelf strips add depth. Do not treat your kitchen LED strip lights as one purchase.
Colour temperature matters most: aim for warm to neutral white (roughly 2700K to 3000K) with a high colour rendering index so food reads correctly.
Hide the source: a diffuser and aluminium channel remove the dotty look and the glare. This is the single biggest quality jump.
Plan dimming early: a driver and switch that let the kitchen shift from bright prep to soft evening light are part of the spec, not an afterthought.

Under-Cabinet, Plinth, or Shelf: Three Strips Doing Three Different Jobs
People say "led strip lights kitchen" as if it is one product. It is really three separate lighting decisions that happen to use the same tape, and good kitchen LED strip lights respect the difference.
Under-cabinet is the workhorse. Mounted at the front underside of a wall cabinet, it throws light down onto the worktop so you are not chopping in your own shadow. This run needs the highest output and the best colour accuracy in the room, because it lands on food and hands.
Plinth (toe-kick) strips sit under the base units and wash light across the floor. This is mood and orientation lighting, a gentle glow for late-night water runs. Output can be lower, and a warmer tone works well here.
Shelf and cabinet interior strips light open shelving, glass-fronted units, and the inside of a display cabinet. Their job is depth and drama rather than task, so a lower wattage and careful hiding matter more than brightness.
Deciding which of the three you actually want, before you buy a single reel of kitchen LED strip lights, saves the most common regret: one long over-bright run doing all three jobs badly.
Why Hiding the Strip Matters More Than the Strip Itself
The quickest way to tell a professional install from a weekend one is whether you can see the light source. Visible kitchen LED strip lights reflect as a hard line in gloss cabinet doors, in glass splashbacks, and in a polished stone worktop. That reflection is what makes a kitchen look cheap even when the tape was decent.
Two things hide it. First, position: set the strip toward the front edge of the cabinet underside and angle it slightly back, so the emitter never sits in a direct sightline. Second, a channel with a diffuser, which we cover below. A honed or matt worktop is far more forgiving than a high-gloss one, so if your surfaces are reflective, budget for proper diffusion rather than hoping the naked strip will behave.
Colour Temperature That Keeps Food Looking Like Food
This is where most kitchen led lighting strips go wrong. Cool white light (4000K and above) reads as clinical and drains warmth out of skin and ingredients. Push it too warm and pale worktops look yellow. For a kitchen, warm white around 2700K to 3000K is the reliable range, and matching it to your overhead fixtures keeps the room coherent. Where an under-cabinet run needs to echo the honeyed tone of alabaster pendants overhead, a warm-white tape such as the COB LED Strip 10W/m 12V Warm White sits closer to the right design language than a cool clinical strip.
Colour rendering matters as much as the number on the reel. Look for a high colour rendering index (CRI 90 or above) so reds and greens look true and raw meat reads correctly, which is a genuine appetite and food-prep point, not a marketing one. The guidance on LED light quality is a useful primer if you want to understand why two sets of kitchen LED strip lights with the same colour temperature can look completely different.
One studio note: we often see people match the strip to their alabaster pendants only after they have installed a cool strip and hated it. Alabaster and onyx glow at a warm, honeyed tone by nature, so a cool under-cabinet run fights it. Pick the warm strip first and the whole scheme reads intentional. If you are still choosing the overhead pieces, our alabaster lighting collection shows the warmth these stones give, which is the tone your strip should echo.
Getting Even Light on the Worktop Without Hot Spots and Gaps
Even light from your kitchen LED strip lights is a function of three things working together: where the strip sits, how bright it is, and how many gaps you leave. A common mistake is running strip only under the middle of each cabinet, which leaves dark corners exactly where two units meet. Run the tape as continuously as the cabinet allows and carry it close to the ends.
Density matters too. Standard LED tape places individual diodes at intervals, which is where the dots come from. COB (chip-on-board) tape spreads the emitter into a continuous line, so it looks like a solid glow rather than a string of points. For under-cabinet work where the strip may be reflected, COB is usually worth it. For longer worktop runs that still need generous output, a higher-density reel like the COB LED Strip 10W/m 24V Warm White 50m lets you carry a single continuous line across several cabinets without cranking the driver to reach the worktop evenly.
Measure your runs before ordering. Most quality tape is cuttable at marked intervals and can be linked around corners with connectors, so you can tailor your kitchen LED strip lights to a real kitchen rather than forcing the kitchen to fit the reel.
Diffusers, Channels, and Beam Angle That Kill the Dotty Look
An aluminium channel with a frosted diffuser cover does three jobs at once. It hides the strip, it spreads the light so individual diodes blur into a line, and it acts as a heat sink that helps the LEDs run cooler and last longer. Skipping the channel is the most common false economy when you fit kitchen LED strip lights.
Choose the diffuser to match the finish. A deeply frosted (opal) cover gives the softest, most even line and is the safest choice under gloss cabinets. A lightly frosted cover lets more light through if you need maximum output on a dark worktop. Recessed channels sit flush into the cabinet underside for a built-in look; surface-mounted channels are easier to retrofit.
Beam angle plays in as well. A wide beam spreads across the worktop; a narrow beam concentrates a brighter band. For general worktop light, wide and diffused wins. Save the tighter beams for accenting a specific feature.
Dimming and Switching So the Kitchen Shifts From Prep to Evening
A kitchen has at least two moods: bright, focused light for cooking, and a low glow for eating and evenings. Kitchen LED strip lights that cannot dim trap you in one of them. Plan dimming into the spec from the start, because retrofitting it is fiddly.
You need three things to agree: the strip, the driver, and the switch or controller. Not every driver dims, and not every dimmer suits LED loads, so match them deliberately. Trailing-edge dimmers and dedicated LED dimming drivers give the smoothest low-end fade without flicker. Smart controllers let you group under-cabinet, plinth, and shelf circuits and set scenes, so a single tap takes you from full prep light to a soft plinth-only glow.
Keep the plinth and under-cabinet runs on separate switching if you can. Being able to leave a gentle floor wash on overnight while everything else is off is one of those small luxuries that makes a kitchen feel considered.
A Quick Buyer's Checklist
Decide which of the three jobs (under-cabinet, plinth, shelf) you are lighting, and spec each set of led strip lights kitchen runs separately.
Choose warm white, 2700K to 3000K, CRI 90 or higher, and match it to your overhead fixtures.
Use COB tape where the strip may be reflected, to avoid the dotty look.
Buy the aluminium channel and diffuser as standard, not as an upgrade.
Measure runs, confirm cut points and corner connectors, and carry light to the cabinet ends.
Match the strip, driver, and dimmer as a set, and keep circuits switchable in groups.
Set the worktop as the priority for output; treat plinth and shelf as softer, lower layers.
A Note on Installation and Safety
Sticking the tape and running it into a channel is well within a confident DIYer's reach. Wiring the driver into the mains is not. Any connection to your fixed electrical supply should be done by a qualified electrician, both for safety and to keep your installation compliant. Plan cable routes and driver locations before you fix anything, and leave the mains work to a professional.
Kitchen LED strip lights are only ever half of a good scheme. The other half is the piece your eye actually lands on: an alabaster pendant over the island, a stone wall light by the pantry, a lamp on the end run. If you are building the whole layered scheme, browse the full lighting range to see how the warm working layer and the sculptural pieces sit together.