Table of Contents
- Introduction
- What Are Spike Lights And How Do They Work?
- How Do Spike Lights Improve Hard-to-Light Spaces?
- How Do You Choose Spike Lights For Better Results?
- How Bright Should Spike Lights Be?
- What Beam Angle Should You Choose?
- What Colour Temperature Works Best For Spike Lights?
- How Do Spike Lights Fit Into A Layered Lighting Plan?
- Step-by-Step: How to Choose Spike Lights Confidently
- What Are The Best Ways To Install Spike Lights?
- What Common Mistakes Should Be Avoided?
- How Does Build Quality Affect Spike Lights?
- Quick Summary
- Conclusion
- FAQs
Introduction
Spike lights are one of the most adaptable outdoor lighting options available, especially when you want to improve dark or awkward areas without permanent installation. When chosen carefully, they can transform gardens, pathways, and feature areas into welcoming spaces that feel intentional rather than overlit.
This type of outdoor fitting is often underestimated and applied too generically. Making considered choices early helps you control emphasis, reduce glare, and create lighting that supports how the space is meant to be enjoyed.
This guide focuses on how to choose the right fittings so you achieve balanced lighting, visual comfort, and a more inviting outdoor environment.
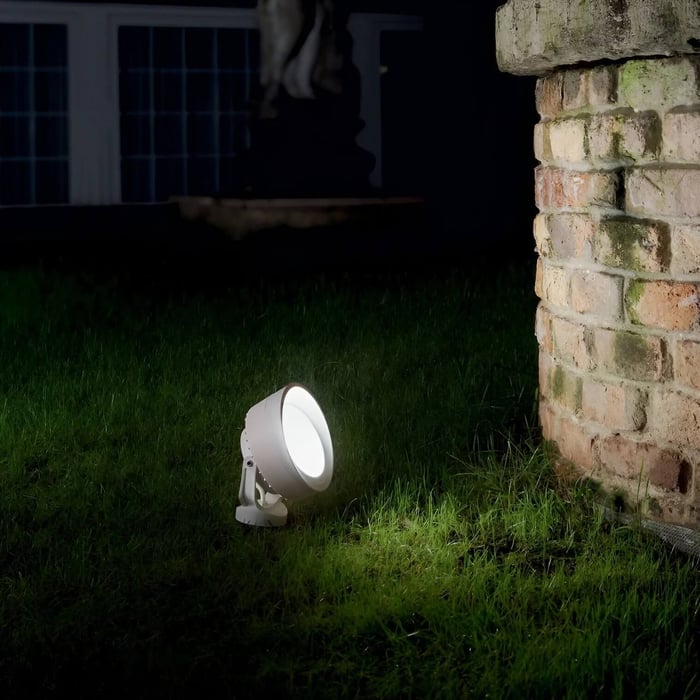
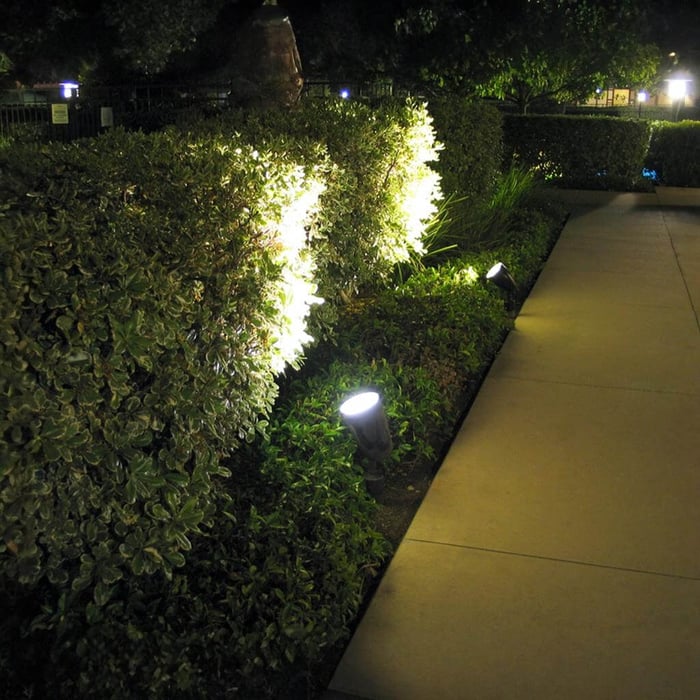
What Are Spike Lights And How Do They Work?
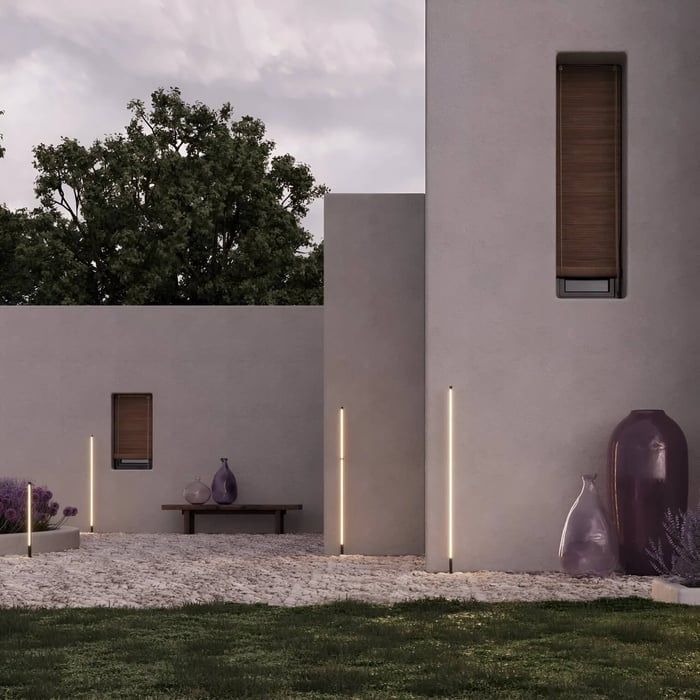
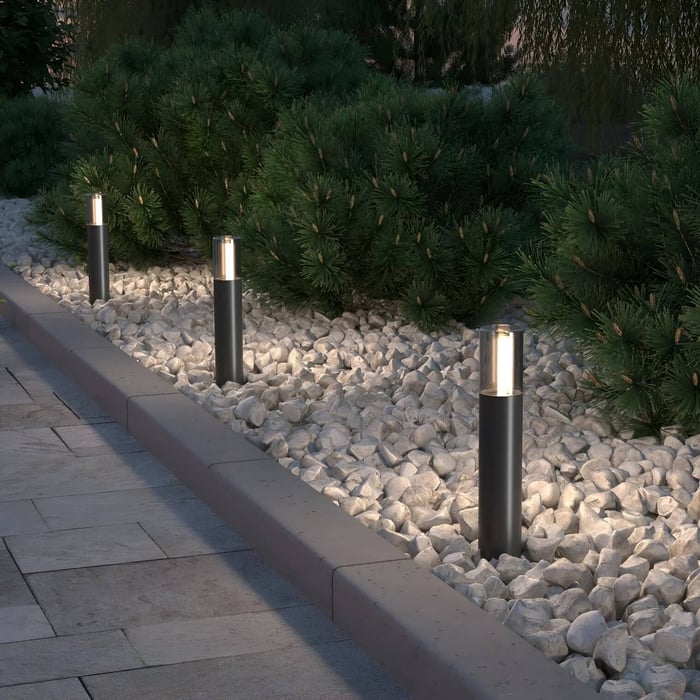
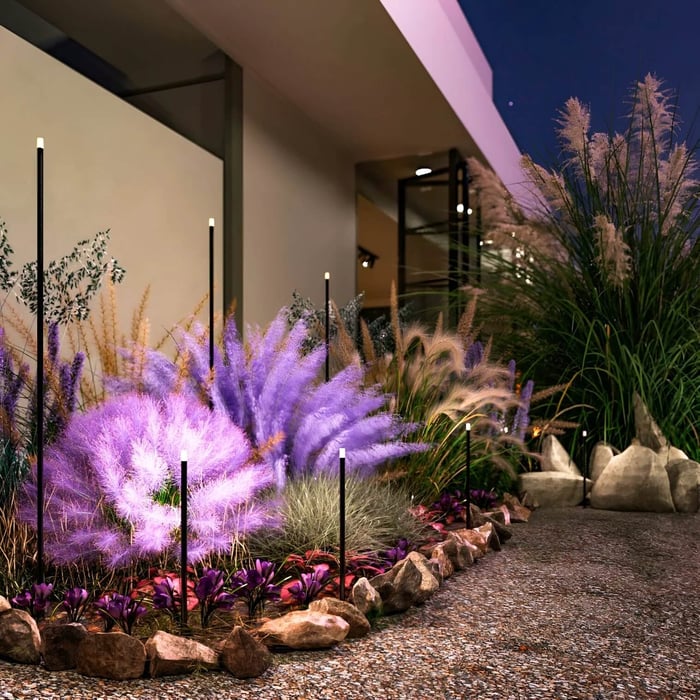
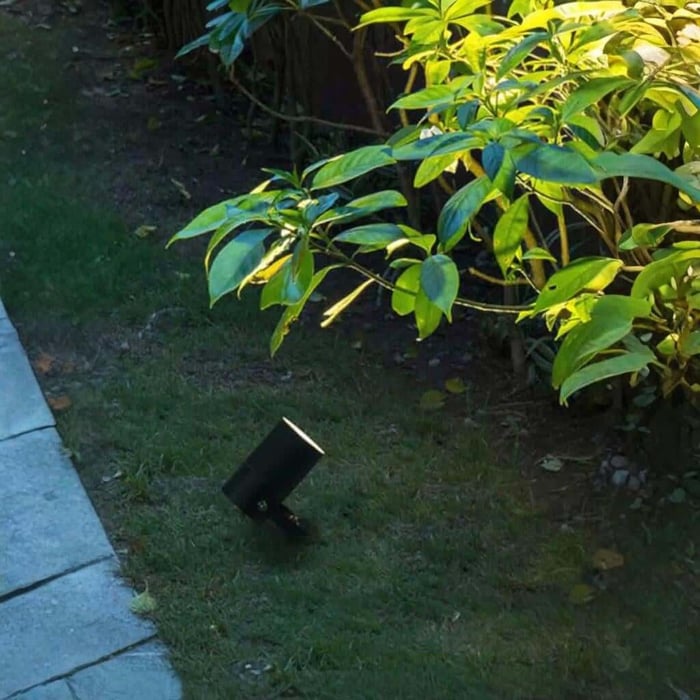
Spike lights are outdoor light fittings mounted on a ground spike that allows them to be pushed directly into soil, lawn, or gravel.
Their key advantage is flexibility: they can be angled, repositioned, and adjusted as your garden grows or your layout changes.
They are commonly used to:
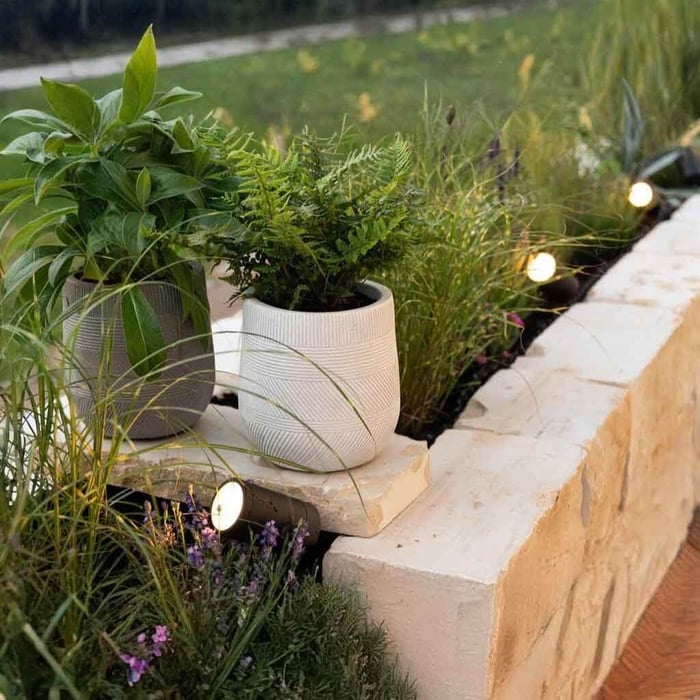
Highlight plants, trees, and shrubs
Illuminate borders and garden beds
Accentuate textures on walls or fencing
Add depth to spaces that lack structural lighting points
Unlike recessed ground lights, these fittings sit above ground, making them easier to adjust and less restrictive in changing landscapes.
How Do Spike Lights Improve Hard-to-Light Spaces?
Spike lights are particularly effective in areas where traditional fixtures struggle to work.
They allow light to be placed exactly where it’s needed, even in spaces without walls, posts, or nearby power points.
Hard-to-light areas where this type of lighting performs well include:
Open planting zones
Irregular garden layouts
Corners with dense foliage
Transitional spaces between paths and lawns
Because the fittings can be repositioned, they offer a practical solution where permanent outdoor ground lights would feel too fixed or intrusive.
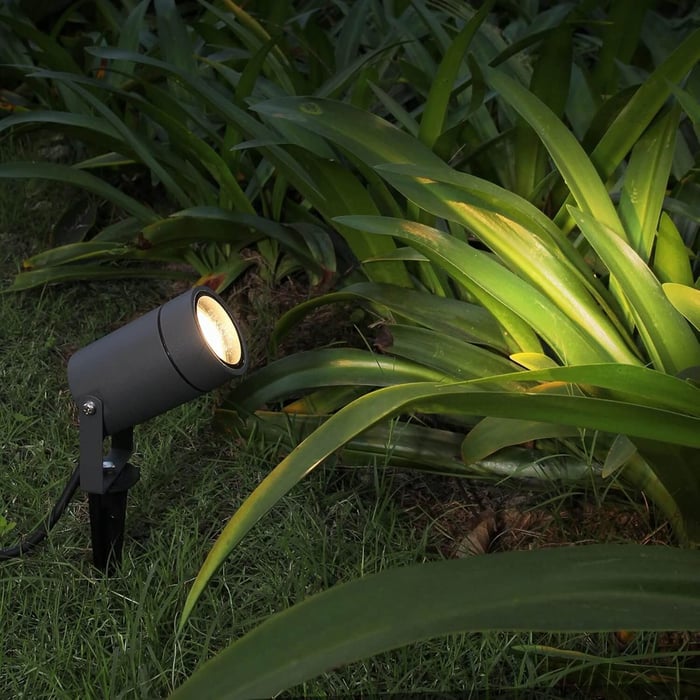
How Do You Choose Spike Lights For Better Results?
Choosing spike lights starts with understanding the role they play in your overall lighting plan.
They are best used as accent lighting rather than general illumination, meaning subtlety is key.
When selecting lighting for this purpose, consider:
What feature you want to highlight
How much light is actually needed
Whether the light should blend in or stand out
How the fitting will age outdoors
How easy it will be to adjust the direction over time
Good fittings should support the space visually without drawing attention to the fitting itself. They should also give you enough flexibility to fine-tune the beam as planting grows or the layout changes.
How Bright Should Spike Lights Be?
Brightness is one of the most misunderstood aspects of spike lights.
More light does not mean better light, especially in outdoor settings.
As a general guide:
500-150 lumens work well for small plants and soft accents
150-300 lumens suit shrubs and medium-height features
300 lumens and above are best reserved for trees or architectural details
300-500 lumens can work for taller focal points when positioned further back
50-100 lumens is often enough for edging and gentle background glow
Using several lower-output fittings often creates a more comfortable and inviting result than one overly bright fitting.
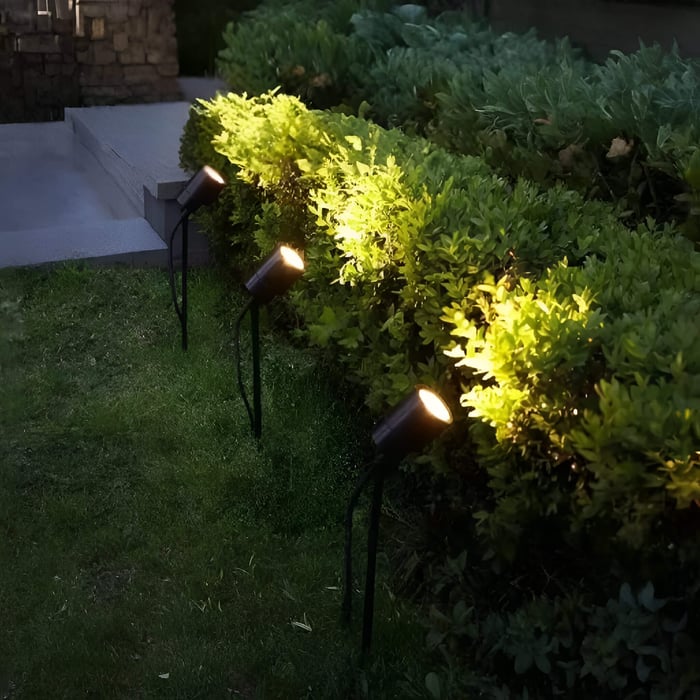
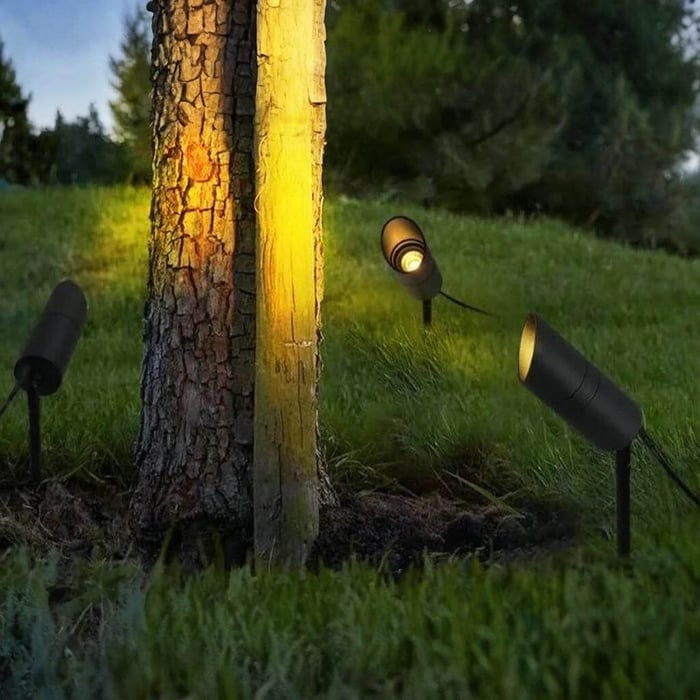
What Beam Angle Should You Choose?
The beam angle controls how focused or spread the light appears.
This directly affects how natural or dramatic the lighting feels.
Common beam angle choices include:
Narrow beams (10-25°) for tall plants or statement features
Medium beams (30-45°) for layered planting and textured surfaces
Wide beams (60°+) for soft washes across ground cover
Very narrow beams (5-10°) for pinpoint highlights on trunks, columns, or sculptures
Extra-wide beams (90°+) for gentle, ambient spill across wider planting areas
Mixing beam angles thoughtfully helps create depth without cluttering the space visually.
What Colour Temperature Works Best For Spike Lights?
Colour temperature plays a major role in how welcoming an outdoor space feels.
For most gardens and residential spaces, warm light feels more natural and relaxing.
Recommended choices:
2700K-3000K for gardens, patios, and seating areas
4000K for modern landscapes or architectural accents
2200K-2400K for an extra-soft, candle-like glow in relaxed zones
3000K for highlighting planting without making greens look harsh
4000K for crisp definition on stone, concrete, and clean-lined features
Consistency matters. Mixing colour temperatures can make even well-placed spike lights feel disjointed, especially when viewed from indoors. For a calmer look, keep one colour temperature across the scheme and only vary it if you’re deliberately separating zones.
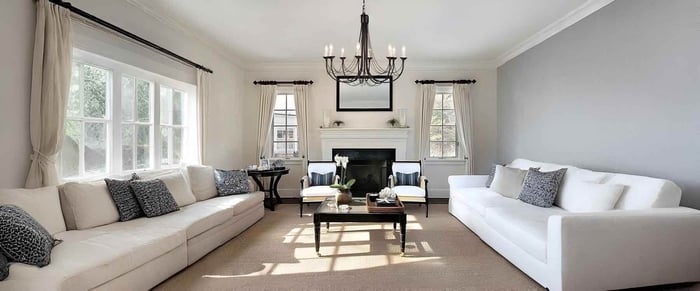
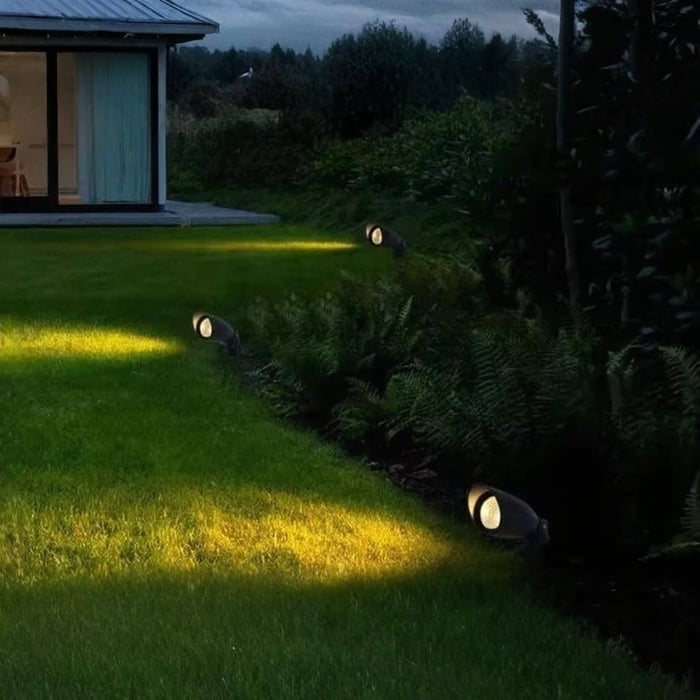
How Do Spike Lights Fit Into A Layered Lighting Plan?
Spike lights work best when they form part of a layered lighting approach rather than acting alone.
They are most effective as accent lighting that complements other fittings.
A balanced outdoor lighting layout often includes:
Ambient lighting for general visibility
Lighting to highlight plants and features
Path or step lighting for guidance
Low-level lighting to define edges and boundaries
Wall lighting to add depth and background glow
Feature lighting for focal points such as trees or sculptures
Subtle backlighting to create contrast behind planting
This approach prevents harsh contrasts and ensures the scheme enhances the space instead of overpowering it. It also helps the garden feel more natural and usable by guiding the eye through different layers rather than lighting everything at the same level.

Step-by-Step: How to Choose Spike Lights Confidently
Choosing spike lighting becomes much easier when broken into clear steps.
Step 1: Identify focal points
Select features worth highlighting, such as trees, planters, or textured surfaces.
Start with the features that matter most from your main viewpoints. A single beautiful tree, a sculptural plant, or a textured wall often gives you more impact than trying to light everything. If you’re unsure, choose one primary focal point and one secondary point, then build outward.
Step 2: Decide on the atmosphere
Soft lighting suits relaxed spaces, while stronger accents work for dramatic features.
Ask yourself how you want the garden to feel. Cosy and calm usually means warm colour temperature and modest brightness. Dramatic and architectural can take slightly stronger highlights, but even then, control is everything direction and beam shape matter more than raw power.
Step 3: Match brightness and beam angle
Ensure the output and spread suit the size and shape of the feature.
Choose lower brightness for small plants and closer distances, and use beam angle to control spill. If the feature is tall and narrow, a tighter beam will often look cleaner. If the feature is wider or you’re lighting layered planting, a medium beam is usually the most forgiving.
Step 4: Check adjustability
Choose lights with adjustable heads to fine-tune the direction.
Adjustability is what lets you avoid glare and keep light off windows or seating. Look for a head that tilts smoothly and holds its position. This matters more than people realise because minor aiming changes can completely alter the mood.
Step 5: Select quality materials
Outdoor-rated finishes ensure durability and consistent performance over time.
Prioritise weather resistance, solid seals, and robust finishes. Think about garden maintenance too: you’ll want a fitting that can be wiped clean and re-aimed without fuss, especially if it sits in dense planting.
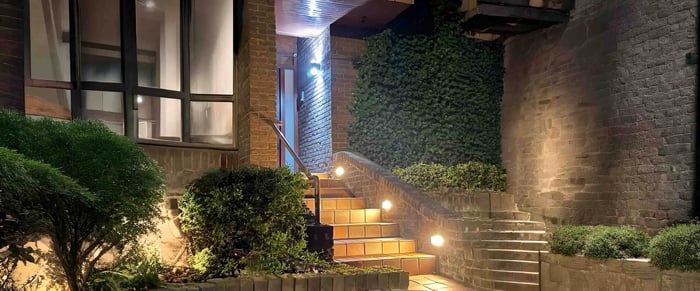
What Are The Best Ways To Install Spike Lights?
Installation is simple, but thoughtful placement makes all the difference.
The fittings should enhance the space without causing glare or uneven lighting.
Best installation practices include:
Securing the spike firmly in stable ground
Angling lights away from walkways and seating
Allowing space for plant growth
Testing placement at night before finalising
This flexibility is one reason these solutions remain popular alongside fixed options such as outdoor ground lights.
What Common Mistakes Should Be Avoided?
Most issues come from rushing the selection process.
Avoiding a few common mistakes can dramatically improve the final outcome.
Common pitfalls include:
Choosing fittings that are too bright
Using identical beam angles everywhere
Overlighting small gardens
Ignoring colour temperature consistency
Placing lights too close to the feature
Well-chosen lighting should feel intentional and balanced. It should add depth and comfort without drawing attention to itself.
How Does Build Quality Affect Spike Lights?
Build quality determines how spike lights perform over time.
Low-quality fittings often fade, corrode, or fail when exposed to weather.
Look for:
Durable outdoor-rated finishes
Reliable LED components
Solid seals to prevent moisture ingress
Adjustable, lockable heads that stay in position
Robust cable connections and strain relief for long-term safety
Brands such as Ideal Lux are often chosen for their balance of design, durability, and consistent light output.
Quick Summary
Spike lights offer flexible, effective outdoor lighting when chosen with care.
By focusing on brightness, beam angle, colour temperature, placement, and build quality, you can create layered lighting that enhances both atmosphere and function without overwhelming the space.
The strongest results come from using modest output, aiming beams thoughtfully, and building a simple hierarchy: one or two key focal points, supported by softer accents. With that approach, the space feels welcoming from both indoors and outdoors, and it remains adaptable as planting changes.
Conclusion
Choosing the right spike lights is about understanding how light shapes an outdoor environment. By selecting suitable brightness levels, matching beam angles to each feature, and keeping colour temperature consistent, you create lighting that looks calm and intentional. Planning for layered effects helps the garden feel deeper and more usable after dark, while careful positioning and quality fittings reduce glare and maintenance issues. With a considered approach, you’ll end up with a welcoming outdoor setting that highlights the best parts of the space and still gives you the flexibility to adjust as the garden evolves.
FAQs
How many spike lights should I use?
Start with a few key features and add more only if needed. Fewer, well-placed spike lights usually create better results.
Are spike lights suitable for small gardens?
Yes, they are ideal because they provide targeted lighting without cluttering the space.
Can spike lights be moved later?
Yes, one of their main benefits is flexibility, allowing repositioning as plants grow.
Do spike lights need professional installation?
Many are easy to install, though larger systems may benefit from professional planning.
Are spike lights weather-resistant?
Quality spike lights are designed for outdoor use and withstand year-round conditions.
Can spike lights be used near pathways?
They can, but should complement dedicated path lighting rather than replace it.
What power options are available?
Most modern spike lights use energy-efficient LED technology.
How do I avoid glare?
Angle lights carefully and avoid placing them directly in sightlines.
Can spike lights highlight walls or fences?
Yes, they work well for washing textured surfaces when positioned correctly.
How long do spike lights last?
High-quality LED spike lights can last many years with minimal maintenance.