Introduction
Outdoor downlights are one of the simplest ways to make an exterior feel safer, smarter, and more welcoming. Used well, they guide guests to the door, reduce trip hazards on paths and steps, and create calm pools of light where you actually use the space. The best results come from lighting key areas with purpose rather than trying to brighten every corner. When the plan is thoughtful, the whole frontage looks more polished and feels easier to move around after dark.
Used badly, they can create glare, patchy coverage, and that “runway” look that feels harsh at night. Too much brightness in the wrong place often causes strong shadows around faces and doorways, which is the opposite of inviting. Poor spacing can leave awkward dark gaps between hotspots, making paths feel less safe. This guide walks you through the practical dos and don’ts that help you choose fittings that look right and work properly.

Quick Summary
Choose outdoor downlights based on what each area needs: safety, task light, or ambience.
Use suitable IP ratings and corrosion-resistant materials for the exposure level.
Avoid over-bright fittings and narrow beams everywhere; glare ruins comfort.
Keep a consistent colour temperature for a cohesive exterior.
Plan placement and spacing before you buy, and align to architectural features.
Avoid style clashes by keeping finishes and design language consistent.
Check access and maintenance needs so the system stays easy to run long-term.

What Are Outdoor Downlights, And Where Do They Work Best?
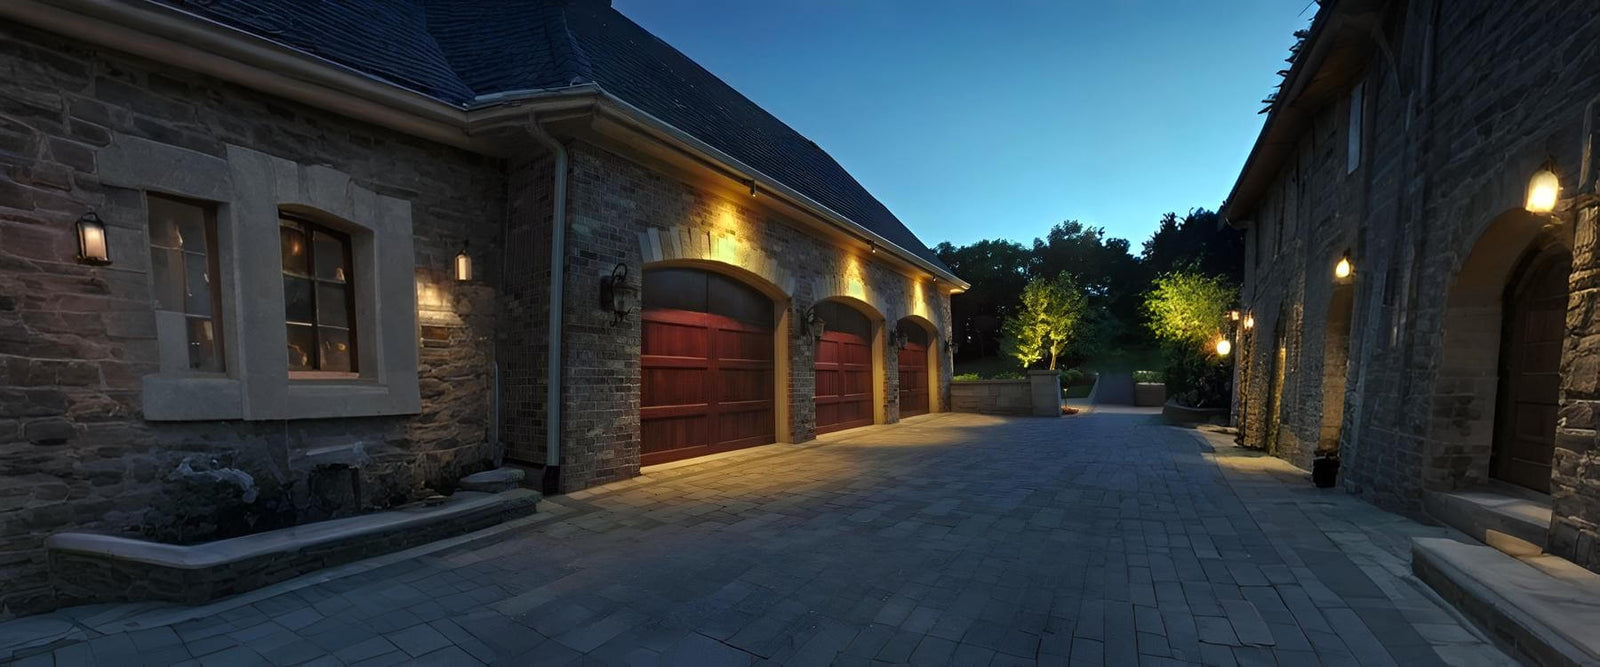
Outdoor downlights are compact fittings that cast light downwards onto the surface below. They’re most commonly installed under soffits and eaves, porch ceilings, canopies, pergolas, and other sheltered exterior ceilings. The aim is controlled light exactly where it’s needed, rather than blasting a whole garden with brightness.
They work best for:
Front entrances: door thresholds, keyholes, and visitor visibility without harsh glare
Side passages: safe route lighting that doesn’t spill into neighbouring windows
Steps and level changes: reliable illumination where trip hazards are most likely
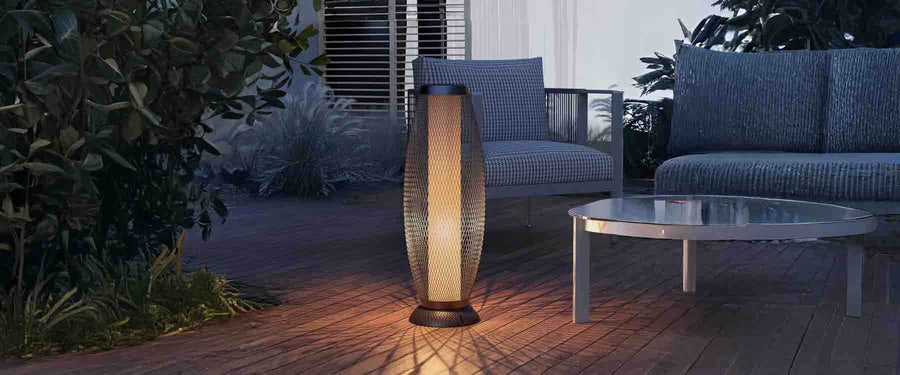
Outdoor living areas: subtle pools of light over seating or dining zones
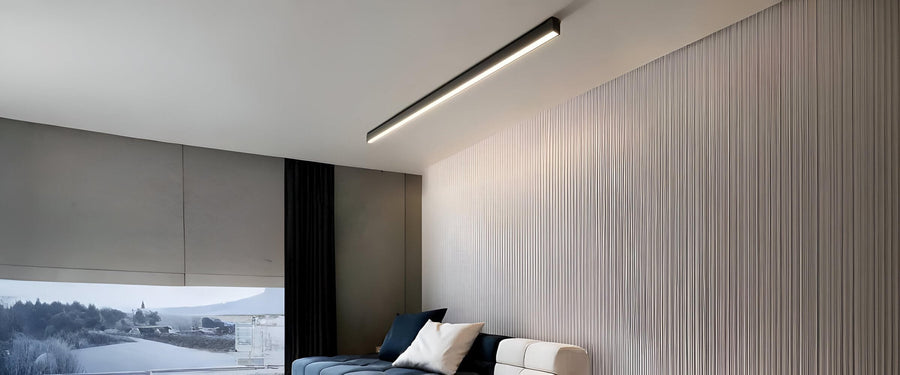
Architectural rhythm: a neat line of light along a long soffit, used with restraint
A quick reality check: outdoor downlights are most successful when you light a purpose, not an entire façade for the sake of it.

What Should You Decide First Before Choosing Outdoor Downlights?
You should decide what each outdoor downlights needs to do before you choose a fitting. That one decision drives beam angle, brightness, colour temperature, spacing, and glare control.
Start by mapping your exterior into simple zones:
Arrival zone: gate to front door, door threshold, house number
Movement zone: paths, side return, steps, drive-to-door route
Use zone: patio seating, outdoor dining, BBQ or outdoor kitchen
Feature zone: a textured wall, planting bed edge, or a statement planter
Example: A porch with one bright downlight can create heavy facial shadows and an uncomfortable hotspot. Two softer fittings, positioned properly, usually look calmer and feel more usable.

Do: Choose The Right IP Rating And Materials For Your Location
You should select outdoor downlights with weather protection suited to how exposed the fitting will be. “Outdoor rated” is a starting point, not a guarantee.
Do choose IP65 for most external ceilings that face wind-driven rain or condensation.
Do consider IP44/IP54 only for truly sheltered porches with deep cover.
Do pick corrosion-resistant finishes if you’re near the coast or in an exposed spot.
Do check the build materials: quality aluminium with a durable powder coat or 316 stainless tends to last better outdoors.
A common failure point isn’t the front face it’s moisture finding its way into weak seals over time. If in doubt, choose the better rating and a proven finish.

Don’t: Pick Brightness By Guesswork
You shouldn’t choose the brightest downlight “just to be safe”. Outdoors, too much light creates glare, sharp shadows, and an unflattering look around the door and seating areas.
Brightness depends on:
Mounting height: higher ceilings can take more output
Surface colour: pale render reflects light, dark brick absorbs it
Beam angle: narrower beams concentrate brightness into a smaller area
Use case: steps need even coverage; seating needs comfort
If you’ve ever walked up to a front door and felt like you were under a spotlight, that’s usually a brightness-and-glare issue, not a lack of fittings.

Do: Pick Beam Angles That Match The Job
You should choose beam angles based on whether you want wide, even coverage or a tighter pool of light.
Wide beams (about 60°+) suit general circulation areas under eaves and long runs.
Medium beams (about 36°-50°) are ideal for porches and door areas where you want clarity without harsh edges.
Narrow beams (about 15°-30°) are best reserved for deliberate accents, not general lighting.
Don’t: Use narrow beams everywhere. It creates bright dots with dark gaps in between, which looks awkward and can leave hazards unlit.

Don’t: Ignore Glare And Cut-off
You should prioritise glare control because it’s what makes outdoor downlights feel comfortable and refined. If you can see the light source from normal walking angles, it will often feel intrusive.
Look for:
Recessed light source (LED set back within the fitting)
Anti-glare baffle or louvre options
Deeper bezels that hide the light at typical sightlines
This matters most in side passages and porches, where people naturally look forward and slightly up as they approach the door.

Do: Keep Colour Temperature Consistent
You should keep colour temperature consistent across your exterior so the whole scheme feels deliberate.
2700K gives a warm, classic glow that flatters brick, stone, and planting.
3000K is slightly cleaner and suits contemporary architecture while still feeling warm.
Mixing colour temperatures is one of the easiest ways to make a new installation look “off”. It’s especially noticeable when downlights sit near wall lanterns or step lighting.

How Do You Choose The Right Size Of Outdoor Downlights?
You should choose the size based on proportion and the visual rhythm of the space, not just what fits the cut-out.
Consider:
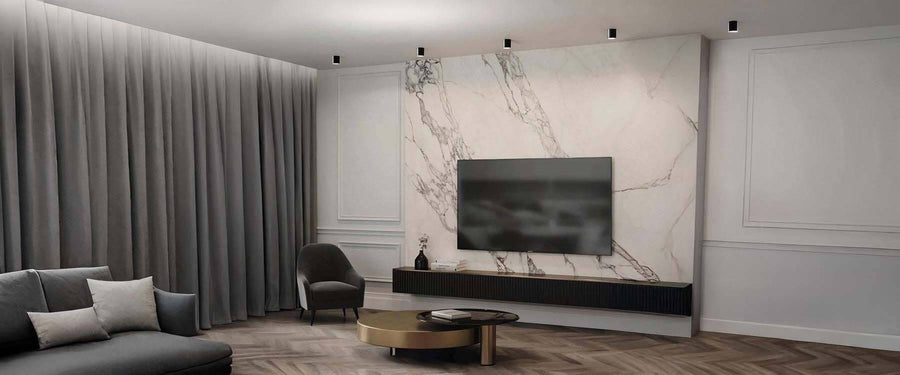
Soffit depth and ceiling height: slimmer soffits often suit smaller, minimal fittings.
Spacing plan: fewer fittings can look neater than many small ones.
Architecture style: modern homes tend to suit clean bezels; more traditional homes can handle a slightly more defined trim.
Don’t: Go tiny purely to “hide” the fitting if it forces you to install too many units. A ceiling scattered with downlights rarely looks premium.

Do: Plan Spacing As A Layout, Not A Scatter
You should plan spacing so light falls evenly and aligns with the structure of the home. Random placement is obvious at night and often creates messy shadows.
Good spacing habits:
Do align with architectural lines: door centreline, bays, posts, pergola beams.
Do keep symmetry where the house is symmetrical.
Do light the route first: thresholds, steps, turns, and level changes.
Don’t place fittings too close to walls unless you’re intentionally washing a surface.
If you want a clean result, aim for calm rhythm over maximum coverage.

Step-by-Step: How To Select Outdoor Downlights Without Regrets
You should follow a simple process so you end up with fittings that suit the home, feel comfortable, and work as a complete scheme.
Define zones and the job of each zone
List each area (front door, path, patio) and choose the purpose: safety, task, or ambience.Assess exposure and set an IP target
Sheltered porch or exposed soffit? If it sees wind-driven rain, treat it as exposed.Choose one colour temperature
Pick 2700K for softer warmth or 3000K for a modern warm-white look, then keep it consistent.Select beam angles for each zone
Wider for general movement, medium for doors, narrow only for accents.Prioritise glare control
Choose recessed light sources and add baffles where people walk directly underneath.Sketch a spacing plan
Mark centre points, align to architectural features, and avoid awkward near-symmetry.Coordinate finishes and style
Match the downlights to your other exterior fittings so the elevation reads as one design.Confirm drivers, dimming, and access
Make sure dimming is compatible if you want it, and plan access to drivers for future servicing.

Don’t: Create Style Clashes With Outdoor Downlights
You should keep exterior lighting in one design language when using outdoor downlights, as mixed styles and finishes can make a home look visually unsettled, even if each fitting looks good on its own.
Style clashes to avoid:
Minimal modern downlights paired with ornate traditional lanterns
Mixed metals with no pattern (for example, matte black overhead and shiny chrome on the wall)
Shapes that fight each other (strong squares alongside decorative curves)
Mixed colour temperatures, especially across the front elevation
Do instead: Choose one finish family and repeat it. If you’re already using black door furniture, black or anthracite downlights often tie the whole frontage together cleanly.

How Do You Pair Outdoor Downlights With Other Fixtures?
You should pair outdoor downlights with other fixtures by giving each type a clear role, then keeping style and colour temperature consistent.
Here’s what tends to work well:
Downlights + security lights: Use downlights for everyday comfort, and let secutiry lighting handle motion-triggered coverage where needed.
Downlights + bricklights: Use brick lights low on walls for gentle guidance on steps and paths, while downlights provide general overhead clarity.
Downlights + outdoor spotlights: Add outdoor spotlights only where you want a feature moment, such as a tree, textured wall, or statement planter.
The key is balance. Avoid stacking bright fittings on top of each other in the same spot. Layering works when each layer has a different job.
Do: Think About Maintenance, Access, And Long-Term Reliability
You should choose fittings that remain practical after installation, especially with outdoor downlights, as exterior ceilings can be awkward to reach and serviceability matters.
Do check whether the LED is integrated or replaceable.
Do consider driver access if your setup uses remote drivers.
Do pick fittings with solid warranties and proven outdoor performance.
Do avoid creating a “sealed ceiling” trap where a small failure means major disruption later.
If you’re building a pergola or overhang, it’s worth planning an access route for drivers and connections from the start.

Do: Consider Glare, Neighbours, And Window Spill
You should avoid